Monthly Archives: July 2012

Print
Recipe

Guess my break was longer than I expected it to be.Both my husband and my daughter were unwell in between and then once they got better I was occupied with too many things.Blogging completely took a back seat. Here I am, back now with this month’s Daring Baker’s Challenge.

Our July 2012 Daring Bakers’ Host was Dana McFarland and she challenged us to make homemade crackers! Dana showed us some techniques for making crackers and encouraged to use our creativity to make each cracker our own by using ingredients we love.

It’s been a busy day today and I just have a few minutes before I step out. I will write more in my next post. But for now presenting the yummiest crackers that I’ve ever made – Cheddar Oregano and Walnut Icebox Crackers. Wow the name itself sounds so tempting, isn’t it? It’s loaded with all my favorite ingredients.

We were asked to make two different crackers using different methods of forming. I chose the ““Icebox methods” to make the “Cheddar Oregano - Walnut Icebox Crackers” and the “Hand rolled method” for making the “Health Crackers”. I followed the recipes as is for the first one. Added chili flakes for the second one, just to give that extra kick;also substituted rosemary with oregano.

HEALTH CRACKERS

Makes about 40 crackers

Ingredients

1 1/2 cups rolled oats
1 cup plain (all-purpose) flour
1/2 cup wheat germ
1 1/2 tablespoons sugar
1/2 teaspoon salt
1/4 cup + 1 1/2 tablespoon vegetable oil
1/2 cup water
1 large egg white
Cracker topping:
Sesame seeds, poppy seeds, nigella (onion) seeds, salt
Salt sprinkling

Directions:
Mix the oats, flour, wheat germ sugar and salt together in a large bowl or bowl for the standup mixer. Combine the water and oil and stir into the oat mixture until it comes together and a dough forms.Form dough into a disk and allow to rest in the fridge for about 20 minutes but up to a day if you are making the ahead.Preheat the oven to moderate 325°F. Divide the dough into quarters and work with one piece at a time, allowing the remaining pieces to stay in the fridge as you proceed with rolling out the crackers. On a lightly floured surface, roll the dough to about 1/16 inch (1½ mm) thick and transfer to a parchment lined baking sheet by carefully wrapping the dough around the rolling pin.
Brush the dough with the egg white mixed briefly with a tablespoon of water and sprinkle with seeds and salt of your choice.Cut the dough with a pizza wheel and bake for 25-30 minutes until browned. Crackers that are not crispy once cooled may be returned to the oven. Store in an airtight container and eat within two weeks.

CHEDDAR OREGANO AND WALNUT ICEBOX CRACKERS

Makes about 40 crackers

Ingredients

½ cup butter, well softened
2¼ cups grated aged cheddar cheese (the better the cheese, the better the cracker), firmly packed
1 cup plus 3 tablespoons all-purpose (plain) flour
1 teaspoon salt
1/2 cup finely chopped walnuts
1/2 tablespoon dried oregano
1/2 teaspoon of chili flakes
Directions:

Combine butter, oregano,chili flakes and cheese in a stand mixer and beat well (can also be done by hand). Add the flour, salt and nuts and stir to combine. Form the dough into two tight logs and wrap with cling film. Chill for at least an hour and up to several days. The log can be frozen at this point for several months.Heat the oven to moderate 325°F.Slice a log into 5mm (1/5 inch) coins and place on a parchment lined baking sheet. Bake about 10 minutes until golden brown.

Store in an airtight container and eat within three days.

I loved making these CRACKERS.Of the two,the Icebox Crackers were my favorite one.Thanks Dana for the great challenge!

Bon Appetit!

Nina

Print
Recipe

We got our little one’s ears pierced when she turned one. Much to my surprise, it was rather a simple process that took less than a minute. She being asleep made the job even easier. Just when I thought that I had knocked off an important milestone in my daughter’s life, one of her earrings fell off in less than 2 weeks. We had to go through another round of ear piercing and this time the “ear piercer” assured us that he had done a thorough job!!

Well, that wasn’t the case! My daughter managed to lose her pair of earrings again. This time my husband wasn’t keen on getting it done again and argued saying that the decision to pierce her ears is entirely hers. Well the truth was he did not want to see his precious darling cry in pain. Last week we had been to Mall of America. While my husband was busy in his favorite apple store, I decided to take little A to Claire’s to get her ear’s pierced again. The lady at the shop did it so quickly even before li’l A realized it. I was glad I got it done when my husband wasn’t around. If not I would have to deal with two kids:).I hope the earrings stay in place at least for some time!

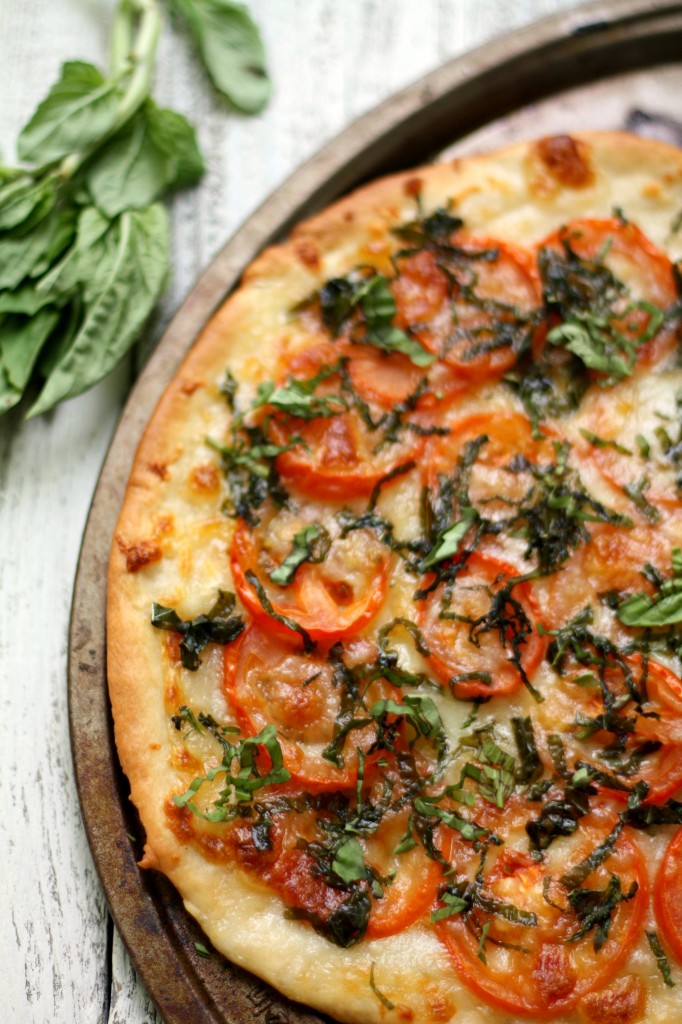
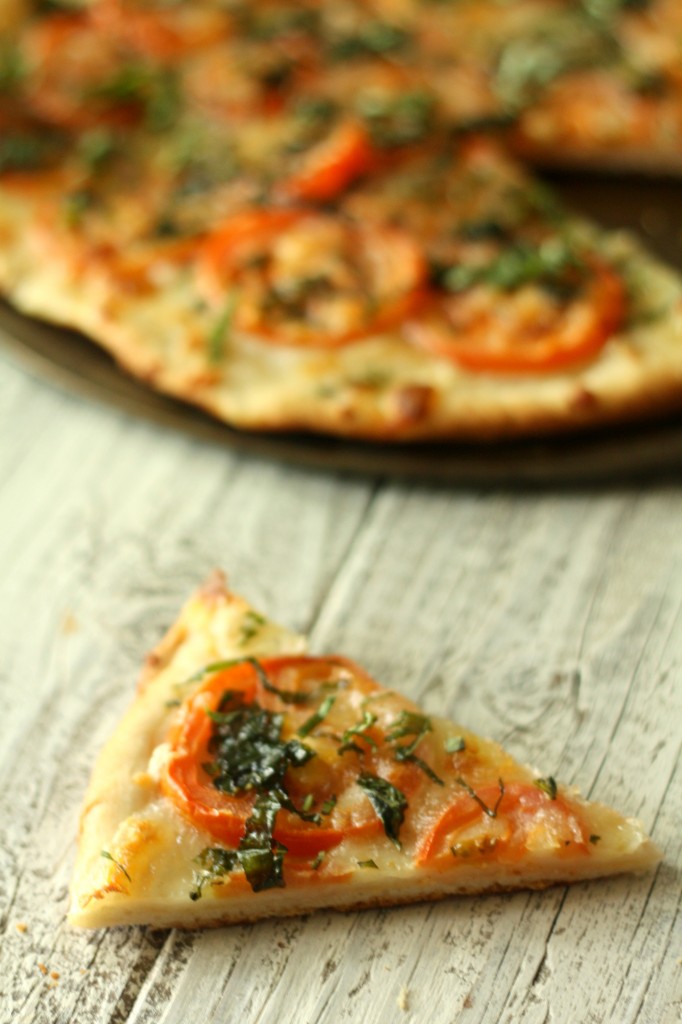
We got back home, and our quick fix dinner was Pizza. I have always been wanting to make it from scratch for a long time but somehow never got around it. They were never amongst my favorite and perhaps that kept me away from trying it out! As far as possible, I make things from scratch. So that’s how the pizza base happened. I adapted the recipe from my favorite author James Peterson’s book Baking.

Pizzas are the one of the most recognizable symbol of Italian food culture in the world. I believe many years back, Queen Margherita of Savoy, wife of king Umberto I, Chef of Pizzeria Brandi and his wife created a pizza resembling the colors of the Italian flagred(tomato),White(mozzarella) and green(basil).They named it after the Queen – Pizza Margherita.

PIZZA MARGHERITA
Makes two 11 inch Pizza crusts

Ingredients for the Pizza Dough

3 cups flour
¾ cup barely warm water
½ teaspoon active dry yeast proofed in 1 tablespoon barely warm water
¾ teaspoon salt
6 tablespoon extra - virgin olive oil

For the Pizza

Extra virgin olive oil for brushing
Pizza dough ( recipe below)
4 medium tomatoes, sliced
12 ounces mozzarella cheese, sliced
6 large basil leaves

For the Dough - Mix the flour, water, and yeast in a bowl. Add the salt and mix, then add the oil. Knead the dough with a stand mixer fitted with the dough hook on medium speed for about 7 minutes. Turn the mixer to high speed if needed to get the dough to slap against the sides of the bowl. You may also during this time, pull the dough off the hook a couple of times so that the dough is mixed evenly. Put the dough in a bowl and cover with plastic wrap. Allow to double in volume at room temperature for about 4hours. Or at room temperature for 1 hour and then overnight in the refrigerator.

For the Pizza – Brush two – 11 inch Pizza pans with olive oil. Divide the dough in half and form each half into a ball, shaping the dough with your fingers, pressing and turning, until the dough is somewhat round. Put on ball on each of the pizza pans. Put the pans in the refrigerator for 15 minutes. Shape the dough nby pressing on it and pressing on it and stretching it with your fingers or with a rolling pin until it covers the pizza pan. You may have to press and stretch the dough 2 or 3 times,with a 15 minute rest between each time to get the dough to cover the pizza pans. Press up the edges of the round from the inside to form a border. Brush the dough with olive oil.

Preheat oven to 500F. Coat the basil leaves with olive oil,roll them up,slice the roll so you end up with strips. Arrange the tomato slices and cheese slices in the pizza.Bake for about 15 minutes,or until the crust is brown. Just before the pizza is done,sprinkle the basil strips over the top,and bake until done.

I had already made the dough before I stepped out, so it was easy to bake once I got back. The pizza crust was crunchy and the topping fills you right up and you don’t feel too heavy. Simple topping yet truly delicious because its CHEESE CHEESE CHEESE:).

The second time I made this I didn’t follow all of the method above. Once the dough had risen, I simple rolled it over, placed it in a baking sheet(yeah not a pizza stone),spread the topping and baked it immediately. It still tasted the same. I guess this is an easy approach.

Bon Appetit!

Nina

Related Posts Plugin for WordPress, Blogger...

COPYRIGHT

MyFreeCopyright.com Registered & Protected

FAVORITE POST

Povitica Bread

Povitica - An East European Bread

Photobucket
BFS-logo
Proud member of FoodBlogs
my foodgawker gallery

SOCIAL MEDIA