Monthly Archives: December 2012

Print
Recipe

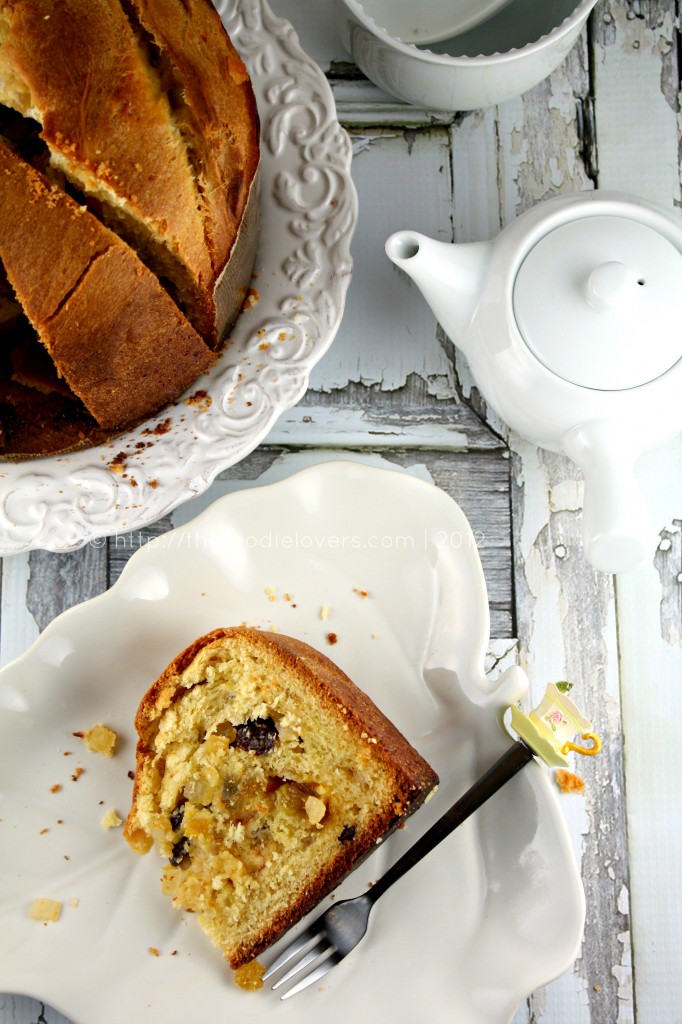
Few months back, I was on a shopping spree at my favorite store - Sur la table, I had picked up two Panettone Papers. It has been my dream to bake one at home. I had the perfect recipe, all the ingredients and more importantly the time to bake, but it was sheer laziness that prevailed. So one fine morning, while browsing I was super thrilled to find this month’s Daring Baker’s Challenge. I couldn’t have asked for anything more appropriate than PANETTONE. Now I knew that the time has come and I had to roll up my sleeves and get into action. But this time I fell sick and my enthusiasm for baking died…what a bummer! Unfortunately I could get to it only on the very last day. I started with the initial process day before yesterday and left the dough to rise in the refrigerator and continued with the baking today. It was the final rise that took almost 10 hours, hence the delay in posting.

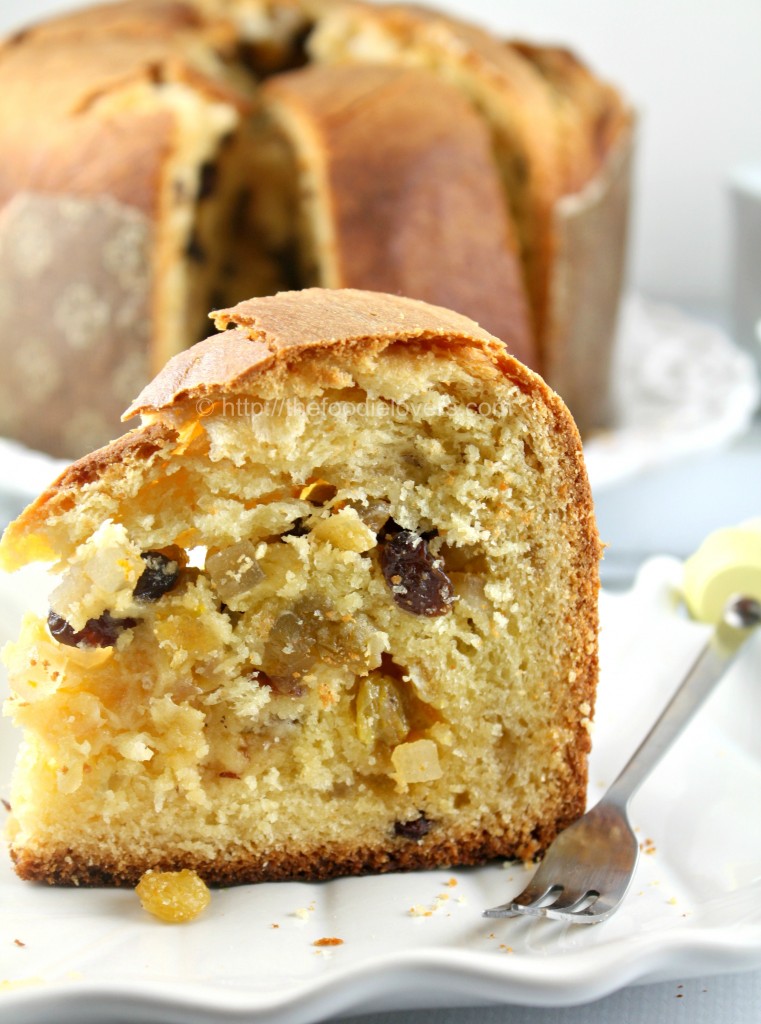
We were asked to make a Panettone in the traditional tall cylindrical shape using the recipe provided with or without the almond glaze. It was optional to make your own candied orange peel. Since I had some left over from the Christmas Fruitcake that I had baked earlier this month.I also added a couple tablespoons of candied lemon peel that I had handy.

<i>The December 2012 Daring Bakers’ challenge was hosted by the talented Marcellina of Marcellina in Cucina. Marcellina challenged us to create our own custom Panettone, a traditional Italian holiday bread!</i>

A brief - Pannettone, a traditional Italian Bread is eaten by the Milanese but now it is available all through Italy and in many parts of the world. Infact the other day I found them at Trader Joe’s and pointed it out with excitement to my husband….see this is what am gona bake this month:)

There are many stories and legends of the Panettone but the one recounted by Carol Field, whose recipe Marcellina has used is that of a rich young Milanese noble who fell in love with the daughter of a poor baker whose name was Tony (Antonio). The nobleman wanted to marry the baker’s daughter so he ensured the baker had at his disposal the very best ingredients – eggs, butter, flour, candied orange peel, citron and sultanas. The baker created a wonderful bread which became known as pan di Tonio (Tony’s bread). The baker found his fame and fortune and the nobleman honorably married the baker’s daughter.

There are lots of different types of Panettone now available – some with chocolate or vanilla fillings or coated in chocolate. I wanted to stick with the traditional one so did not make any changes to the recipe except that I halved the recipe to make one instead of two Panettones.

PANETTONE

Makes 1 Panettoni

Ingredients

Sponge
1/2 satchel active dry yeast
40ml warm water
1/4 cup unbleached all-purpose flour

First Dough
1/2 satchel active dry yeast
1.5 tablespoons warm water
1 large egg, at room temp
½ cup + 2 tablespoon unbleached all-purpose (plain) flour
2 tablespoon sugar
1/4 cup unsalted butter, at room temp

Second dough
1 large eggs
2 large egg yolks( i just discarded a little yolk, as I just wanted 1.5 yolks:))
1/3 cup sugar
1.5 tablespoon honey
1/2 tablespoon vanilla extract
1/2 teaspoon lemon essence/extract
1/2 teaspoon orange essence/extract
1/2 teaspoon salt
1/2 cup unsalted butter, at room temp
1.5 cups unbleached all-purpose (plain) flour; plus up to (2/3 cup) for kneading

Filling and final dough

3/4 cup golden raisins or golden sultanas
1/4 cup candied citron
1/4 cup candied orange peel
2 tablespoon candied lemon peel
Grated zest of 1/2 orange
Grated zest of 1/2 lemon
1 to 1.5 tablespoons unbleached all-purpose (plain) flour

Directions:

Sponge - Mix the yeast and water in a small bowl and allow to stand until creamy. That’s about 10 minutes or so. Mix in the flour. Cover with plastic wrap and allow to double in size for about 20 to 30 minutes.

First Dough: In the mixer bowl, mix together the yeast and water and allow to stand until creamy. Again, about 10 minutes or so. With the paddle attached mix in the sponge, eggs, flour, and sugar. Add in the butter and mix for 3 minutes until the dough is smooth and even. Cover with plastic wrap and allow double in size, about 1 – 1 ¼ hours

Second dough : With the paddle mix in thoroughly the egg, egg yolks, sugar, honey, vanilla, essences/extracts, and salt. Mix in the butter until smooth. Add the flour and slowly incorporate. At this stage the dough will seem a little too soft, like cookie dough. Replace the paddle with the dough hook and knead for about 2 minutes.Turn out the dough and knead it on a well-floured surface until it sort of holds its shape. Don’t knead in too much flour but you may need as much as 1/3 cup. Be careful the excess flour will affect the finished product.

First Rise - Oil a large bowl lightly, plop in your dough and cover with plastic wrap . Now we need to let it rise until it has tripled in size. There are two ways to go about this. Rise in a warm place for 2 – 4 hours Or rise for 2 hours on your kitchen bench then slow the rise down and place in the refrigerator overnight.I chose the latter.If you do this it will take some time to wake up the next morning but I preferred this method.

Filling and Final Rise - Soak the raisin/sultanas in water 30 minutes before the end of the first rise. Drain and pat dry with paper towels. Combine all your filling ingredients and mix well.Press out the dough into an oval shape. Sprinkle over one quarter of the filling and roll up the dough into a log . Press out again into an oval shape and sprinkle over another quarter of the filling . Roll into a log shape again. Shape into a ball and slip into panettone paper. Cut an X into the top of each panettone and allow to double in size. I think I cut it too deep which I realized only after the final rise. Rising time will vary according to method of first rise. If it has been in the refrigerator it could take 4 hours or more. If it has been rising on the kitchen bench in a warm place it should be doubled in about 2 hours.

Baking - When you think your dough has only about 30 minutes left to rise preheat our oven to moderately hot 400F. Just before baking carefully (don’t deflate it!) cut the X into the dough again ( Since mine was deep enough I avoided this step)and place in a knob (a nut) of butter. Place your panettoni in the oven and bake for 10 minutes. Reduce the heat to moderate 350°F and bake for another 10 minutes. Reduce the heat again to moderate 325°F and bake for 30 minutes until the tops are well browned and a skewer inserted into the panettone comes out clean.

Freezing/Storage Instructions: Once your panettone is thoroughly cooled, place in a large plastic bag or container and it will keep quite well maybe for a week. At first the panettone is soft and tender but after a day or two it becomes dry like the commercial variety. I believe that the glaze would keep the panettone a bit more moist but I wasn’t too keen to make it.

My Panettone baked pretty well, except that it had a pretty large hole right on the top….coz of the deep X mark that I had made earlier. Also because of that each slice was a little dense just right in the center. It was soft otherwise and tasted very good…perfect for the holiday season. Am so happy that I was able to participate in this month’s DBC. Thanks Marcellina for a wonderful challenge!.

Bon Apetit !

Nina

Print
Recipe

Snow Storm today….more than a feet of snow already and it’s not over yet. This reminds me of a similar snow storm two years back at a time when we were expecting our little one. I vividly recall the tense face of my husband who had to shovel our drive way every two hours just to make sure we don’t get stuck in case I develop labor. Thankfully, my baby was sweet enough to come out on after the stormy weather.

And today one of my neighbor’s car got stuck in the drive way and we had to help them.We were at home today but had a few friends over for dinner last night. It’s very easy to get carried away with temptation during the holiday season with lot of potlucks,parties and get togethers. I therefore wanted to make an attempt to do something light and healthier. I am actually slowly switching to whole grains.Recently, I came across TVP – Textured Vegetable Protein and have been wondering for a while as to how best I could use this ingredient.

TVP also called as TSP ( textured Soy protein)is produced from soy flour and absorbs flavors of whatever it is added to. It’s truly a great meat substitute for vegetarians.You get it in the form of chunks,granules or flakes. 1:1 is the ratio to cook with TVP. Hydrate 1 cup of TVP with a cup of liquid.( I used hot water).It is cheap, quick to cook and loaded with proteins….making it very healthy. You may also use the soy chunks or nuggets that’s easily available, but I haven’t tried it yet.

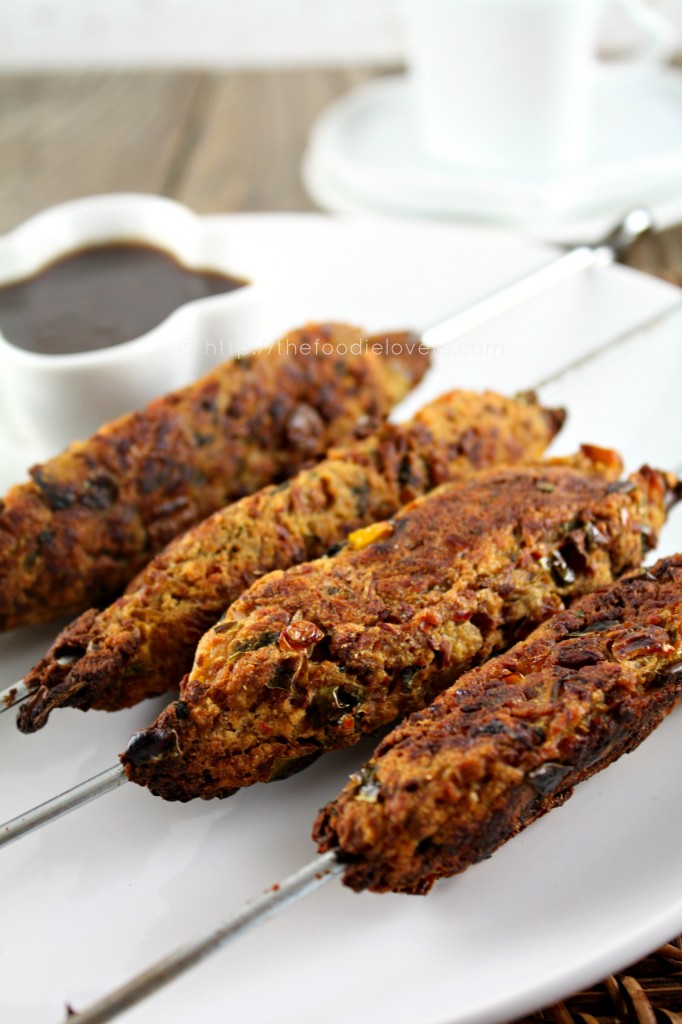
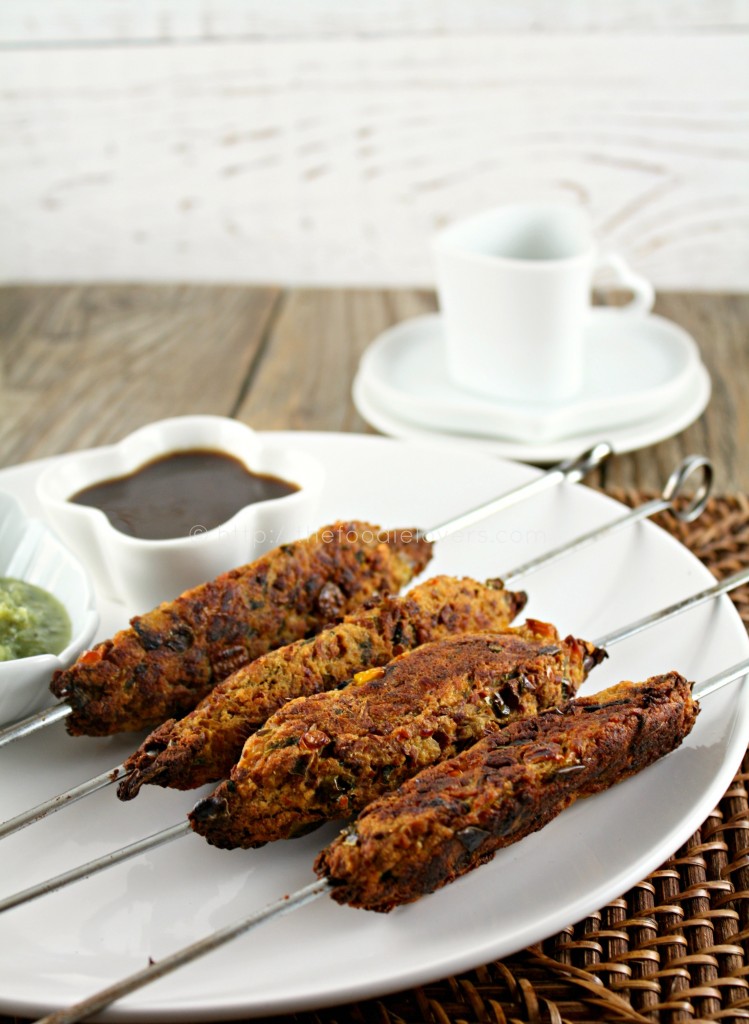
I came across Sala’s wonderful blog, her recipe – Minty Veggie Kebabs was something that caught my attention. She had used TVP and that’s how this idea came about. I have tweaked the recipe to suit my taste buds. I usually bake my kebabs in the same way using mashed vegetables, but the addition of TVP made so much of a difference.These Kebabs were crispy from the outside and soft on the inside. They tasted delicious with mint and date chutney.If you are using TVP for the first time like me; this is definitely a good recipe to start with.

BAKED VEGETABLE KEBABS USING TVP

Makes about 15 kebabs

Ingredients :

1 cup TVP
2 green chillies, chopped
4 garlic cloves
a small piece of ginger(1″)
a teaspoon chilli flakes
2 large Potato
2 tablespoon olive oil
1 red onion, chopped
1 bell pepper, chopped
1 carrot,grated
1/2 cup grated cauliflower
1/4 cup corn( I used frozen)
1 teaspoon garam masala
Few mint leaves
1/2 cup cilantro
juice from 1/2 lemon
bread crumbs ( as needed)
salt as per taste

Directions :To start with add a cup of hot water to TVP and allow it to soak for about 20 - 30 minutes.Drain and squeeze it well.Set it aside. Cook the potatoes, peel and mash them. In a motor and pestle, pound the garlic,ginger,green chili and chili flakes(increase/decrease as per your spice levels).

Heat oil in a skillet, add the onions and saute until pink. Add the pound garlic mixture. Cook for about 3 - 4 minutes. Add the bell pepper,carrots,cauliflower and cook until they are half cooked. Now add in the corn,TVP,garam masala and salt. If there is any water it should evaporate by now; you should end up with a thick cooked mixture.Check the taste for spices. Transfer it to a large bowl, add mashed potatoes,mint and cilantro. Squeeze lemon juice. Knead into a thick mixture. If there is still moisture, add the bread crumbs. I used Panko, but any bread crumbs should work. (I didn’t measure the panko, but i think I would have used about 1/2 cup). If using wooden skewers soak in water before using it. Divide the mixture into 15 balls.Take each of them and tightly press onto a skewer forming a log, like a kebab. Place them on a greased baking sheet,lined with aluminium foil/parchment(ensure to spray oil,it might stick otherwise).

Preheat oven to 400F and bake them for about 20 minutes, flip them on the other side and bake for another 10 - 15 minutes or until done.It might take longer depending on your oven temperature. Keep checking in between, you should end up with a brown color coating all over.If you under cook it, it will not be crunchy. Serve them with mint and date chutney( I used store bought ones).

Bon Apetit!

Nina

Print
Recipe

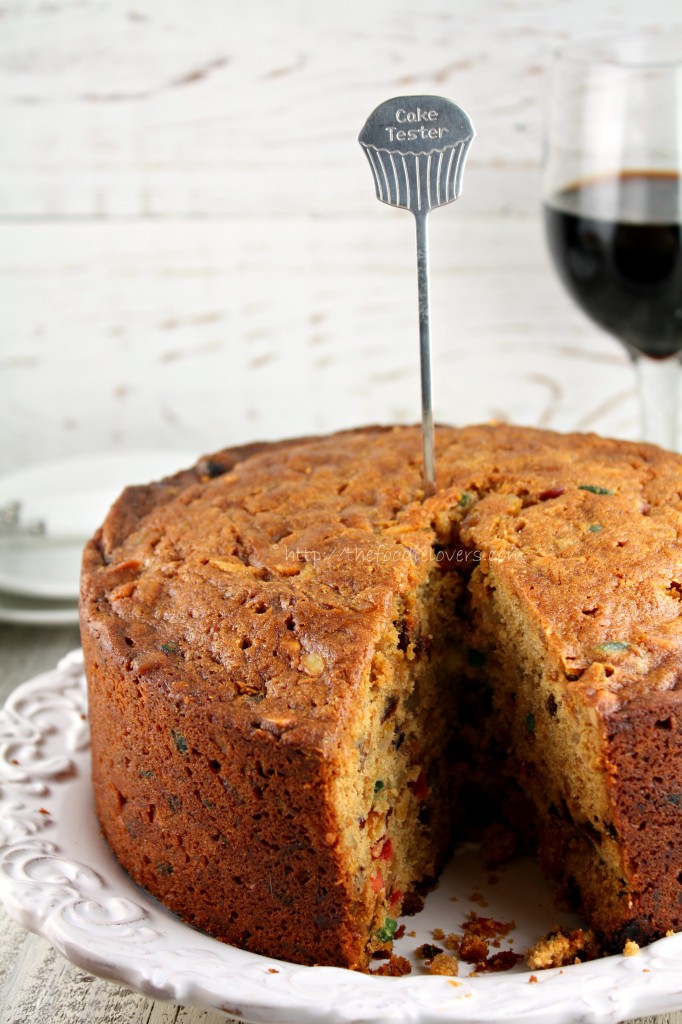
I love the Holiday seasonits fun,festive and everyone’s just happy during this time of the year.Starting from Costumes+Halloween party + Candies to thanksgiving+ doorbusters+blackfriday shopping to Cakes+ Santa+ lights +some more shopping and last but not the least the brand new year - A New beginning , a New Hope. Can this get any better??? When I think about Christmas the first thing that comes to my mind is the “Christmas Fruit Cake”. Is there anything better than this?:-)

Each one has their own recipe; some follow their traditional one, while others have recipe passed on from generations. They are made in a variety of ways - dark & light,with or without yeast,plain / frosted/glazed, some are dense,some are dry,with or without alcohol and so on.

This year, I started baking my cakes well in advance. Fruitcakes need a lot of care and pampering as they taste best when they age and mature. A good cake is the one which is fed well with alcohol either rum or brandy, thus allowing the flavors to set in and intensify. Feeding with alcohol gives the cake a unique flavor; moistness which in turn reduces sweetness and thus making it very rich and scrumptious. It’s a real cake loaded with all the goodness;-) . A traditional Cake contains sultanas, glace cherries, figs, apricots, currants, raisins, candied peel, prunes etc.

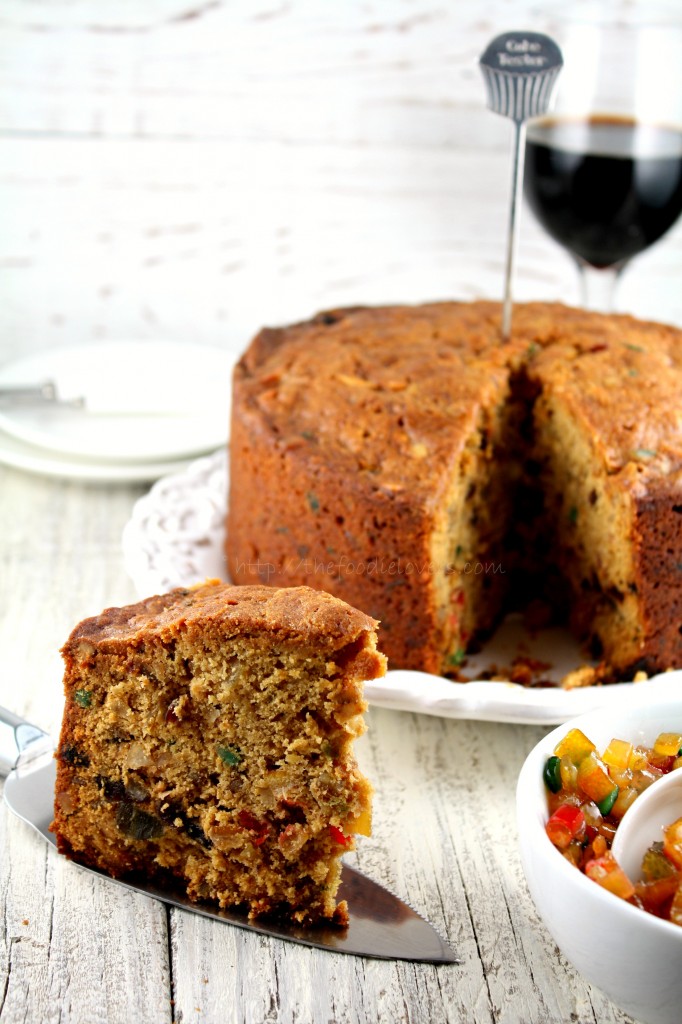
I found it easy to use the fruit cake mix (contains– orange and lemon peel,cherries,pineapple,citron, corn syrup) along with raisins, nuts, dried cranberries, sultanas and blueberries. Though there wasn’t any change to the taste; I think I baked my cake for little longer than required; as a result it wasn’t as soft as expected. Also, I felt that it was a little too sweet. Since the readymade fruit mix that I used already had corn syrup, I should have reduced the amount of sugar. The next time I would use ¾ to a cup.

Things to keep in mind while baking – These cakes should always be baked in low temperatures. And since it bakes for a long time, ensure to line the cake tin/pan with parchment on the base as well as the sides. Once baked you may also wrap the cake in cheesecloth before feeding it. For an alcohol free cake, use orange juice instead of rum/brandy. From my personal experience, I feel the batter needs to be heavy enough for the dried fruit and nuts to be suspended in it , if it is thin the fruits might sink in the bottom. Usually while baking cakes with nuts or dry fruits its suggested to toss them with a little bit of flour ( to avoid them to sink down), but in this case it’s not possible as we have soaked it in alcohol.

Once the cake was done, the most difficult part was the wait time. It was right in front of us for a week, the longer we looked, the stronger was our temptation. I wrote so much about feeding ….maturing…ageing and so on. Unfortunately mine didn’t last for more than a week for the entire process. Christmas is yet to come but my cake is gone!!! There isn’t a scrap left and all the flavors were truly delicious!. Guess its time to bake another one!

CHRISTMAS FRUIT CAKE

Makes one 8” round cake

Ingredients:

3 1/4 cup fruit mix

1/2 cup dried cranberries,blueberries and sultanas

1/2 cup raisins

1/3 cup rum + li’l more for feeding

2 cups all-purpose flour

½ teaspoon all spice mix

¼ teaspoon salt

1 teaspoon baking powder

1 cup butter, softened

1 ¼ cup brown sugar

4 eggs

2 tablespoon molasses

1 teaspoon vanilla extract

Zest of a lemon and orange

Directions : Place the fruitcake mix along with raisins, dried cranberries, sultanas and blueberries in a large bowl and pour rum over it. Mix well and cover and leave to stand overnight. I kept mine for almost 36 hours.

Preheat oven at 300F. Line the base and sides of an 8 x 3” round pan with parchment paper. Mix flour, baking powder, all spice powder & salt and set it aside. In the bowl of a stand mixer, beat butter and brown sugar until creamy. Gradually beat in the eggs. Once all the eggs are well incorporated, add vanilla extract, molasses, lemon and orange zest. Stir in the flour. When completely mixed, add the fruits and nuts ; do not over beat. Spoon the mixture into the prepared pan and bake for about 2 hours or until a skewer inserted to the center comes out clean .If the top of the cake starts to brown, cover it with a foil and bake.

Once done, remove the cake from the oven , allow it to rest and bring it to room temperature. Using a skewer gently poke a few holes on top of the cake. Feed the cake with rum, a tablespoon at a time once every week. You may also brush the cake with rum . Just before serving you may want to decorate it. Either sprinkle confectioner’s sugar or cover it with Marzipan or frost it the way you like….or simply eat it the way it is!

Bon Apetit!

Nina


Related Posts Plugin for WordPress, Blogger...

COPYRIGHT

MyFreeCopyright.com Registered & Protected

FAVORITE POST

Povitica Bread

Povitica - An East European Bread

Photobucket
BFS-logo
Proud member of FoodBlogs
my foodgawker gallery
Manage your shopping list and search for recipes from across the web at ZipList.com

SOCIAL MEDIA

ARCHIVES

Blogroll