Monthly Archives: January 2013

Print
Recipe

HB 2 main

I am sure each of us has one or the other food craving? Isn’t it? There are times when I have the most irresistible urge to try out something and would probably go mad if I can’t have it! I still recall vividly during my initial stages of pregnancy when I had a sudden craving for Arby’s curly fries and I had to send my husband late in the night to get it for me! Similarly I had this sudden craving for Dipping dots Ice Cream in the middle of a night! I had them at Wisconsin Dells for some for the first time which is like 3 hours drive from the place where I live and I couldn’t possible send my husband to get it this time:). Hence I googled up and got a nearby address where these ice-creams where were sold. Along with a few friends we went in the middle of the night, only to land at a local theater’s vending machine. I couldn’t stop laughing!!! Ahh such is my craving.

HB 3 main

On the same note, Pull - Apart Bread has been on my mind for some time now. I was longing for some savory bread and I HAD TO - HAD TO bake something and this was the first thing that struck me. So I baked a Whole Wheat Pull-Apart Bread with some garlic butter spread. My husband said it was too garlicky and didn’t like it much( he hates garlic!!!).Though I loved it, it was a little hard. So I started browsing to find a good recipe.

HB 5 main

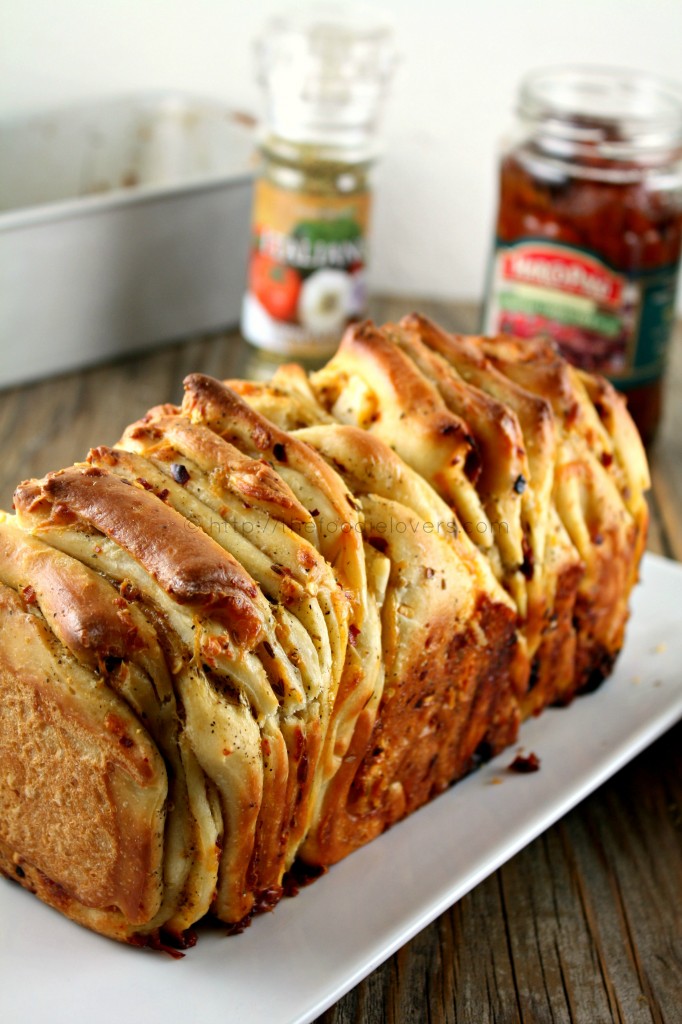
To my surprise, every other blog I stumbled upon had posted about this bread. All the blogs lead to Aparna’s “We need to Bake “ group. That’s when I hoped onto Aparna’s beautiful blog and read the details and was keen to participate. I immediately wrote to her and she was kind enough to add me and asked me to bake the bread and post it by end of this month. In addition to her recipe I added some sun dried tomatoes. So here is my bread for your eyes.

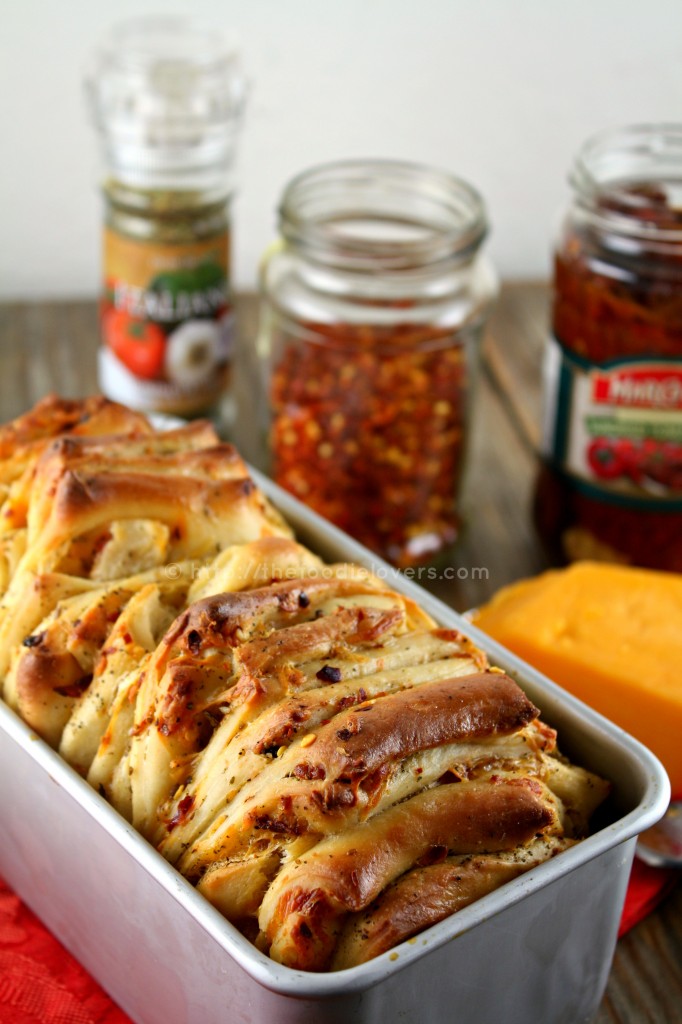
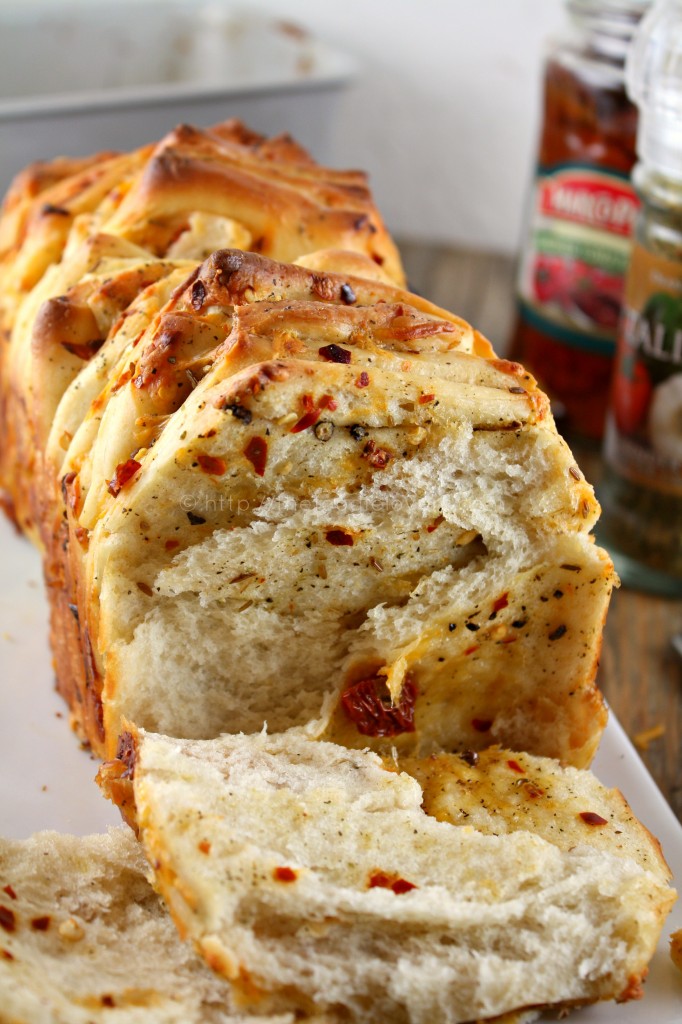
HERB AND CHEESE PULL- APART BREAD WITH SUN DRIED TOMATOES
Makes one loaf ( 9 x 4 or 5)
Ingredients:

For the Dough:
1/2 cup warm milk
1 teaspoon sugar
2 teaspon active dry yeast
2 3/4 to 3 cups all-purpose flour
1 teaspoon salt
2 tablespoon butter,room temperature
3/4 teaspoon garlic paste
3/4 cup milk (+ a couple of tablespoon to brush over the bread)

For the Filling:
1 tablespoon butter,melted
2 teaspoon dried italian herbs
1 teaspoon cumin seeds,crushed
Crushed pepper and red chilli flakes, to taste
1/2 cup grated cheddar cheese
2 tablespoon chopped sundried tomatoes

Directions:

In a small bowl, dissolve the sugar and the yeast in the 1/2 cup of warm milk. Keep aside for about 5 minutes till the yeast mixture bubbles up. In the bowl of a stand mixer( Kitchenaid) Put 2 ¾ cup of flour, salt, softened butter, and garlic paste and stir a couple of times to mix. Then add the yeast mixture and the ¾ cup of milk and knead till you have a soft, smooth and elastic/ pliable dough which is not sticky. Add a little extra flour if your dough is sticking, but only just as much as is necessary. I didn’t use up the entire milk, also didn’t have the need to add more flour.

Shape the dough into a ball and place it in a well-oiled bowl, turning the dough to coat it completely with oil. Cover and let it rise for about 1 to 1 ½ hours or until almost double in volume. Dust your work surface lightly with flour. Deflate the dough, shape it into a square and roll the dough out into a larger square that is about 12’ by 12”. Brush the surface of the square with the melted butter. Evenly sprinkle the herbs, pepper/ chili flakes and the cumin seeds and then the grated cheese. Use a rolling pin to very lightly press the topping into the dough to ensure the topping doesn’t fall off when you are stacking the strips. Using a pizza cutter, slice the dough from top to bottom into 6 long and even strips – they do not have to be perfect. Lay each strip on top of the next, with the topping facing upwards, until you have a stack of the strips
You can put the 2 strips cut from the sides in the middle of the stack so it looks neater. Using a pastry scraper or a sharp knife, cut straight down through the stack dividing it into 6 equal pieces (6 square stacks). Grease and lightly flour a 9” by 4” (or 5”) loaf tin. {I used a (7.75x 4.75)}. Butter and lightly flour the loaf pan. Layer the square slices, cut sides down into the loaf tin. Cover the loaf tin dough with a towel and allow the dough to rise for an hour. Lightly brush some milk over the top of the loaf. Bake the dough 350F for about 30 to 40 minutes until it is done and the top is golden brown.

The bread was fantastic, both in terms of look and taste. It was very flavorful. As the name suggest you have to PULL the Bread apart: you don’t need a knife. I am so glad that I joined this group, this will keep me going.

Thanks Aparna for the lovely recipe:)

Roxana of Roxana’s Home Baking asked me to send this to her “Bake your own Bread” event and I was happy to do so:). Thanks a bunch Roxana:)

Bon Apetit!

Nina

Print
Recipe

spec2 main

I must confess that if it was not for Daring Baker’s Challenge I wouldn’t have “dared” to bake so many things. Even in my wildest of dreams I wouldn’t have thought about making-Armenian Nazook,Batternberg Cake,Dutch Crunch Bread,Povitica….and so on. DBC is such a wonderful platform to give folks an opportunity to pursue and hone their baking skills! What makes this even special is the exposure it gives to baking delicacies of different countries and ethnicities.

It is entirely my privilege to be a part of this forum. This month’s challenge reminded me of the Nanaimo Bars that we baked few years back on DBC. Very soon it going to be four years with Daring Baker’s and I have loved every bit of this exciting and enriching journey. Lets go ahead with yet another fascinating challenge – A traditional Dutch Pastry called GEVULDE SPECULAAS ( Stuffed Speculaas).

spec 3 main

Francijn of Koken in de Brouwerij was our January 2013 Daring Bakers’ Hostess and she challenged us to make the traditional Dutch pastry, Gevulde Speculaas from scratch! That includes making our own spice mix, almond paste and dough! Delicious!

To start with we had to make the speculaas spice;the almond paste and then the speculaas dough.The entire recipe can be made in one day but to enjoy the full flavor it was recommended to refrigerate the almond paste and dough for a few days before assembling it.

Francijn mentioned about the history of Netherlands and spices - Until 1800 cloves, mace and nutmeg are exclusively found on the Maluku Islands, in the East Indian Archipelago. That’s why these islands are called “the spice islands”. To make one’s fortune in Europe through the spice trade, one needed a monopoly on the European trade. Since 1500 the Portuguese owned that monopoly.
The Republic of the Seven United Netherlands, too, wanted to get rich from the spice trade, and established the Dutch East India Company around 1600, to join forces. Since 1660 the monopoly on spice trade was firmly in Dutch hands. In the Dutch Golden Age, roughly the 17th century, the republic got rich through this trade, and flourished like never before, economically, artistically and scientifically. In many Dutch cities the heritage of this century is still visible. Sadly, this wealth must be considered in the light of war and repression. The Dutch used much violence and oppressed people to establish and defend their monopoly.

Only after World War II Dutch India became independent from the Netherlands. Until that moment the trade of spices, coffee, rubber, tobacco, opium, sugar, indigo and tea from Dutch India contributed significantly to the Dutch economy.
In light of this historical involvement of the Netherlands in the spice trade, the contents of my kitchen cupboard are not surprising. Anise seeds, cayenne pepper, chili pepper, lemon grass, mace, ginger, cinnamon, cardamom, curry powder, cumin, coriander seeds, cloves, galangal, mustard seed, nutmeg, paprika, allspice, saffron, vanilla, fennel, white pepper, black pepper. And that’s without the long list of herbs.

Spec1 main

SPECULAAS SPICES

When spices had become commonly available in the 17th century, bakers’ guilds began to make their secret spice mixtures. A mixture that gloriously survived the ages is “speculaaskruiden” (speculaas spices). Speculaaskruiden contain at least cinnamon, cloves, mace and ginger, and these spices to taste: pepper, cardamom, coriander, anise seeds and nutmeg.The smell of speculaaskruiden is overwhelming, especially when you take the trouble to mix them yourself. The deliciously warm and woody aroma is a perfect fit for the chilly Dutch winter months.
From the golden age onward, this spice mixture was used to bake a crisp, buttery biscuit: speculaas. For centuries it remained a luxury item, baked only in the holiday season, and often given as a present. Sometimes bakers made the dough three months in advance so that the flavor would permeate the dough.Ever since the 15th century, the 6th of December has been celebrated as the nameday of St. Nicholas, combined with an exchange of gifts on the evening before. But in the age of the Dutch East India Company St. Nicholas became associated with speculaas. And that is not so strange, as St. Nicholas was the patron saint of sailors as well as many bakers’ guilds.

In the course of time many recipes using speculaas spices have been created. Speculaasjes (“speculaas cookies / windmill cookies”) which are shaped using a wooden mold, speculaasbrokken (“speculaas chunks”), kruidnoten (“spiced nuts / miniature spiced cookies”), gevulde speculaas (“speculaas stuffed with almond paste”). And that is not the end of it: speculaas spices can be used in custards, cakes, muffins, bread toppings, cheesecake crusts and so on.
Recipe Speculaas SpicesSpeculaas spices can be bought in a store. But it’s more fun to make your own mixture, so that you can adjust the flavor. Here is a representative recipe from the extensive Dutch tradition.

Mandatory:
cinnamon 40 to 60 % of the total amount
ground cloves 1 or 2 parts
mace ½ or 1 part
ginger ½ or 1 part
Optional:
white pepper ½ or 1 part
cardamom ½ or 1 part
coriander ½ or 1 part
anise ½ or 1 part
nutmeg 1 or 2 parts
A convenient way to mix the spices is as below:

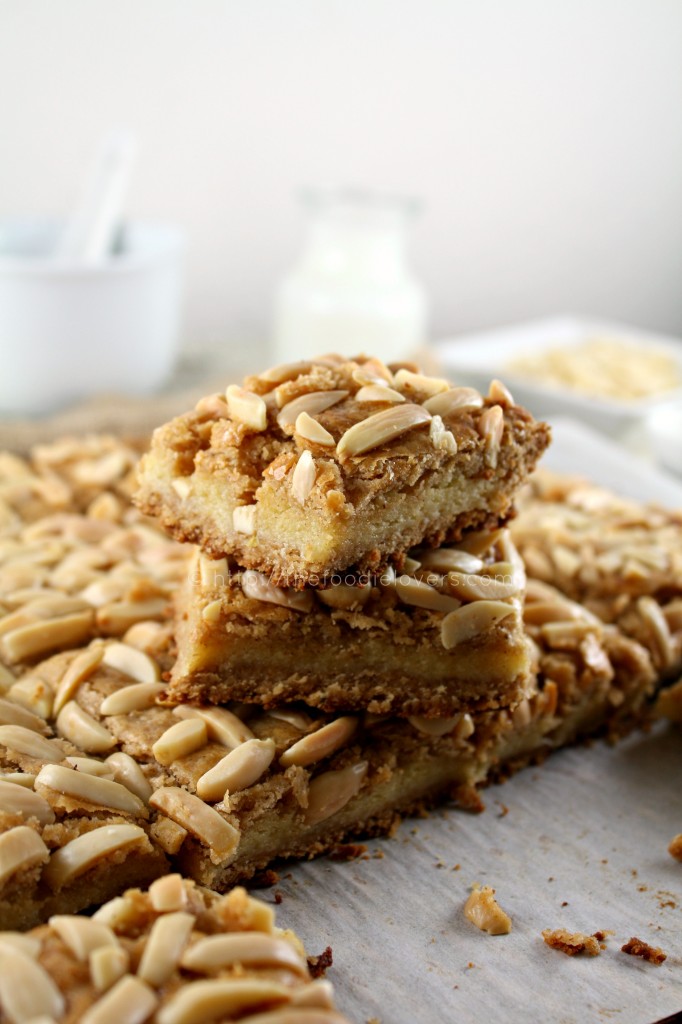
GEVULDE SPECULAAS - TRADITIONAL DUTCH PASTRY

SPECULAS SPICE
Take at least 1 or 2 teaspoons of ground cloves, ½ or 1 teaspoon of mace and ½ or 1 teaspoon of ginger.
Add to taste ½ or 1 teaspoon of white pepper, ½ or 1 teaspoon of cardamom, ½ or 1 teaspoon of coriander, ½ or 1 teaspoon of anise, and 1 or 2 teaspoons of nutmeg.Measure or weigh the amount of spices you have now, and add an equal amount of cinnamon.This method yields at least 4 and at most 18 teaspoons of spices, so if you plan to mix just a few spices, use bigger or more spoons to get a reasonable amount.

Take your time to smell the ingredients individually before you decide how much to add. And remember the proportions,that will make adjustments easier next time. Store the spices airtight, dry and dark, they will not spoil for a long time.

ALMOND PASTE
Ingredients:

1-1/3 cups ground almonds
5/8 cup granulated sugar
1 large egg
1 teaspoon lemon zest

Add Almonds and sugar, grind for one or two minutes. Add the egg and let the food processor combine it. You’ll end up with a sticky mass of almonds paste. Store it in an airtight container in the refrigerator. Although the flavor gets better as days pass by, it is not wise to store the paste for too long, as it contains a raw egg. For the same reason you should not eat the paste unbaked.

SPECULAAS DOUGH

Ingredients:
1¾ cups all purpose (plain) flour
1 teaspoon baking powder
¾ cup brown sugar, firmly packed
a pinch salt
2 tablespoons speculaas spices
3/4 cup unsalted butter

Directions:Put flour, baking powder, sugar, salt and spices in a bowl.Cut the butter in dices and add.Knead until smooth.Feel free to add a little milk if the dough is too dry.Wrap in clingfoil and put in the refrigerator for two hours.You can choose to make the dough a few days in advance, just like the almond paste, that will benefit the flavor. Freezing is no problem.

ASSEMBLING

Ingredients:
speculaas dough
almond paste
whole almonds without skins for decoration
1 large egg
shallow baking pan, 8×10 inch (20×26 cm) or, round with of diameter 10 inch (26 cm)

Directions:
Grease the pan. Preheat the oven to moderate 350°F. Divide the dough into two portions.Roll out both portions on a lightly floured surface, until they are exactly as big as the baking pan. Put one of the layers in the pan and press it lightly to fill the bottom. Lightly beat the egg with a teaspoon cold water. Smear 1/3 of the egg over the dough in the pan. Roll out the almond paste between two sheets of clingfoil, until it is exactly as big as the pan, and put it on the dough in the pan. (If you chose to make the paste soft, you can smear the paste instead of rolling it.) Press the paste lightly down to fit in the pan, and smear the next 1/3 of the egg over it. Now put the second layer of dough on top of the paste, press it lightly, and make as smooth as possible. Smear the last 1/3 of the egg over the dough. Decorate the pastry with the almonds. Bake for 40 minutes in the preheated oven. Let cool completely in the pan, then cut it in portions as you like. If you wrap the stuffed speculaas in clingfoil, after it has cooled completely, you can store it a few days at room temperature. Freezing is possible, but fresh speculaas tastes better.

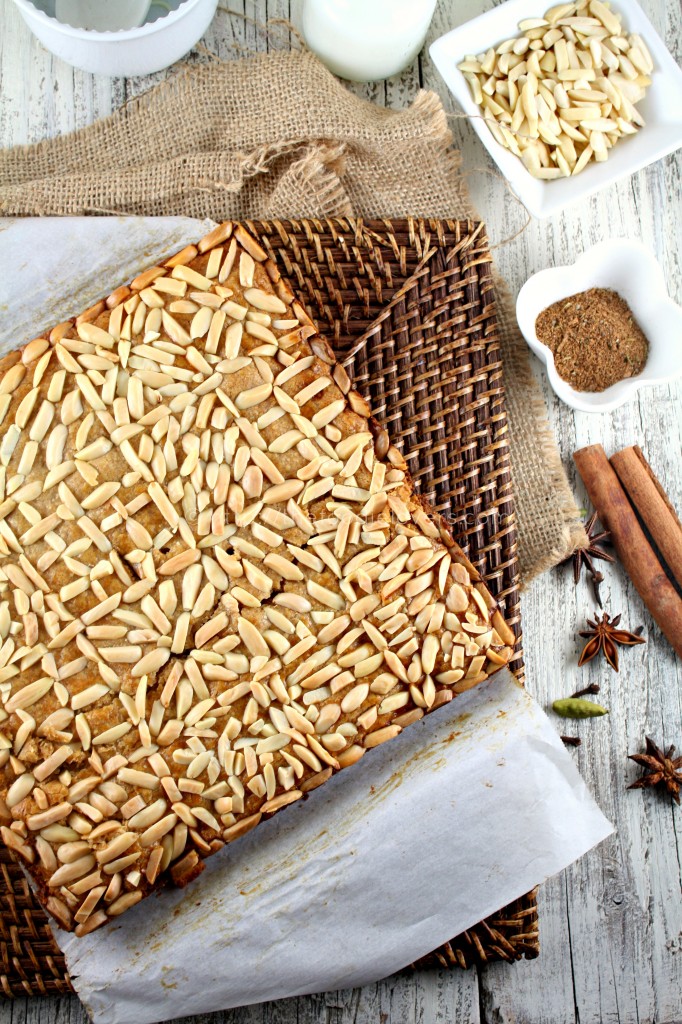
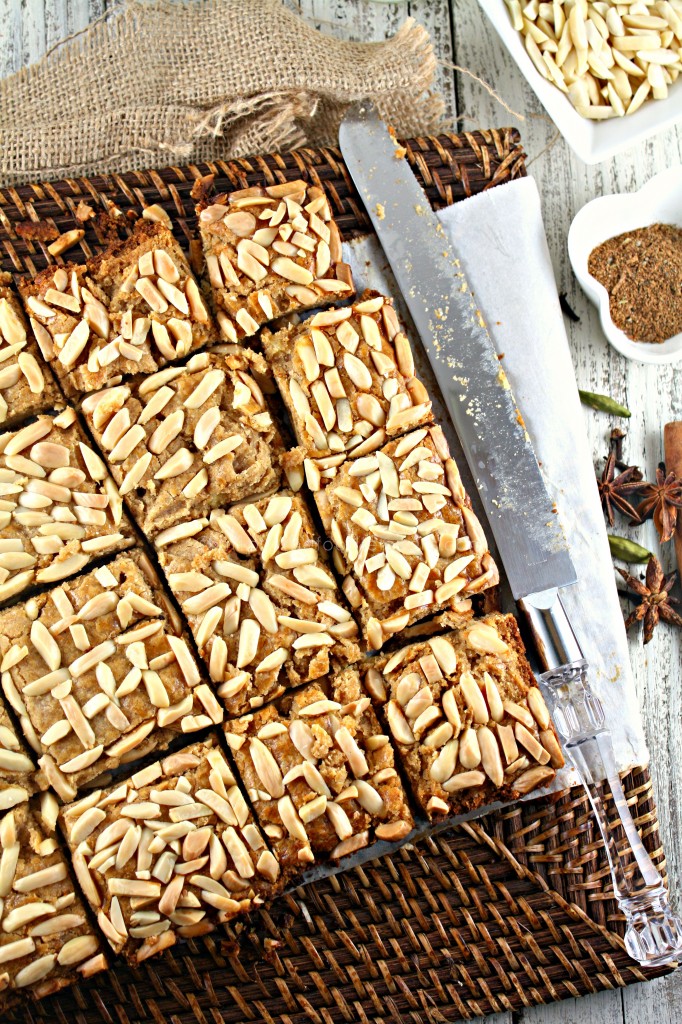
While mixing the spices - I smelt each and every one of them. I could feel it’s wonderful aroma fill up the entire house while baking. The nutty almond filling sandwiched between two layers of crunchy Speculaas dough was yum. The sweet level was perfect, just like the way I like - not too sweet.

While I was planning to decorate the pastry with almonds,I came across Hannah’s comment in the DBC forum. She had decorated her pastry so beautifully and I was totally inspired by her creativity. I decorated mine in a similar way!

Thanks Francijn for such a lovely challenge!

Bon Apetite!

Nina

Print
Recipe

MBread 2 main

Subzero Wind Chill Grips Midwest - MN endures tremendous amount of cold weather. So far this winter was a mild one, we had only one subzero low all winter!.But now Sunday through Tuesday is supposed to be the coldest days in the last four years.It’s about -15F/-19C now and going to be 3F/-16C tomorrow. I am looking outside my window and it is so sunny yet so chilly. Urgh!! The weather is so damn contradicting. How I wish Spring was here soon:(

Mbread 1 main
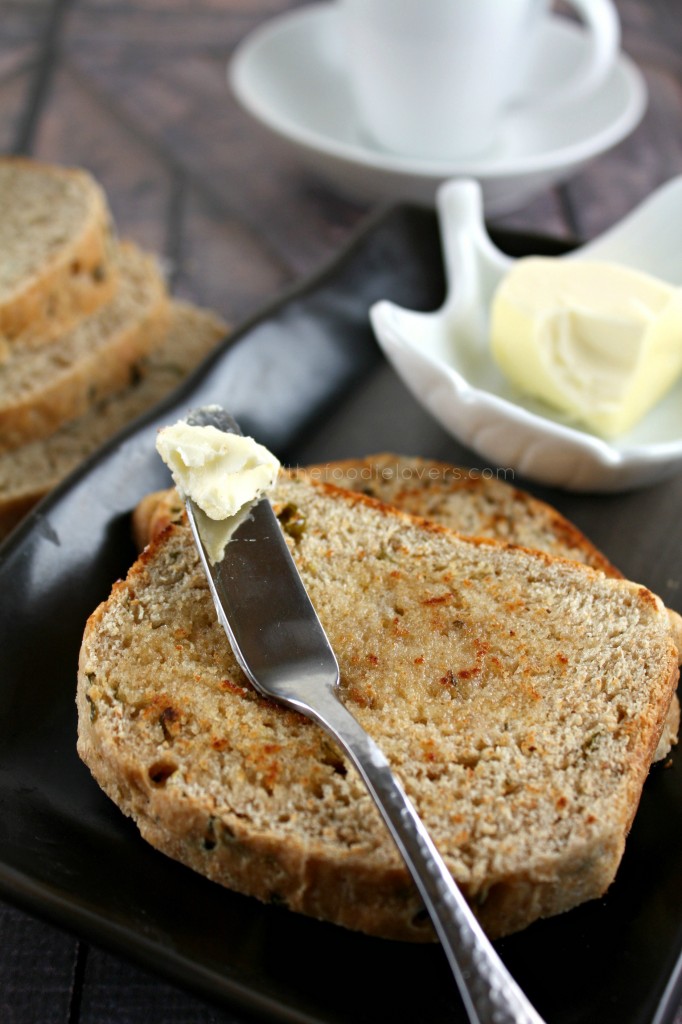
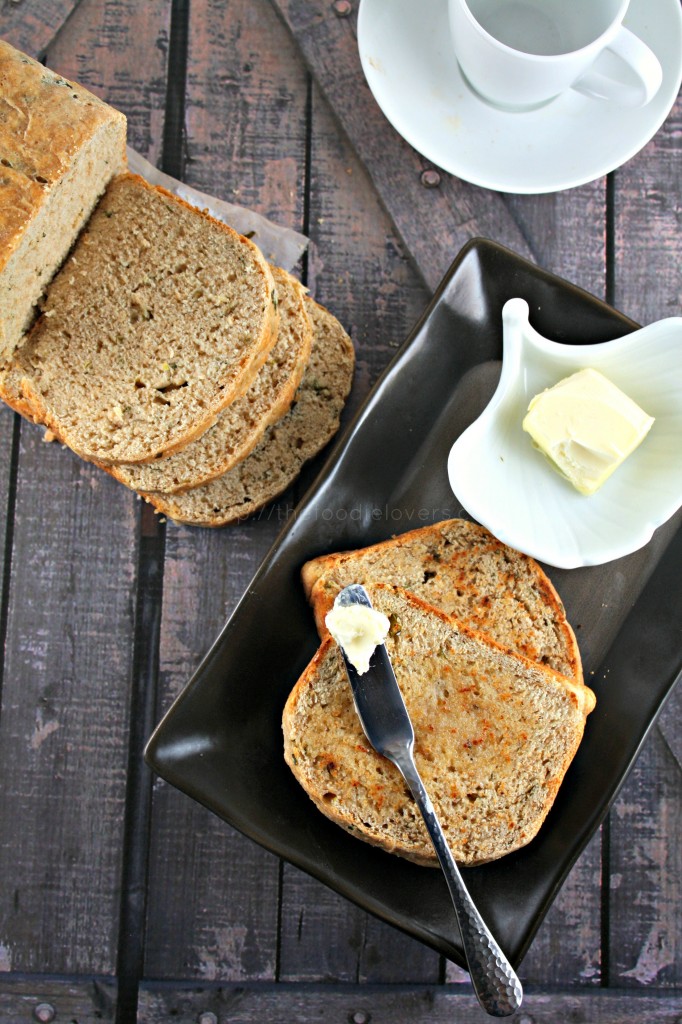
Baking is something that has been keeping me busy this season, atleast I get to take my mind of the bitter cold temperature. Mint has always been my favorite herb and that is what caught my attention when I came across this recipe. I have baked two versions of the same bread. First time was the exact recipe as mentioned below and the last time was a Savory one which you see in the pictures below. {For the savory one instead of 2 ½ cup bread/all-purpose flour – I used a cup of whole wheat flour along with 1 ½ cup of bread flour; added 2-3 minced thai green chilies; avoided the honey; added salt and 1 teaspoon butter}. As you can see in the pictures, due to the addition of wheat flour, the bread is light brown in color. Both the breads tasted great. However the savory one had a little hard crust, but was soft inside and turned slightly hard the next day. The original recipe yielded very flavorful and delicious bread which was very soft; I felt as though it had a brand new taste:)

MINTED YOGURT BREAD
Makes 1 medium (8 ½ x 4 ½”) loaf pan

Ingredients:

2 ½ cups bread/all-purpose flour
1 package dry yeast
1 cup plain yogurt, room temperature
3 tablespoon coarsely chopped fresh mint
Zest of a lemon
2 teaspoons honey
1 teaspoon butter,melted

Directions: In a mixing or mixer bowl of a stand mixer, measure 1 cup flour and the yeast ( if you are using whole wheat flour too, mix the flours and then measure). Stir to blend. Pour in the yogurt, mint, lemon zest and honey. Beat together with a wooden spoon or mixer flat beater until thoroughly mixed into a batter like dough. Add additional flour, ¼ cup at a time, first stirring with the spoon and then working with your hands, until a rough ball of dough has formed. This will be too thick for the beater blade, so attach a dough hook and stir with it. Knead for a minute. The dough may be somewhat sticky when turned out of the bowl, but a few sprinkles of flour as you shape the dough under your hands will make it less so.

Place the dough in an oiled bowl, cover with plastic wrap and let rise to double in bulk, about 1 hour. Punch down the dough. Shape into a ball; flatten the dough into an oval roughly the length of the pan. Fold in half lengthwise, pinch the edges into a seam and place seam down in the pan. Cover the loaf pan with a length of wax paper and leave until it has doubled in volume, about 40 minutes. The center should rise slightly above the edge of the pan. Preheat oven to 350F. Bake the loaf until it is lightly golden in color and tests done when tapped on the bottom crust with a forefinger, about 35 minutes. It should sound hard and hollow. Remove the pan immediately and brush with the melted butter. Cool on rack before slicing.

Particularly delicious toasted. Minty!

The above recipe was adapted from Bernard Clayton’s New complete book of Breads

Bon Apetite!

Nina

Print
Recipe

FB Scones 4 main

The WHOLE GRAIN bug seems to have caught me too. It’s been a while that I have been thinking of switching to whole grains but somehow it never happened. A few weeks back while shopping at Whole Foods I was overwhelmed looking at different kinds of flours available there. I immediately bought - rye, spelt and buckwheat flour. With Rye flour, I baked a Raisin Rye Bread which never made it to my blog as we wiped it even before I could photograph it. With Spelt,I plan to make some biscuits – so watch out for this space:).

FB Scones 2 main

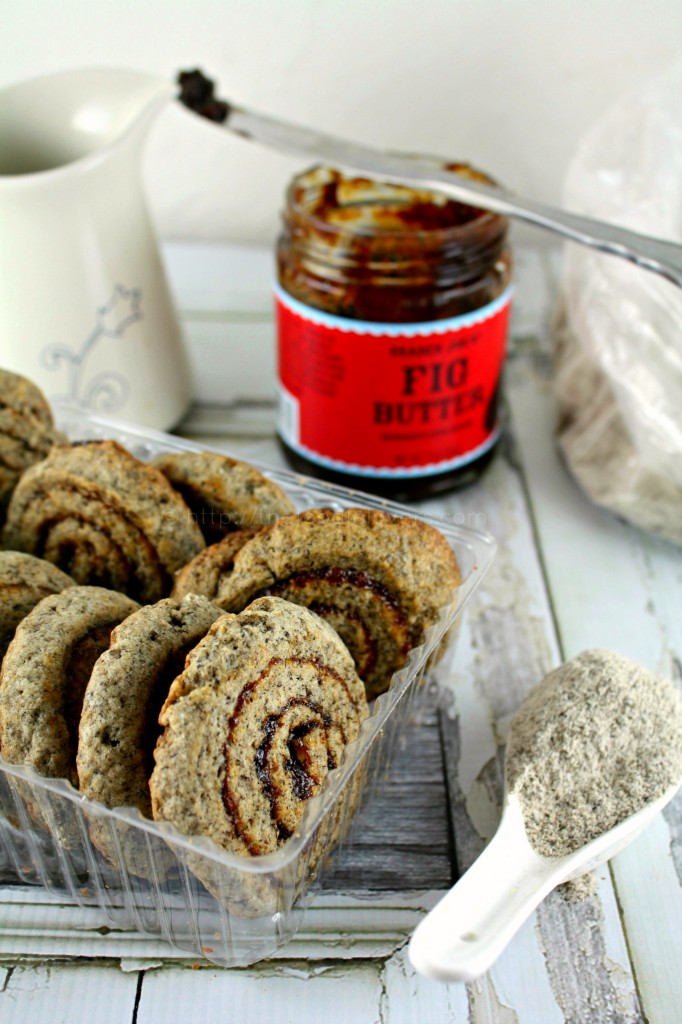
BUCKWHEAT is a very healthy grain with very high nutritional values. It has a strong and distinctive flavor, so not many prefer this flour. It’s usually grounded with the outer bran resulting in a rich grey/purple color with dark flecks. The black flecks/hull is the reason for its pleasant bitterness. Buckwheat is said to be something of an acquired taste.. Since I was working with it for the first time, I so wanted to like it - mainly because its healthy. With the flour, all I could think was to make Pancakes. Since I wanted to bake, I decided to go with the Scones.

Scones 1 main

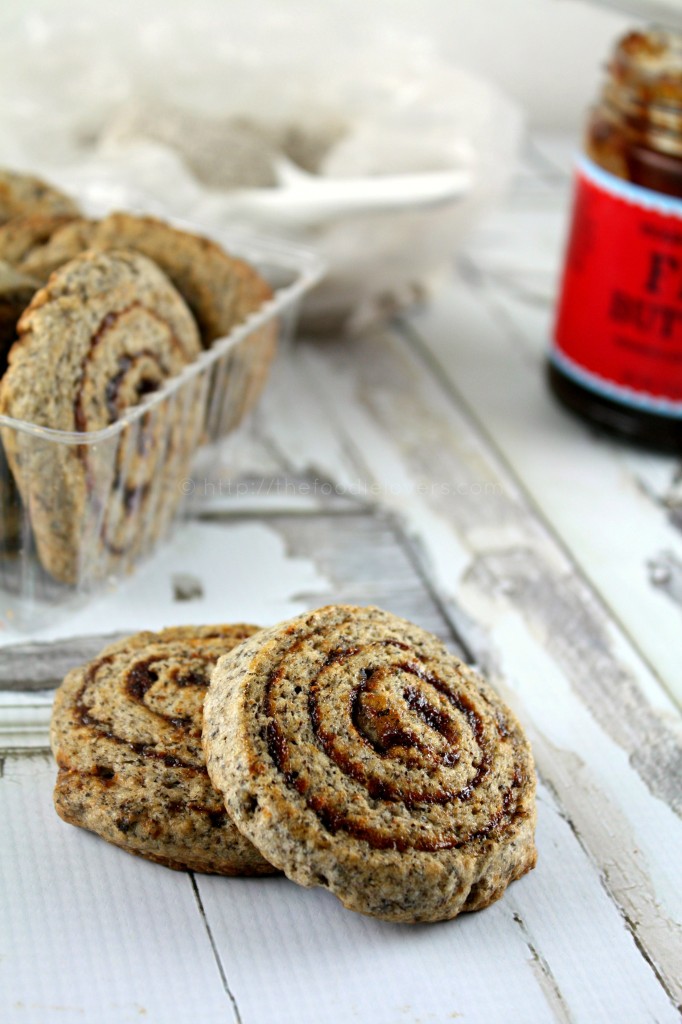
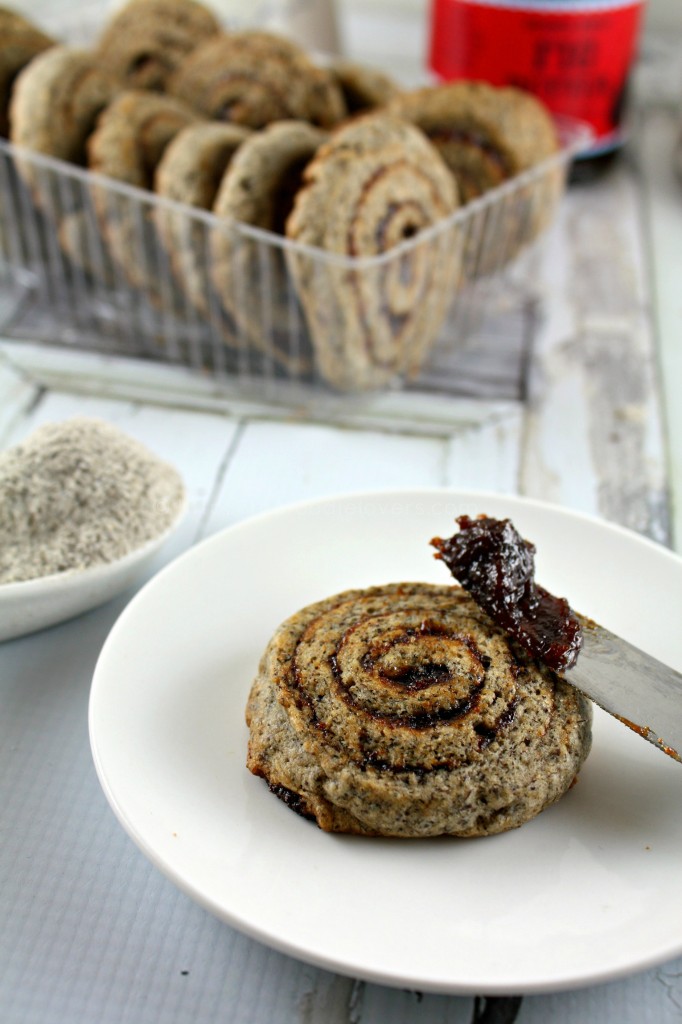
Also as it does not contain gluten, it’s very good for people with gluten allergies. If you are planning to introduce Buckwheat in your cooking, these Scones are the best way to start:). The scones tasted nutty and delicious. I didn’t have time to make the fig butter so picked up a bottle from Trader Joe’s. The fig butter and the buckwheat were meant to be together,they paired so well. I even spread a little on top of the baked scones….gosh it was heaven!!!

FIGGY BUCKWHEAT SCONES

Makes about 12
Ingredients:
Dry Mix – ½ cup buckwheat flour
½ cup + 2 tablespoon all-purpose flour
¼ cup sugar
1 teaspoon baking powder
¼ teaspoon salt
Wet Mix
4 tablespoon butter (cut into small pieces)
½ cup + 1 tablespoon heavy cream
½ cup fig butter ( or more)
Directions: Sift dry ingredients into a large bow, pouring back into the bowl any bits of grain or other ingredients that may remain in the sifter. Add the butter to the dry mixture. Rub the butter between your fingers,breaking it into smaller bits. Continue rubbing until the butter is coarsely ground and feels like grains of rice. The faster you do this,the more butter will stay solid,which is important for the success of this recipe. Add cream and gently mix it into the flour with a spatula until the dough is just combined.

Using a spatula or pastry scrapper transfer the dough into a well floured surface. It will be sticky so flour your hands with the flour and pat the dough into a rectangle that is about 8 x 16 inches and 3/4 inch thick. I rolled it out a little too thin so ended up with 12 scones. Ideally for this recipe you should get about 6-8 scones. If at any time the dough rolls off in a different direction,use your hands to square the corners and pat it back into shape. As you’re running periodically run a pastry scrapper or spatula underneath to loosen the dough,flour the surface and continue rolling. This keeps the dough from sticking. Flour the top of the dough with flour if the dough is sticking. Spread the fig butter over the dough.Roll the long edge of the dough,patting the dough as you roll so that it forms a neat 16 inches long roll. Roll the finished log so that the seam is on the bottom and the weight of the roll seals the edge.

Using a knife,slice the roll in half. Put the halves on a baking sheet,cover loosely with plastic wrap and refrigerate for about 30 minutes( The dough can be kept covered in the refrigerator for upto 2 days).While the dough is chilling preheat the oven to 350F. Line the Baking sheet with parchment paper.

After 30 minutes,take the logs out and cut each half into slices about 1 1/4 inches wide. Place each scone flat ,with the spiral of the fig butter facing up. Give the scones a squeeze to shape them into rounds. Bake for about 35-40minutes,rotating sheets halfway through. The scones are ready to come out when their undersides are golden brown.

They are best eaten warm from the oven or later the same day. They start becoming a little soft after a day or so.

The above recipe was adapted from Good to the Grain book by Kim Boyce.

Bon Apetite!

Nina

Related Posts Plugin for WordPress, Blogger...
Next Entries »

COPYRIGHT

MyFreeCopyright.com Registered & Protected

FAVORITE POST

Povitica Bread

Povitica - An East European Bread

Photobucket
BFS-logo
Proud member of FoodBlogs
my foodgawker gallery
Manage your shopping list and search for recipes from across the web at ZipList.com

SOCIAL MEDIA

ARCHIVES

Blogroll