| Povitica ( pronounced as Po-va-teet-za) is nothing but a sweet bread with a nut filling. A dough made with flour and yeast. It is then rolled and stretched out as thin as possible. The walnut filling is spread,its rolled and then baked in a bread loaf pan.It is also known as Nutroll,Potica,Kalachi or Strudia. Its traditionally served during holiday season. The Daring Baker’s October 2011 challenge was Povitica,hosted by Jenni of The Gingered Whisk. Povitica is a traditional Eastern European Dessert Bread that is as lovely to look at as it is to eat! The original recipe given was for four loaves and that was a lot for the two of us at home. So I used up the quarter batch ingredients and baked just one loaf. 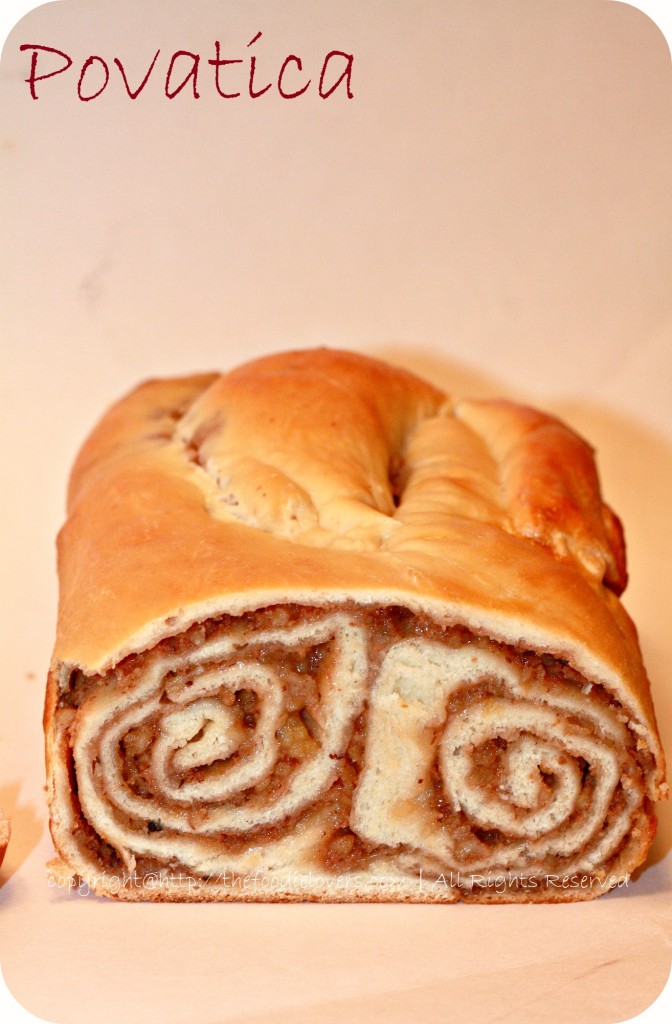
Quarter Batch Dough Ingredients (Makes one loaf)
To activate the Yeast:
½ Teaspoon Sugar
¼ Teaspoon All-Purpose (Plain) Flour
2 Tablespoons Warm Water
1½ Teaspoons Dry Yeast Dough:
½ Cup Whole Milk ( I used 2% milk)
3 Tablespoons Sugar
¾ Teaspoon Table Salt
1 Large Egg
1 tablespoon Unsalted Butter,melted
2 cups All-Purpose Flour,measure first then sift,divided ( I actually needed 2.5 cups of Flour) Topping:
2 Tablespoons Cold STRONG Coffee
1½ Teaspoons Granulated Sugar
Melted Butter or Egg White wash Quarter Batch Filling Ingredients (enough filling for one loaf)
1¾ Cups Ground English Walnuts
¼ Cup Whole Milk ( I used 2% milk only)
¼ Cup Unsalted Butter
1 Egg Yolk From A Large Egg,Beaten
¼ Teaspoon Pure Vanilla Extract
½ Cup Sugar
¼ Teaspoon Unsweetened Cocoa Powder
¼ Teaspoon Cinnamon To Activate Yeast: 1. In a small bowl,stir sugar,flour,and the yeast into 2 tbsp warm water and cover with plastic wrap.
2. Allow to stand for 5 minutes. Make the Dough:
3. In a medium saucepan,heat the milk up to just below boiling (about 180°F/82°C),stirring constantly so that a film does not form on the top of the milk. You want it hot enough to scald you,but not boiling. Allow to cool slightly,until it is about 110°F/43°C.
4. In a large bowl,mix the scalded milk,sugar,and the salt until combined.
5. Add the beaten eggs,yeast mixture,melted butter,and 1/4 cup of flour.
6. Blend thoroughly and slowly add remaining flour,mixing well until the dough starts to clean the bowl.
7. Turn dough out onto floured surface and knead,gradually adding flour a little at a time,until smooth and does not stick. Note:I actually used 2.5 cups of flour.
8. Place dough in a lightly oiled bowls,cover loosely with a layer of plastic wrap and then a kitchen towel and let rise an hour and a half in a warm place,until doubled in size. Make the Filling
10. In a large bowl mix together the ground walnuts,sugar,cinnamon and cocoa.
11. Heat the milk and butter to boiling.
12. Pour the liquid over the nut/sugar mixture.
13. Add the eggs and vanilla and mix thoroughly.
14. Allow to stand at room temperature until ready to be spread on the dough.
15. If the mixture thickens,add a small amount of warm milk To Roll and Assemble the Dough:
16. Spread a clean sheet or cloth over your entire table so that it is covered.
17. Sprinkle with a couple of tablespoons to a handful of flour (use flour sparingly)
18. Place the dough on the sheet and roll the dough out with a rolling pin,starting in the middle and working your way out,until it measures roughly 10-12 inches (25½ cm by 30½ cm) in diameter.
19. Spoon a teaspoon of melted butter on top.
20. Using the tops of your hands,stretch dough out from the center until the dough is thin and uniformly opaque. You can also use your rolling pin,if you prefer.
21. As you work,continually pick up the dough from the table,not only to help in stretching it out,but also to make sure that it isn’t sticking.
22. When you think it the dough is thin enough,try to get it a little thinner. It should be so thin that you can see the color and perhaps the pattern of the sheet underneath.
23. Spoon filling evenly over dough until covered
24. Lift the edge of the cloth and gently roll the dough like a jelly roll
25. Once the dough is rolled up into a rope,gently lift it up and place it into a greased loaf pan in the shape of a “U”,with the ends meeting in the middle. You want to coil the dough around itself,as this will give the dough its characteristic look when sliced.
26. Repeat with remaining three loaves,coiling each rope of dough in its own loaf pan.
27. Brush the top of each loaf with a mixture of 1/8 cup of cold STRONG coffee and 1/2 tablespoons of sugar. I actually used egg white in place of this.
28. Cover pans lightly will plastic wrap and allow to rest for approximately 15 minutes.
29. Preheat oven to moderate 350°F
30. Remove plastic wrap from dough and place into the preheated oven and bake for approximately 15 minutes.
31. Turn down the oven temperature to slow 300°F and bake for an additional 45 minutes,or until done.
32. Remove bread from oven and brush with melted butter.
33. Check the bread at 30 minutes to ensure that the bread is not getting too brown. You may cover the loaves with a sheet of aluminum foil if you need to.
34. Remove from the oven and allow to cool on a wire rack for 20-30 minutes,still in the bread pan.
35. It is recommended that the best way to cut Povitica loaves into slices is by turning the loaf upside down and slicing with a serrated knife. 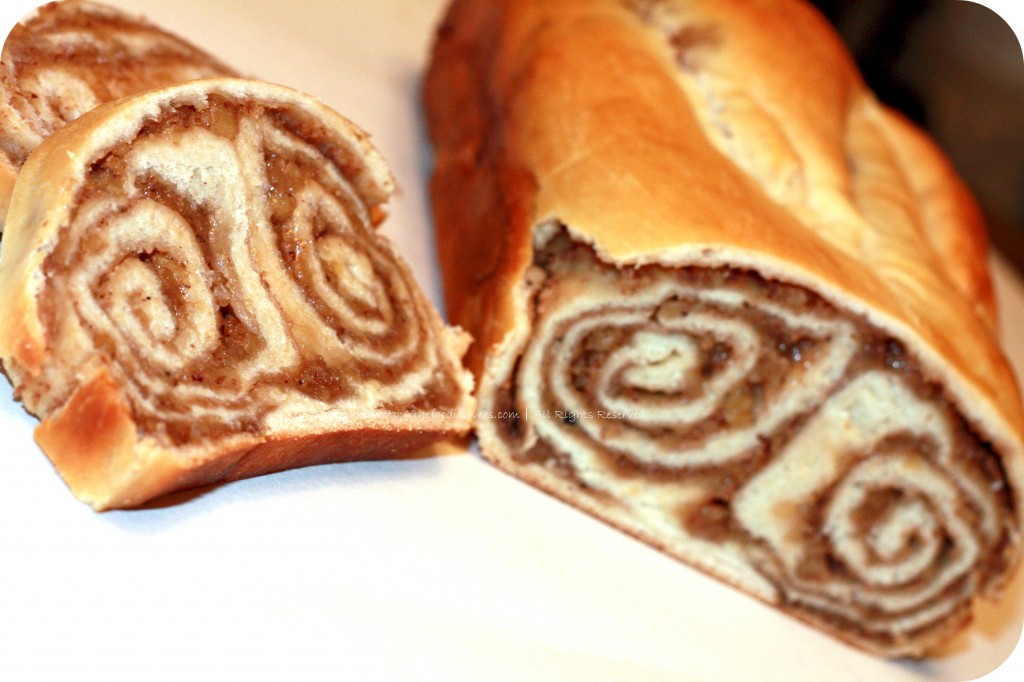
Thanks Jenni for a great challenge!
Similar to Puff Pastry,making Croissants from scratch is quite a challenge. It takes hours to make,involves a lot of effort,but end of the day when you have a bite of these gorgeous croissants,each and every minute spent baking,makes it worth it! Rugelach and Croissants are my all time favorites. I never get bored making them. 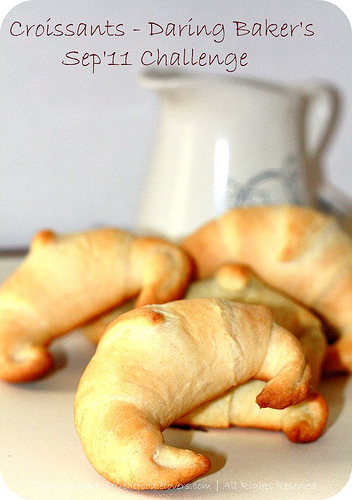
The Daring Bakers go retro this month! Thanks to one of our very talented non-blogging members,Sarah,the Daring Bakers were challenged to make Croissants using a recipe from the Queen of French Cooking,none other than Julia Child! Preparation time:In total,12 hours.
Making dough,10 mins
First rise,3 hours
Kneading and folding,5 mins
Second rise,1.5 hours (or overnight in the fridge)
Rolling in the butter (turns one and two),15 mins
First rest,2 hours
Turns three and four,10 mins
Second rest,2 hours (or overnight in the fridge)
Forming croissants,30 mins
Final rise,1 hour (or longer in the fridge)
Baking,15 mins Ingredients
1¼ teaspoon dry-active yeast (about ½ sachet)
3 tablespoons warm water
1 teaspoon sugar
1 3/4 cups plain flour
2 teaspoons sugar
1½ teaspoon salt
½ cup milk
2 tablespoons tasteless oil (I used Canola oil)
½ cup chilled,unsalted butter
1 egg,for egg wash Directions: 1. Mix the yeast,warm water,and first teaspoon of sugar in a small bowl. Leave aside for the yeast and sugar to dissolve and the yeast to foam up a little.
2. Measure out the other ingredients
3. Heat the milk until tepid (either in the microwave or a saucepan),and dissolve in the salt and remaining sugar
4. Place the flour in a large bowl.
5. Add the oil,yeast mixture,and milk mixture to the flour
6. Mix all the ingredients together using the rubber spatula,just until all the flour is incorporated
7. Turn the dough out onto a floured surface,and let it rest a minute while you wash out the bowl
8. Knead the dough eight to ten times only. It’s a little difficult to explain,but essentially involves smacking the dough on the counter and removing it from the counter using the pastry scraper.
9. Place the dough back in the bowl,and place the bowl in the plastic bag.
10. Leave the bowl at approximately 75°F/24°C for three hours,or until the dough has tripled in size.
11. After the dough has tripled in size,remove it gently from the bowl,pulling it away from the sides of the bowl with your fingertips.
12. Place the dough on a lightly floured board or countertop,and use your hands to press it out into a rectangle about 8 by 12 inches.
13. Fold the dough rectangle in three,like a letter (fold the top third down,and then the bottom third up)
14. Place the dough letter back in the bowl,and the bowl back in the plastic bag.
15. Leave the dough to rise for another 1.5 hours,or until it has doubled in size. This second rise can be done overnight in the fridge.
16. Place the double-risen dough onto a plate and cover tightly with plastic wrap. Place the plate in the fridge while you prepare the butter.
17. Once the dough has doubled,it’s time to incorporate the butter
18. Place the block of chilled butter on a chopping board.
19. Using the rolling pin,beat the butter down a little,till it is quite flat.
20. Use the heel of your hand to continue to spread the butter until it is smooth. You want the butter to stay cool,but spread easily.
21. Remove the dough from the fridge and place it on a lightly floured board or counter. Let it rest for a minute or two.
22. Spread the dough using your hands into a rectangle about 14 by 8 inches (35 cm by 20 cm).
23. Remove the butter from the board,and place it on the top half of the dough rectangle
24. Spread the butter all across the top two-thirds of the dough rectangle,but keep it ¼ inch (6 mm) across from all the edges.
25. Fold the top third of the dough down,and the bottom third of the dough up.
26. Turn the dough package 90 degrees,so that the top flap is to your right (like a book).
27. Roll out the dough package (gently,so you don’t push the butter out of the dough) until it is again about 14 by 8 inches (35 cm by 20 cm).
28. Again,fold the top third down and the bottom third up.
29. Wrap the dough package in plastic wrap,and place it in the fridge for 2 hours.
30. After two hours have passed,take the dough out of the fridge and place it again on the lightly floured board or counter.
31. Tap the dough with the rolling pin,to deflate it a little
32. Let the dough rest for 8 to 10 minutes
33. Roll the dough package out till it is 14 by 8 inches (35 cm by 20 cm).
34. Fold in three,as before
35. Turn 90 degrees,and roll out again to 14 by 8 inches (35 cm by 20 cm).
36. Fold in three for the last time,wrap in plastic,and return the dough package to the fridge for two more hours (or overnight,with something heavy on top to stop it from rising)
37. It’s now time to cut the dough and shape the croissants
38. First,lightly butter your baking sheet so that it is ready
39. Take the dough out of the fridge and let it rest for ten minutes on the lightly floured board or counter
40. Roll the dough out into a 20 by 5 inch rectangle (51 cm by 12½ cm).
41. Cut the dough into two rectangles (each 10 by 5 inches (25½ cm by 12½ cm)
42. Place one of the rectangles in the fridge,to keep the butter cold
43. Roll the second rectangle out until it is 15 by 5 inches (38 cm by 12½ cm).
44. Cut the rectangle into three squares (each 5 by 5 inches (12½ cm by 12½ cm))
45. Place two of the squares in the fridge
46. The remaining square may have shrunk up a little bit in the meantime. Roll it out again till it is nearly square
47. Cut the square diagonally into two triangles.
48. Stretch the triangle out a little,so it is not a right-angle triangle,but more of an isosceles.
49. Starting at the wide end,roll the triangle up towards the point,and curve into a crescent shape.
50. Place the unbaked croissant on the baking sheet
51. Repeat the process with the remaining squares of dough,creating 12 croissants in total.
52. Leave the tray of croissants,covered lightly with plastic wrap,to rise for 1 hour
53. Preheat the oven to very hot 475°F
54. Mix the egg with a teaspoon of water
55. Spread the egg wash across the tops of the croissants.
56. Put the croissants in the oven for 12 to 15 minutes,until the tops are browned nicely
Yummiest Croissants are ready to eat:). They are best the day they are baked. Thanks Sarah for the lovely Challenge! The August 2011 Daring Bakers’ Challenge was hosted by Lisa of Parsley,Sage,Desserts and Line Drive and Mandy of What the Fruitcake?!. These two sugar mavens challenged us to make sinfully delicious candies! This was a special challenge for the Daring Bakers because the good folks at Chocoley offered an amazing prize for the winner of the most creative and delicious candy! 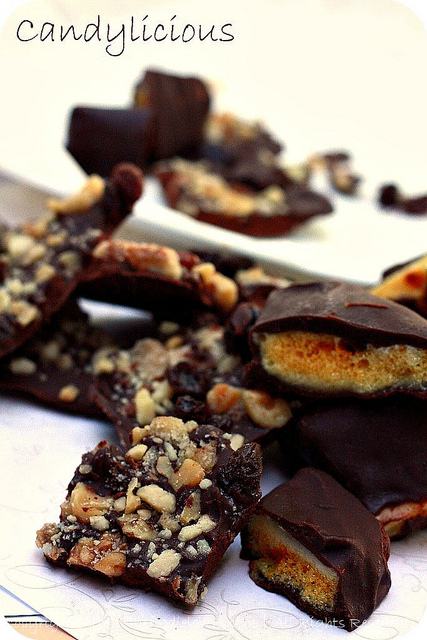
We were asked to make TWO candies,the first candy must be either a truffle,dipped or not dipped in chocolate OR a cut (square) dipped chocolate/bonbon OR a filled chocolate/bonbon using a chocolate mold
The other candy can be any CHOCOLATE OR NON-CHOCOLATE candy. I decided to make Chocolate Bark and Sponge Candy. CHOCOLATE BARK 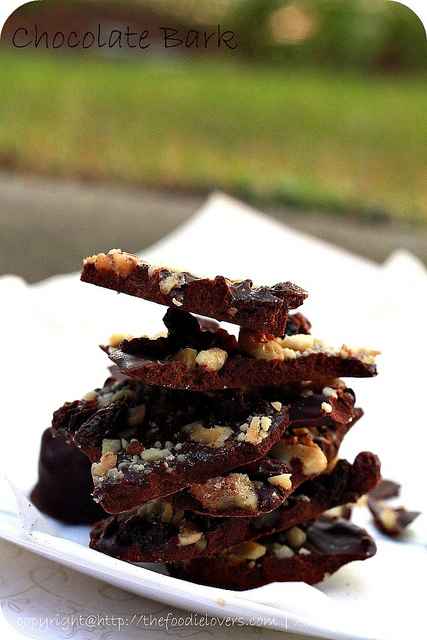
Ingredients
Milk/Dark/White Chocolate,tempered (any amount)
Various nuts ( I used Walnuts,Almonds and Raisins)
Directions:
Line a baking tray with parchment paper.Temper your chocolate using your preferred method. Once tempered,spread the chocolate over the parchment paper.Sprinkle your ingredients over the chocolate.Leave to set
Tip:To help speed up the setting,you can put it in the fridge for about 15-30min. Don’t leave it in the fridge to avoid the chocolate from sweating (water droplets will form on the chocolate).Break into pieces and store at room temperature in an airtight container.
SPONGE CANDY 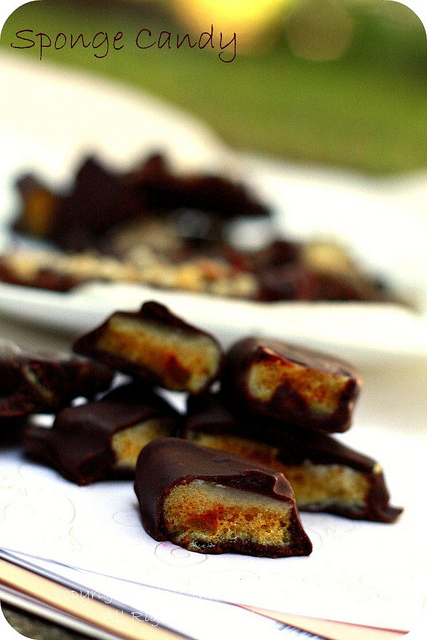
Ingredients
2½ cups Granulated White Sugar
2/3 cup Light corn syrup
6 tablespoons Water
1 tablespoon Baking Soda
2 teaspoons Vanilla extract
Vegetable oil for greasing pan Directions: 1. Liberally grease a 10-inch round spring form cake pan with vegetable oil. Trace the bottom of the pan on a piece of parchment paper. Line the bottom of the pan with the parchment paper circle. Line the sides of the pan with a parchment paper so that the parchment paper creates a collar that sits 1 to 2-inches above the pan. Liberally grease the parchment paper.
2. In a deep medium saucepan add sugar,corn syrup,water,and vanilla. Over medium-high heat bring the mixture to a boil (without stirring) and cook until hard crack stage,i.e. until temperature reads 285°F / 140°C on a candy thermometer (if using light corn syrup,it will be light amber,if using dark corn syrup it will be the color of maple syrup). This should take about 10 minutes. If sugar crystals form on the sides of the pan during the cooking process,brush the sides of the pan with a clean pastry brush dipped in water.
3.Remove from heat. Working quickly,add the baking soda and quickly blend to incorporate the soda into the sugar mixture,about 5 seconds. The mixture will bubble up when you add the baking soda. Be very careful not to touch the hot mixture.
4.Immediately pour the hot toffee into the prepared pan. Let set completely before touching. Cut into pieces. It makes a huge mess. But the messy little crumbs can be saved to top ice cream. Leave candy as is and enjoy,or dip pieces in tempered chocolate and let set.
This surely was an easy DBC! 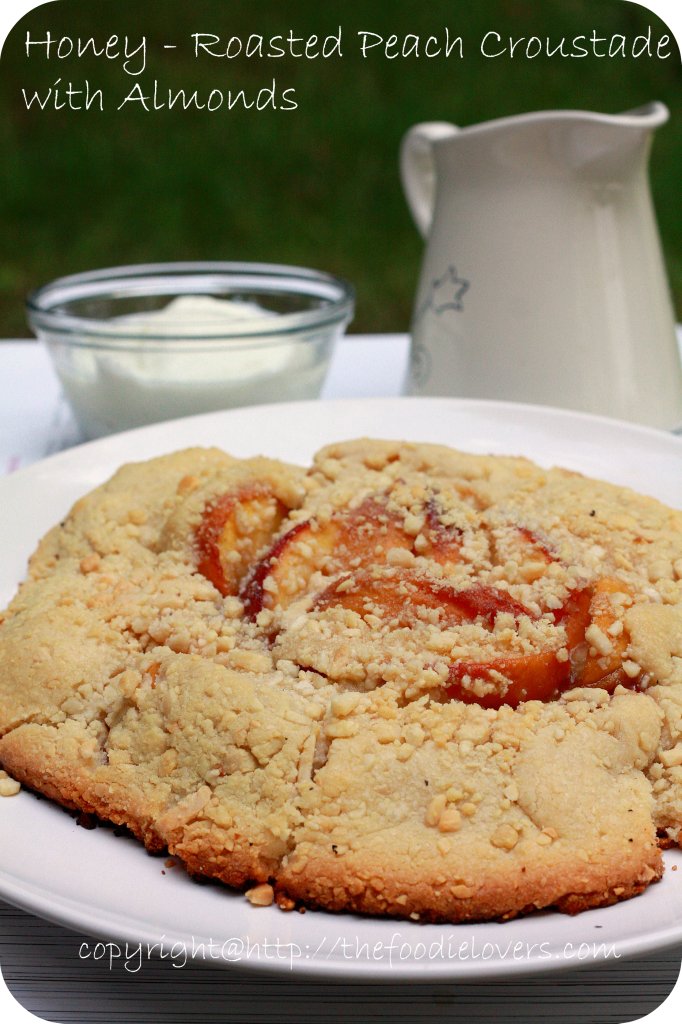
To identify subtle difference between two seemingly similar things is an art in itself. Especially in food,there could be so many dishes with similar ingredients,texture,appearance yet there is a difference. Should I say subtle? While I try experimenting different cuisines on my guinea pig( read Husband)how I wish he knew what exactly I made or intended to make. For instance,he thinks a Flan,Mousse and Panna Cotta are all same. A Crisp,Crumble and Cobbler are the same…duh! Just for information -A CRISP like its name has a crispy texture when baked,something like a streusel topping.A CRUMBLE is something like a crisp,mostly made with oats topping. A COBBLER has a biscuit like topping,looks like cobblestones. On the same lines,a CROUSTADE means “Crust”or “Pie Crust”also a shell with some filling. I had some fresh Pears and decided to bake a Peach Croustade. I have always used fresh fruits as filling but this time I decided to roast them first. This dessert is fully rich with flavors,the crunchiness of almonds in each bite is sinful. Adapted from -Bon Appetit Desserts by Barbara Fairchild,my fav book:) Ingredients: Peaches:
2-3 large Pears ( unpeeled,quartered and pitted)
2 tablespoons honey
2 tablespoons brown sugar Crust:
2/3 cup slivered almonds
1 cup all purpose flour
1/4 cup sugar
1/2 teaspoon salt
7 tablespoons chilled butter(cut into cubes)
1 large egg yolk
2 tablespoons honey Peaches:Preheat oven at 400F. Line a baking tray with foil and place the peaches with the skin side down on the foil. Drizzle with honey and sprinkle brown sugar. Roast the peaches until just tender and beginning to brown,about 20 minutes. Turn the peaches and continue roasting until fruit is very tender and honey begins to turn dark brown on the edges of the pan,about 12 minutes longer.Cool for a while. Crust: Using on/off turns coarsely chop the almonds in a processor. Set aside. Blend flour,sugar and salt in the processor. Add butter and process until it resembles coarse meal.Drop egg yolk through feed tube;using on/offs turn,blend just until moist clumps form. Gather the dough into a ball;flatten into disk.Wrap in plastic and freeze for 30 minutes. Do Ahead: Can be made 1 day ahead. Keep chilled. Let stand at room temperature 20 minutes to soften slightly before rolling out. Preheat oven at 375F. Roll out dough disk between 2 floured sheets of parchment paper to 10-inch rounds,sprinkling with additional flour as necessary. Remove top parchment sheet and sprinkle 1/2 cup of almonds evenly all over the disc. Replace the top sheet and roll out into a 11-inch round,embedding nuts into the dough. Invert crust and parchment onto a heavy baking sheet,nut side down. Remove the top sheet of parchment. Arrange peaches over center of crust in concentric circles,alternating skin side up and skin side down and leaving 1 1/2 to 2 inch plain border. Using the parchment as aid,fold outer edge of crust over edges of peaches. Drizzle peaches with honey.Sprinkle with remaining chopped almonds. Bake until crust is brown,about 30 minutes. Serve warm with Vanilla Ice Cream or Honey Sweetened Greek Yogurt ( mix Greek Yogurt(1 cup) and 2 tablespoons of honey).
Enjoy! Frasiers is something that I came across the first time at the DBC forum. And I was quite thrilled to bake one. But I must say this wasn’t the best cake I have ever baked. I wasn’t quite happy the way my Frasier looked,no doubt it tasted excellent but the look wasn’t quite appealing. My cake shrunk after baking…I wonder why.. did I bake longer??? ,no idea! I loved all my fellow bloggers post and have decided to make a beautiful looking Frasier again. It tasted great too,so why will I not bake it again:). Thanks Jana for the wonderful recipe! Anyways coming to my post… Jana of Cherry Tea Cakes was our July Daring Bakers’ host and she challenges us to make Fresh Frasiers inspired by recipes written by Elisabeth M. Prueitt and Chad Robertson in the beautiful cookbook Tartine. 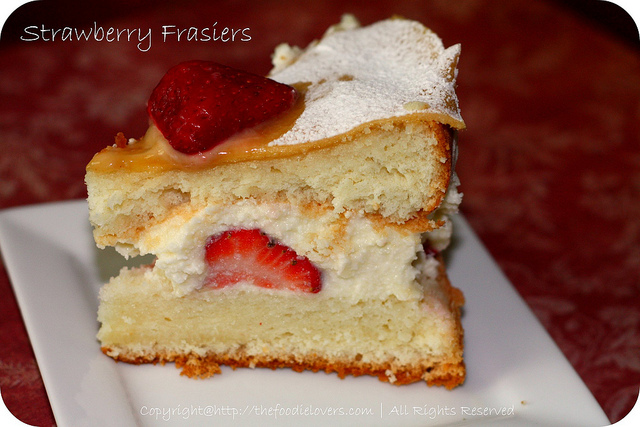
Basic Chiffon Cake Ingredients: 1 cup + 2 tablespoons all-purpose flour
1 teaspoon baking powder
3/4 cups sugar
1/2 teaspoon salt,preferably kosher
1/4 cup vegetable oil
3 large egg yolks
⅓ cup + 1 tablespoon water
1 teaspoon pure vanilla extract
3/4 teaspoon lemon zest,grated
5 large egg whites
¼ teaspoon cream of tartar Directions: Preheat the oven to moderate 325 F. Line the bottom of an 8-inch spring form pan with parchment paper. Do not grease the sides of the pan. In a large mixing bowl,stir together the flour and baking powder. Add in all but 3 tablespoons of sugar,and all of the salt. Stir to combine.In a small bowl combine the oil,egg yolks,water,vanilla and lemon zest. Whisk thoroughly.Combine with the dry ingredients and mix thoroughly for about one minute,or until very smooth. Put the egg whites into a stand mixer,and beat on medium speed using a whisk attachment on a medium speed,until frothy. Add cream of tartar and beat on a medium speed until the whites hold soft peaks. Slowly add the remaining sugar and beat on a medium-high speed until the whites hold firm and form shiny peaks.
Using a grease free rubber spatula,scoop about ⅓ of the whites into the yolk mixture and fold in gently. Gently fold in the remaining whites just until combined. Pour the batter into the prepared pan. Bake for 45 to 55 minutes or until toothpick inserted into the center comes out clean. Removed the cake from the oven and allow to cool in the pan on a wire rack.
To unmold,run a knife around the sides to loosen the cake from the pan and remove the spring form sides. Invert the cake and peel off the parchment paper. Refrigerate for up to four days. Pastry Cream Filling: Ingredients:
1 cup whole milk
1/2 teaspoon pure vanilla extract
1/8 teaspoon salt,preferably kosher
2 tablespoons cornstarch
1/4 cup sugar
1 large egg
2 tablespoons unsalted butter
3/4 teaspoon gelatin
1/2 tablespoon water
1 cup heavy cream Directions: Pour the milk,vanilla,and salt into a heavy sauce pan. Place over medium-high heat and scald,bringing it to a near boiling point. Stir occasionally.Meanwhile,in a stand mixer add the cornstarch and sugar. Whisk to combine. Add the eggs to the sugar and cornstarch and whisk until smooth.When the milk is ready,gently and slowly while the stand mixer is whisking,pour the heated milk down the side of the bowl into the egg mixture.
Pour the mixture back into the warm pot and continue to cook over a medium heat until the custard is thick,just about to boil and coats the back of a spoon. Remove from heat and pass through a fine mesh sieve into a large mixing bowl. Allow to cool for ten minutes stirring occasionally. Cut the butter into four pieces and whisk into the pastry cream a piece at a time until smooth. Cover the cream with plastic wrap,pressing the plastic wrap onto the top of the cream to prevent a skin from forming. Chill in the refrigerator for up to five days. In a small dish,sprinkle the gelatin over the water and let stand for a few minutes to soften.
Put two inches of water into a small sauce pan and bring to a simmer over a medium heat.
Measure 1/4 cup of the chilled pastry cream into a small stainless steel bowl that will sit across the sauce pan with the simmering water,without touching the water.Heat the cream until it is 120 F. Add the gelatin and whisk until smooth. Remove from the water bath,and whisk the remaining cold pastry cream in to incorporate in two batches. In a stand mixer,fitted with the whisk attachment,whip the cream until it holds medium-stiff peaks. Immediately fold the whipped cream into the pastry cream with a rubber spatula. Simple Syrup: You may choose to flavor the syrup. One way is to use flavored sugar (for example:apple cider sugar,orange sugar,or vanilla sugar) or to stir in 1-2 teaspoons of flavored extract. You may also infuse with herbs or spices,if desired or add four tablespoons (60 ml) of fruit juice or liqueur while the syrup is cooling. Ingredients:
1/3 cup sugar,flavored or white
1/3 cup of water Directions: Combine the water and sugar in a medium saucepan. Bring the mixture to a boil and let the sugar dissolve. Stirring is not necessary,but will not harm the syrup.Remove the syrup from the heat and cool slightly.
Transfer syrup to a lidded container or jar that can be stored in the refrigerator. Simple syrup can be stored for up to one month. Fraisier Assembly: Components: 1 baked 8 inch chiffon cake
1 recipe pastry cream filling
⅓ cup simple syrup or flavored syrup
2 lbs strawberries
confectioners’ sugar for dusting
½ cup almond paste Directions: Line the sides of a 8-inch spring form pan with plastic wrap. Do not line the bottom of the pan. Cut the cake in half horizontally to form two layers.Fit the bottom layer into the prepared spring form pan. Moisten the layer evenly with the simple syrup. When the cake has absorbed enough syrup to resemble a squishy sponge,you have enough. Hull and slice in half enough strawberries to arrange around the sides of the cake pan. Place the cut side of the strawberry against the sides of the pan,point side up forming a ring.
Pipe cream in-between strawberries and a thin layer across the top of the cake. Hull and quarter your remaining strawberries and place them in the middle of the cake. Cover the strawberries and entirely with the all but 1 tbsp of the pastry cream. Place the second cake layer on top and moisten with the simple syrup.Lightly dust a work surface with confectioners’sugar and roll out the almond paste to a 10-inch round 1/16 inch thick. Spread the remaining 1 tablespoon of pastry cream on the top of the cake and cover with the round of almond paste.
(This is how my Frasier looked…could be better the next time I bake this…hmmm) 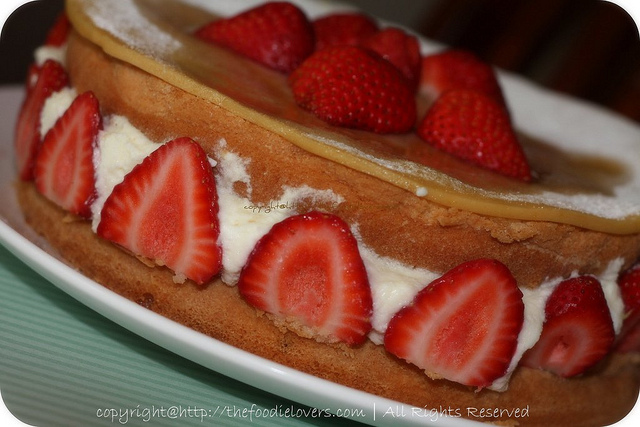
Cover with plastic wrap and refrigerate for at least 4 hours.To serve release the sides of the spring form pan and peel away the plastic wrap. Serve immediately or store in the refrigerator for up to 3 days. Better late than Never -I didn’t want to miss out on this month’s challenge too. Somehow managed to work on it today. My site was hacked,took some time to figure it out. Its up now and here is my post. Erica of Erica’s Edibles was our host for the Daring Baker’s June challenge. Erica challenged us to be truly DARING by making homemade phyllo dough and then to use that homemade dough to make Baklava. Phyllo Dough Mixing/Kneading:15-25 minutes
Resting time:30-90 minutes (longer is better)
Rolling Phyllo:varies,approx. 2 minutes per sheet Syrup:15 minutes plus cooling
Baklava:30 minutes
Resting:Overnight Ingredients:
1 1/3 cups unbleached all purpose (plain) flour
1/8 teaspoon salt
1/2 cup less 1 tablespoon water,plus more if needed
2 tablespoons vegetable oil,plus additional for coating the dough
1/2 teaspoon cider vinegar,(could substitute white wine vinegar or red wine vinegar,but could affect the taste) Directions:
1. In the bowl of your stand mixer combine flour and salt.
2. Mix with paddle attachment
3. Combine water,oil and vinegar in a small bowl.
4. Add water &oil mixture with mixer on low speed,mix until you get a soft dough,if it appears dry add a little more water (I had to add a tablespoon more)
5. Change to the dough hook and let knead approximately 10 minutes. You will end up with beautiful smooth dough. If you are kneading by hand,knead approx. 20 minutes
6. Remove the dough from mixer and continue to knead for 2 more minutes. Pick up the dough and through it down hard on the counter a few times during the kneading process.
7. Shape the dough into a ball and lightly cover with oil
8. Wrap tightly in plastic wrap and let rest 30-90 minutes,longer is best ( I let mine rest 2 hours and it was perfect) Rolling your Phyllo Roll the dough as thin as you can.
1. Unwrap the dough and cut off a chunk slightly larger then a golf ball. While rolling be sure to keep the other dough covered so it doesn’t dry out.
2. Be sure to flour your hands,rolling pin and counter. As you roll you will need to keep adding,don’t worry,you can’t over-flour.
3. Roll out the dough a bit to flatten it out.
4. Wrap the dough around your rolling pin/dowel
5. Roll back and forth quickly with the dough remaining on the dowel.
7. Rotate and repeat until it is as thin as you can it. Don’t worry if you get rips in the dough,as long as you have one perfect one for the top you will never notice
8. When you get it as thin as you can with the rolling pin,carefully pick it up with well floured hands and stretch it on the backs of your hands as you would a pizza dough,just helps make it that much thinner. Roll out your dough until it is transparent. NOTE:you will not get it as thin as the frozen phyllo dough you purchase at the store,it is made by machine
9. Set aside on a well-floured surface. Repeat the process until your dough is used up. Between each sheet again flower well. You will not need to cover your dough with a wet cloth,as you do with boxed dough,it is moist enough that it will not try out. Baklava Recipe Adapted from Alton Brown,The Food Network
30 servings Ingredients
For the syrup:
· 1 1/4 cups honey
· 1 1/4 cups water
· 1 1/4 cups sugar
· 1 cinnamon stick
· 1 (2-inch/50 mm) piece fresh citrus peel (lemon or orange work best)
· a few cloves or a pinch or ground clove When you put your baklava in the oven start making your syrup. When you combine the two,one of them needs to be hot,I find it better when the baklava is hot and the syrup has cooled Directions 1. Combine all ingredients in a medium pot over medium high heat. Stir occasionally until sugar has dissolved
2.Boil for 10 minutes,stir occasionally.
3. Once boiled for 10 minutes remove from heat and strain cinnamon stick and lemon,allow to cool as baklava cooks Ingredients for the Filling:
1 (5-inch/125 mm piece) cinnamon stick,broken into 2 to 3 pieces or 2 teaspoons (10 ml) (8 gm) ground cinnamon
15 to 20 whole allspice berries ( I just used a few pinches)
3/4 cup blanched almonds
3/4 cup raw or roasted walnuts
3/4 cup raw or roasted pistachios
2/3 cup sugar
phyllo dough (see recipe above)
1 cup (2 sticks) melted butter Directions: 1. Preheat oven to moderate 350°F/180°C/gas mark 4.
2. Combine nuts,sugar and spices in a food processor and pulse on high until finely chopped. If you do not have a food processor chop with a sharp knife as fine as you can. Set aside
3. Trim your phyllo sheets to fit in your pan
4. Brush bottom of pan with butter and place first phyllo sheet
5. Brush the first phyllo sheet with butter and repeat approximately 5 times ending with butter. (Most recipes say more,but homemade phyllo is thicker so it’s not needed)
6. Sprinkle 1/3 of the nut mixture on top
7. Continue layering phyllo and buttering repeating 4 times
8. Sprinkle 1/3 of the nut mixture on top
9. Continue layering phyllo and buttering repeating 4 times
10. Sprinkle 1/3 of the nut mixture on top
11. Continue layering and buttering phyllo 5 more times. On the top layer,make sure you have a piece of phyllo with no holes if possible,just looks better.
12. Once you have applied the top layer tuck in all the edges to give a nice appearance
13. Bake for approximately 30 minutes;remove from oven and cut again this time all the way through. Continue baking for another 30 minutes. (Oven temperatures will vary,you are looking for the top to be a golden brown,take close watch yours may need more or less time in the oven
14. When baklava is cooked remove from oven and pour the cooled (will still be warmish) syrup evenly over the top,taking care to cover all surfaces when pouring. It looks like it is a lot but over night the syrup will soak into the baklava creating a beautifully sweet and wonderfully textured baklava!
15. Allow to cool to room temperature. Once cooled cover and store at room temperature. Allow the baklava to sit overnight to absorb the syrup.
16. Serve at room temperature.
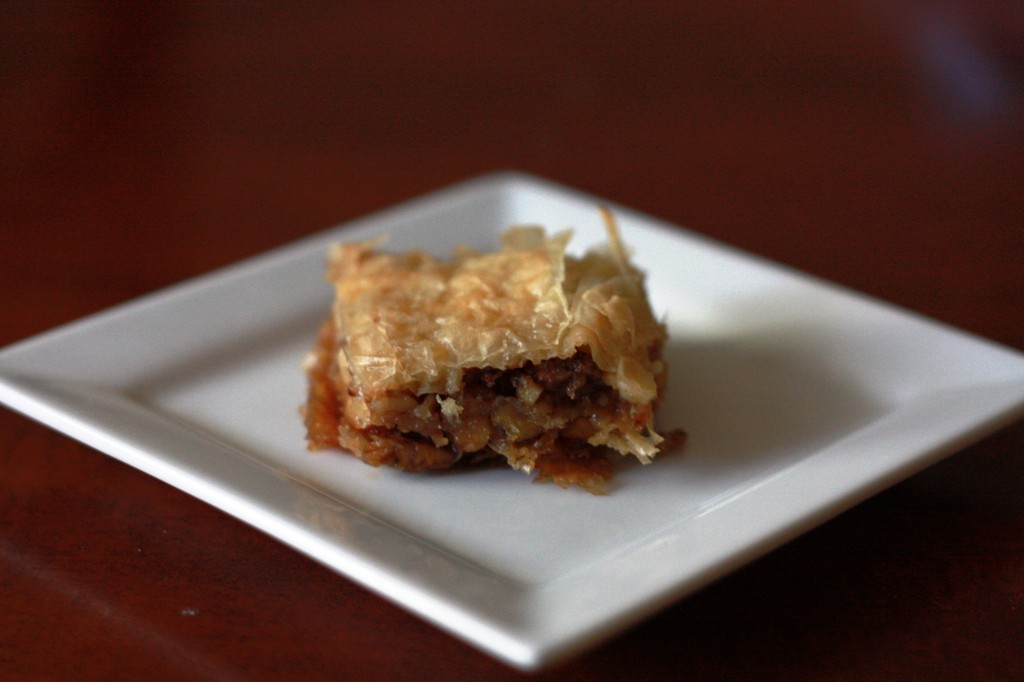
Freezing/Storage Instructions/Tips: There are a few ways to store your Baklava. It is recommended that you store your baklava at room temperature in an airtight container. Stored at room temperature your baklava will last for up to 2 weeks. You will notice as the days pass it will get a little juicier and chewier. You may choose to store it in the fridge;this will make it a little harder and chewy,but does increase the shelf life. You can also freeze your baklava and then just set it out at room temperature to thaw. The March 2011 Daring Baker’s Challenge was hosted by Ria of Ria’s Collection and Jamie of Life’s a Feast. Ria and Jamie challenged The Daring Bakers to bake a yeasted Meringue Coffee Cake. 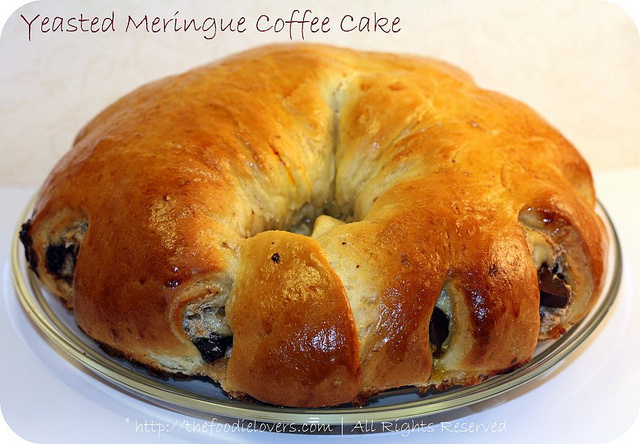
There is something about Coffee Cakes,the more I taste the more tempting it has been for me to experiment. A Classic Coffee Cake is intended to be served with coffee,that which never happens at my house. It gets over as soon as it is baked!. For once,I worked on the challenge well ahead of time. I took some pictures the day I baked them,planned to take some more the next day. Unfortunately there wasn’t anything left as my dear husband had wiped it.:-( duh! .So here I am left with only two pictures. Anyways am happy he liked them:). To me adding yeast means baking a “bread”. Adding yeast and making meringue layer for a coffee cake recipe,was something I wouldn’t have thought about. This one was really different and interesting…..it was fun to make something new. As I didn’t have enough time,I stuck with the original recipe without thinking too much on creativity. Here is how I made them. (I halved the original recipe as I wanted to make only one cake) Adapted from The Daring Baker’s Challenge March 2011 Recipe Source -Jamie found this recipe on a piece of yellowed paper in her dad’s collection of clipped out and hand-written recipes from the 1970’s,no source,no date,and she tried the recipe and it was brilliant. FILLED MERINGUE COFFEE CAKE Makes 1 round coffee cakes,each approximately 10 inches in diameter For the yeast coffee cake dough 2 cups flour
1/8 cup sugar
a pinch salt
½ package active dried yeast
3 oz whole milk
1/8 cup water (doesn’t matter what temperature)
1/4 cup unsalted butter at room temperature
1 large eggs at room temperature
10 strands saffron For the meringue: 2 large egg whites at room temperature
1/8 teaspoon salt
1/4 teaspoon vanilla
1/4 cup sugar For the filling Jamie’s version:
1/2 cup chopped pecans or walnuts( I used a mixture of walnuts,almonds and cashew nuts)
1 Tablespoons granulated sugar
1/8 teaspoon ground cinnamon
1/2 cup semisweet chocolate chips or coarsely chopped chocolate
Egg wash:1 beaten egg
Cocoa powder (optional) and confectioner’s sugar (powdered/icing sugar) for dusting cakes Prepare the dough In a large mixing bowl,combine ¾ cup of the flour,the sugar,salt and yeast.
In a saucepan,combine the milk,water and butter and heat over medium heat until warm and the butter is just melted. Ria’s version:add the 10 saffron threads to the warmed liquid and allow to steep off of the heat for 10 minutes. This will give the mixture a distinct aroma and flavor and a yellowish-orange hue.
With an electric mixer on low speed,gradually add the warm liquid to the flour/yeast mixture,beating until well blended. Increase mixer speed to medium and beat 2 minutes. Add the eggs and 1/2 cup flour and beat for 2 more minutes. Using a wooden spoon,stir in enough of the remaining flour to make a dough that holds together. Turn out onto a floured surface (use any of the 3/4 cups of flour remaining) and knead the dough for 8 to 10 minutes until the dough is soft,smooth,sexy and elastic,keeping the work surface floured and adding extra flour as needed. Place the dough in a lightly greased (I use vegetable oil) bowl,turning to coat all sides. Cover the bowl with plastic wrap and a kitchen towel and let rise until double in bulk,45 – 60 minutes. The rising time will depend on the type of yeast you use. Prepare your filling In a small bowl,combine the cinnamon and sugar for the filling if using. You can add the chopped nuts to this if you like,but I find it easier to sprinkle on both the nuts and the chocolate separately
Once the dough has doubled,make the meringue. In a clean mixing bowl – ideally a plastic or metal bowl so the egg whites adhere to the side (they slip on glass) and you don’t end up with liquid remaining in the bottom – beat the egg whites with the salt,first on low speed for 30 seconds,then increase to high and continue beating until foamy and opaque. Add the vanilla then start adding the 1/4 cup sugar,a tablespoon at a time as you beat,until very stiff,glossy peaks form. Assemble the Coffee Cakes Line 2 baking/cookie sheets with parchment paper.
Punch down the dough. On a lightly floured surface,working one piece of the dough at a time,roll out the dough into a 20 x 10-inch (about 51 x 25 ½ cm) rectangle. Spread half of the meringue evenly over the rectangle up to about 1/2-inch (3/4 cm) from the edges. Sprinkle half of your filling of choice evenly over the meringue (ex:half of the cinnamon-sugar followed by half the chopped nuts and half of the chocolate chips/chopped chocolate).
Now,roll up the dough jellyroll style,from the long side. Pinch the seam closed to seal. Very carefully transfer the filled log to one of the lined cookie sheets,seam side down. Bring the ends of the log around and seal the ends together,forming a ring,tucking one end into the other and pinching to seal.
Using kitchen scissors or a sharp knife (although scissors are easier),make cuts along the outside edge at 1-inch (2 ½ cm) intervals. Make them as shallow or as deep as desired but don’t be afraid to cut deep into the ring.
Cover the coffee cake with plastic wrap and allow them to rise again for 45 to 60 minutes.
Preheat the oven to 350°F (180°C).
Brush the tops of the coffee cakes with the egg wash. Bake in the preheated oven for 25 to 30 minutes until risen and golden brown. The dough should sound hollow when tapped.
Remove from the oven and slide the parchment paper off the cookie sheets onto the table. Very gently loosen the coffee cakes from the paper with a large spatula and carefully slide the cakes off onto cooling racks. Allow to cool.
Just before serving,dust the tops of the coffee cakes with confectioner’s sugar as well as cocoa powder if using chocolate in the filling. These are best eaten fresh,the same day or the next day. 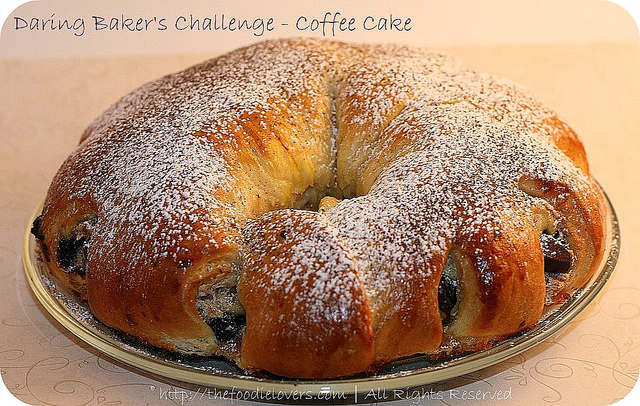
Verdict:Its a very different Coffee Cake -not very sweet,has a great texture,very soft too.I liked it warm….its one of the best coffee cakes I’ve baked! Thanks Ria and Jamie for this wonderful challenge. 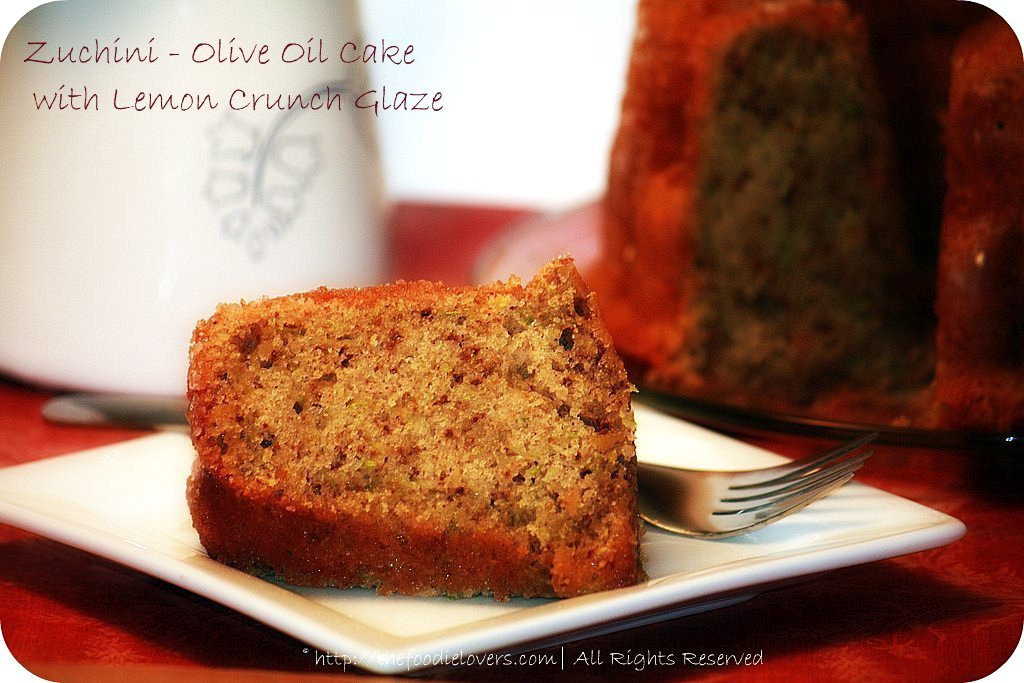
They say “time is what prevents everything from happening”.Well I blame it to “time” too.Of late I have been taking too many breaks,have been too very busy with things. Cooking,Baking,Reading,Blogging and everything interesting has taken a back seat. I somehow managed to force myself and participate in most of the Daring Baker’s Challenges. Now that I am back ,I hope to stick on for long this time onwards. “Baking” just happened to me. I have spent several years cooking,but when I did bake I saw it as a diversion,a good change ,something I enjoyed the most,a great way to experiment and create new things. I love to cook but very soon discovered that I loved baking more:). And to write and share all my experiences……….. happened this blog!. To get started on a sweet note,I baked a Zuchini – Olive Oil Cake with Lemon Crunch Glaze yesterday.Olive oil is something I have never used for baking pastries. I always felt that the smell of EVOO might over power any recipe. But this one proved me wrong,this cake was one of the most moistest ( if this word even exists:-D) cake I have had,doesn’t need much preparation and can be baked in no time. These days its my goal to create/bake things in smaller quantities just enough to please the two of us at home. Hence,I reduced the original recipe into half. I am particularly very fond of almond flour as it gives a lovely aroma and density to the cake. This is arguably one of the best cakes I’ve ever baked! Adapted from “Dolce Italiano” by Gina Palma Makes 1 small cake ( approximately 4-5 servings).The original recipe called in for a 10 cup Bundt cake,I used a small one( I am guessing its a 5 cup bundt pan) FOR THE CAKE ½ cup walnut pieces 1 cup unbleached all purpose flour ½ teaspoon baking powder ¼ teaspoon baking soda ½ teaspoon salt 1 teaspoon ground cinnamon ½ teaspoon ground ginger ¼ teaspoon ground nutmeg 2 large eggs ¾ cup + 2 tablespoon sugar ½ cup extra virgin olive oil 1 teaspoon pure vanilla extract 1 ¼ cup grated zucchini(finely grated) FOR THE LEMON GLAZE: 1/8 cup freshly squeezed lemon juice( about ½ of a large lemon) 1/6 cup granulated sugar ½ cup confectioner’s sugar TO MAKE THE CAKE:Preheat the oven to 350F. Grease the Bundt pan using a nonstick cooking spray. Place walnuts in a baking sheet and toast them until golden brown,7-9 minutes. Cool the and finely ground them in a food processor. Set aside. Sift the flour,baking powder,baking soda,salt and all the spices into a medium bowl.In a stand mixer fitted with a paddle attachment beat the eggs,sugar,olive oil on medium speed until light and fluffy about 3 minutes,beat in the vanilla extract. Beat in the dry ingredients all at once on low speed until they are thoroughly combined,then switch the mixer to medium speed and mix for 30 seconds. Beat in the zucchini and walnuts on low speed until they are completely incorporated,scraping the sides of the bowl. Pour the batter onto the prepared pan and bake for 35-40 minutes,rotating the pan half way through baking to ensure even baking. The cake is done when an skewer inserted comes out clean and the cake has begun to pull away from the sides of the pan. While the cake is baking ,prepare the glaze. In a medium bowl,whisk together all the three ingredients and whisk together until the glaze is completely smooth. Allow the cake to cool for 10 minutes and then invert onto a wire rack. Using the pastry brish brush the glaze over the entire surface of the warm cake..Allow the cake to cool completely and the glaze to dry completely. Transfer to a serving plate and if desired lightly dust confectioner’s sugar. Any left over cake can be wrapped in a plastic wrap and served the following day. We wiped it the same day:) 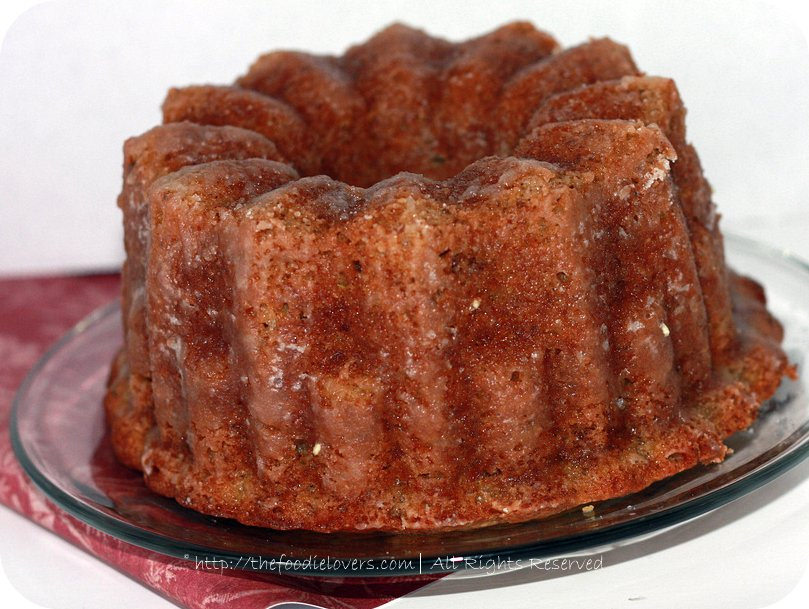
Verdict:As mentioned earlier this is one of the finest cakes ,very moist and flavorful. No one can eat just once. I will surely bake this whenever I have zucchini in my pantry. Loved it! | About meStraight from a foodie lover’s heart thats what this site is all about. It’s just not about the taste,appearance or the presentation neither it is about satisfying ones hunger or revitalizing the organs. There is much more to it. I have been passionate about baking and this blog gave me an opportunity to express myself and hone my latent culinary skills.And last not but the least learn,the art of baking and cooking from many many talented people,age and location not withstanding.I welcome you to my world of foodie lovers!. Hope you enjoy reading it as much as I enjoy writing it - Nina:)  |


