Category Archives: Baking

Print
Recipe

laming 1
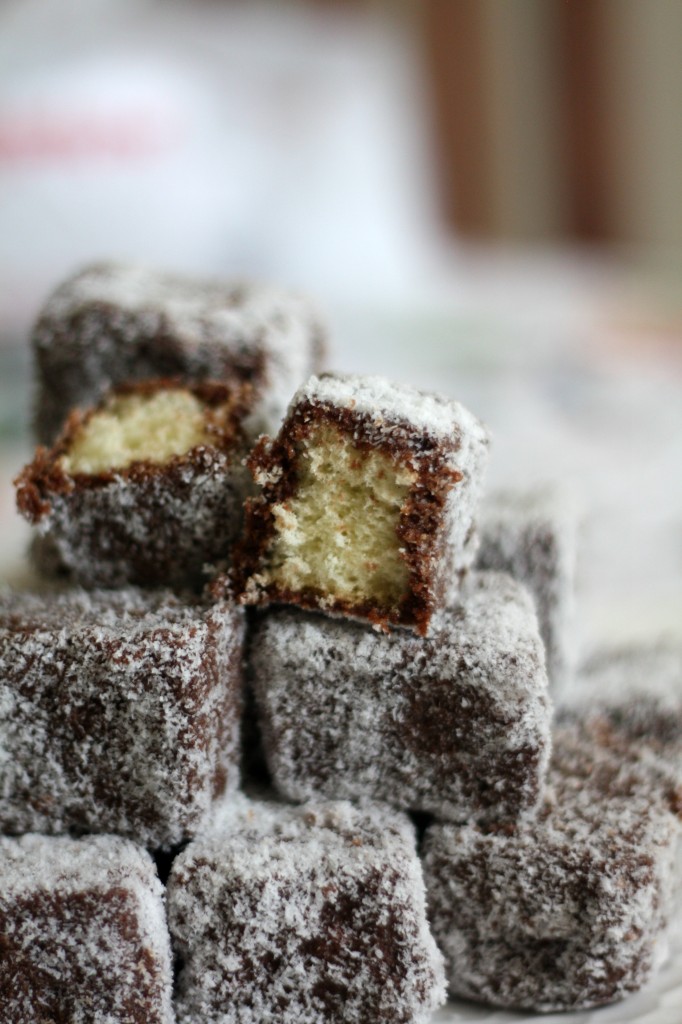
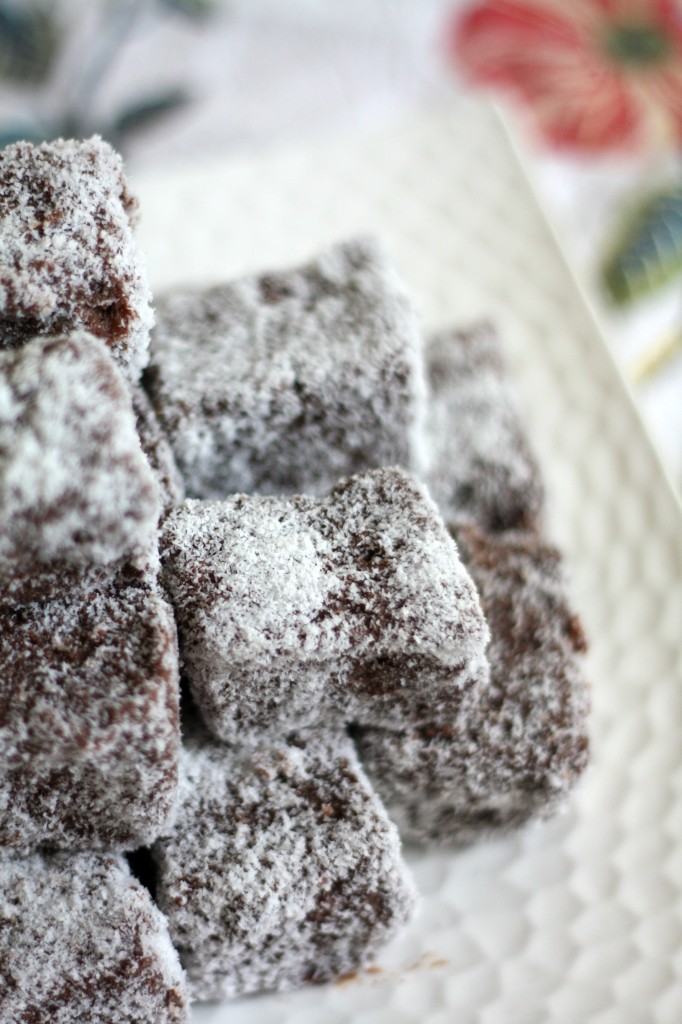
For the May Daring Baker’s Challenge Marcellina from Marcellina in Cucina dared us to make Lamingtons. An Australian delicacy that is as tasty as it is elegant.

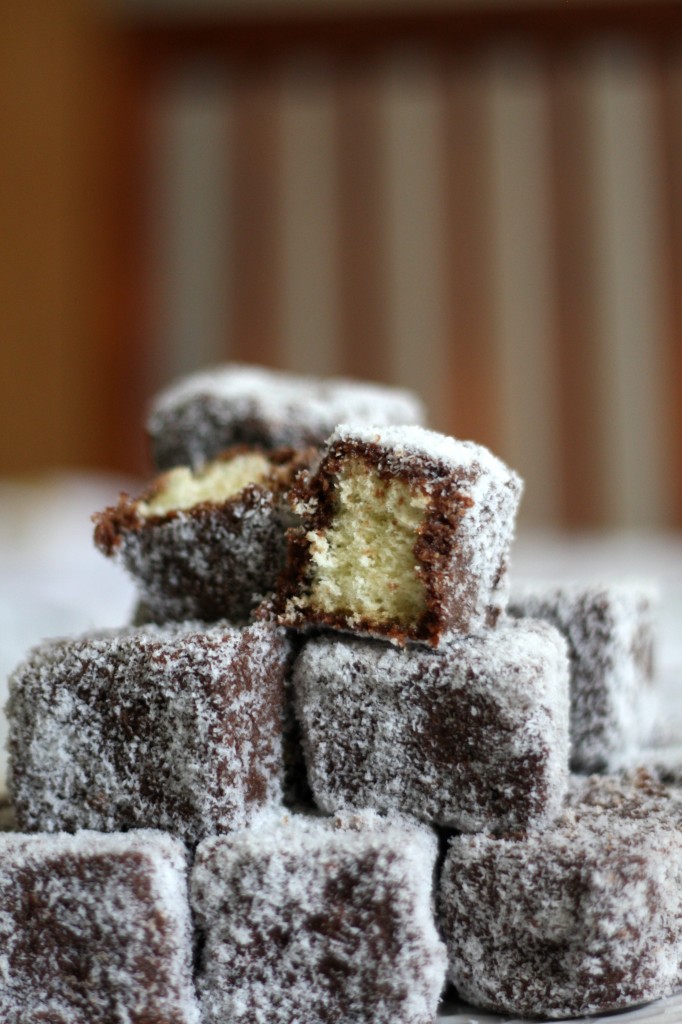
As per Marcellina, a Classic Lamington is a cube of vanilla sponge cake dipped in chocolate icing and then coated with dessicated coconut. It is said that the cakes were named after Lord Lamington who was the Governor of Queensland, Australia from 1896 to 1901. One of the stories that came about was the one that tells of Lord Lamington’s maid-servant accidentally dropping a freshly baked sponge cake into some melted chocolate. Apparently Lord Lamington disliked wastage so he suggested coating the chocolate coated cake in desiccated coconut to avoid messy fingers.
laming 4
Few things to keep in mind - It is best to use day old sponge since the process of slicing the cake into rectangles, icing and rolling in desiccated coconut is much easier. Desiccated coconut is coconut meat that has been shredded or flaked and then dried to remove as much moisture as possible. Of all the forms of dried coconut this is generally the finest. Most commonly used as the coating on Lamingtons. Shredded coconut is similar to desiccated coconut but has a coarser texture. Use unsweetened desiccated coconut.
Laming 2
The sponge is a little difficult to master but the key is a light hand, accurate measuring, room temperature eggs, and knowing just how long to bake it. Oh, and don’t open the oven door to peak or your cake will flop.

Lamingtons – Daring Baker’s May’15 Challenge

Serving Size: 24 servings

A true Australian delicacy - A simple sponge cake coated with chocolate icing and tossed with dessicated coconut.

Ingredients

  • Sponge Cake
  • 5 large eggs, at room temperature
  • 1 cup castor (superfine) sugar
  • Pinch salt
  • 1 teaspoon vanilla extract
  • 1 ¼ cups cornflour (cornstarch)
  • 1 ½ teaspoons baking powder
  • 1 tablespoon butter, melted (optional)
  • 2¾ cups unsweetened desiccated coconut, to assemble
  • Chocolate icing
  • 3 ¼ cups icing (powdered) sugar
  • 1/3 cup cocoa powder
  • 1 tablespoon butter, melted
  • ½ to ¾ cup milk

Instructions

Preheat oven to moderate 350°F. Prepare a 9”x 13”baking pan by lining with nonstick paper. In a stand mixer bowl place eggs, sugar and salt. Using the whisk attachment, beat on high for 15 minutes.While the eggs and sugar are beating sift the cornflour and baking powder at least 3 times. After 15 minutes add vanilla and beat on high for another 5 minutes. The mixture should have at least tripled in size, be light in color and very foamy. Sift flour mixture over the egg mixture. I like to use a whisk but you can also use a large metal spoon to lightly fold the flour in. Some people like to use a wooden spoon but I find it too heavy. Heavy handling now will result in a flat tough sponge. If you are using butter, thoroughly fold it in now but lightly. Spread mixture into your prepared pan and smooth out evenly. Some cooks at this stage drop the pan onto the bench top to even out the air bubbles! I have never had that much courage!

Bake in preheated moderate oven for 22-25 minutes. The sponge will rise quite a lot but then settle back down.

When baked the sponge will have shrunk very slightly from the sides and should feel springy when pressed gently.

Turn the sponge out immediately onto a wire rack to cool and reverse sponge so as not to mark the top. Allow to cool. It is best to keep the cake for a day before making the Lamingtons as the cake will be easier to handle.

Chocolate Icing

Sift the icing sugar and cocoa into a heatproof bowl. Stir in the butter and ½ cup milk. Set the bowl over a pan of hot water. Stir until icing is smooth adding more milk to thin the icing if needed. I find I need more than ½ cup but not quite ¾ cup of milk.

To assemble the Lamingtons:

Cut the sponge cake into 24 rectangular pieces 6 across and 4 down. To be particular you can trim the crusts.Keep the icing over the hot water to keep it melted. Place desiccated coconut in a shallow bowl.

Dip each piece into the chocolate icing, allow excess to drip off.

Toss gently into the coconut. Stand cakes on a wire rack to set, about 2 hours.
http://www.thefoodielovers.com/2015/06/lamingtons-daring-bakers-may15-challenge/

Thanks Marcellina for a great challenge.

Enjoy!

Print
Recipe

Foug 1
For the month of April’s Daring Baker’s Challenge Rachael of Pizzarossa and Sawsan of Chef in Disguise took us on a trip to Italy. They challenged us to try our hands at making Focaccia from scratch. Original recipe adapted from here.
Foug 2
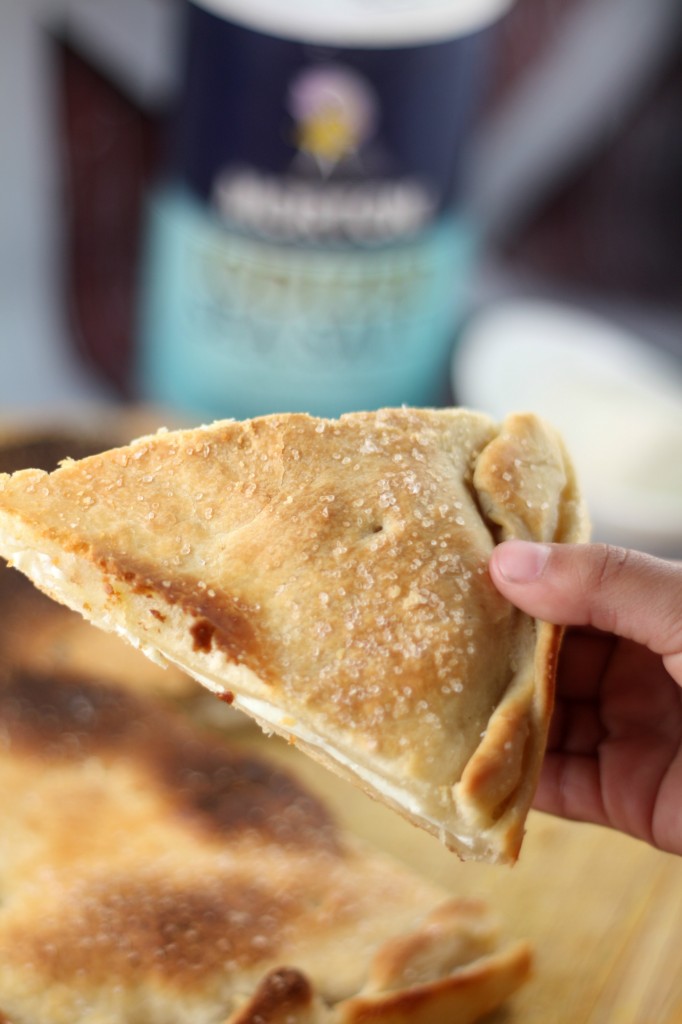
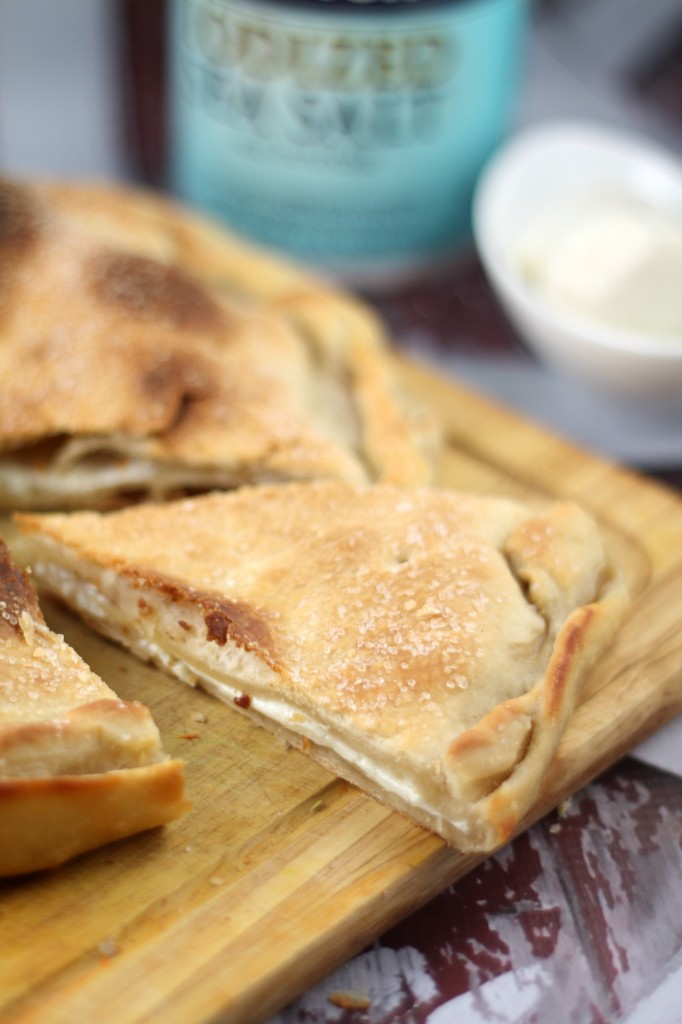
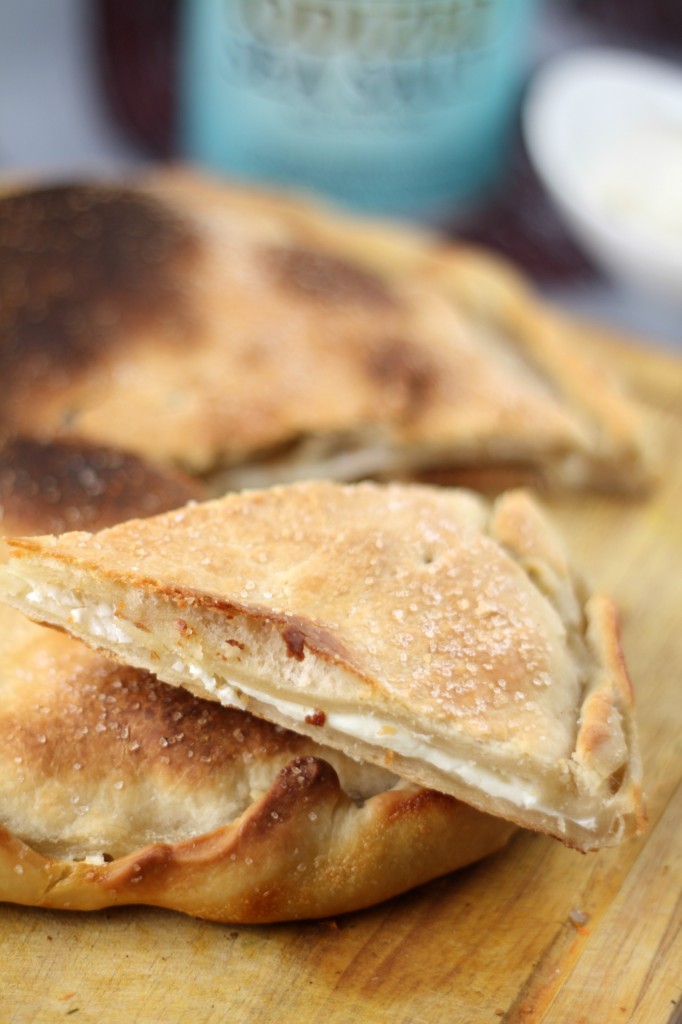
Focaccia is a type of flat Italian bread that is baked in the oven. Focaccia can be topped with a variety of toppings ranging from rosemary and sea salt to different types of cheese, herbs, vegetables and even fruit. We were tempted with four different kinds of Focaccia – Basic Focaccia,Sour Dough Focaccia,Fugazza and Focaccia di Recco and asked to make any one or all of them. The first three is something I have already made in the past. Focaccia di Recco was something new to me so I decided to go ahead with it. Focaccia di Recco is from the northern coastal region of Italy called Liguria. It is unleavened and stuffed with Stracchino (Crescenza), which is a very young cheese with a fine rind barely encapsulating a gooey cheese much like a very thick mascarpone.
foug 3 If you can’t get Stracchino (Crescenza), you can use another young, melty cheese – I have used fresh mozzarella for this recipe. This recipe will make more dough than you need if you roll it as thinly as is traditionally done, but you can freeze the excess, well wrapped in a zip lock bag, for several months.

Focaccia di Recco – Daring Baker’s April’15 Challenge

Ingredients

  • 3¾ cups all-purpose (plain) flour
  • pinch course sea salt, plus extra for topping
  • 3 tablespoons extra virgin olive oil, plus extra for oiling and topping
  • 1¼ cups water
  • 2/3 oz Stracchino (Crescenza) cheese / Mozarella

Instructions

In a large bowl, whisk together flour and salt and form a well in the middle. Add cold water and 3 tablespoons of olive oil. Start mixing the dough with a fork, incorporating the flour little by little.

Once the dough has come together, start kneading it with your hands. Knead the dough for 8 to 10 minutes, until smooth. When the dough is ready, wrap it well with plastic wrap, being sure to expel all the air so your dough doesn’t dry out, and let it rest for an hour at room temperature.

Preheat oven to very hot 480°F. Divide the dough into two equal parts and roll each piece out on a floured surface with a floured rolling pin, trying to keep them as round and as thin as possible. I rolled these ones a little thick, because we find it easier to handle when it’s more sturdy, but traditionally it should be almost transparent.

Grease a medium sized round pizza tray (not the type with holes in it, or you will have a very messy oven) or baking dish with olive oil. Place one layer of dough on the bottom of the dish. Add the cheese in pieces using your hands.

Cover the cheese with the second sheet of dough. Use a knife or a pair of kitchen shears to remove any excess dough from around the edges of the pan.

Seal the edges by pinching them together. Snip small holes into the top layer of dough so that the steam can escape during baking. Brush with extra virgin olive oil and sprinkle with salt.

Bake in the centre of a preheated very hot oven for 6 - 8 minutes, until golden. When the focaccia is done, remove it from the oven and let cool enough to be handled.

Transfer to a platter, cut it and serve as an appetizer or with an aperitif.

http://www.thefoodielovers.com/2015/04/focaccia-di-recco-daring-bakers-april15-challenge/

As per the recipe, this Focaccia should take about 5-6 minutes to bake. But mine took more than 15minutes. It didn’t brown well on top so I let it bake for long enough. It overbaked and the cheese was no more goey. I could cut it and serve it without any mess. They are best eaten immediately. However it can also be refrigerated overnight and reheated the next day. Making this bread is super easy, simple ingredients and utterly delicious!

Enjoy!
Nina

Print
Recipe

gOBI 1
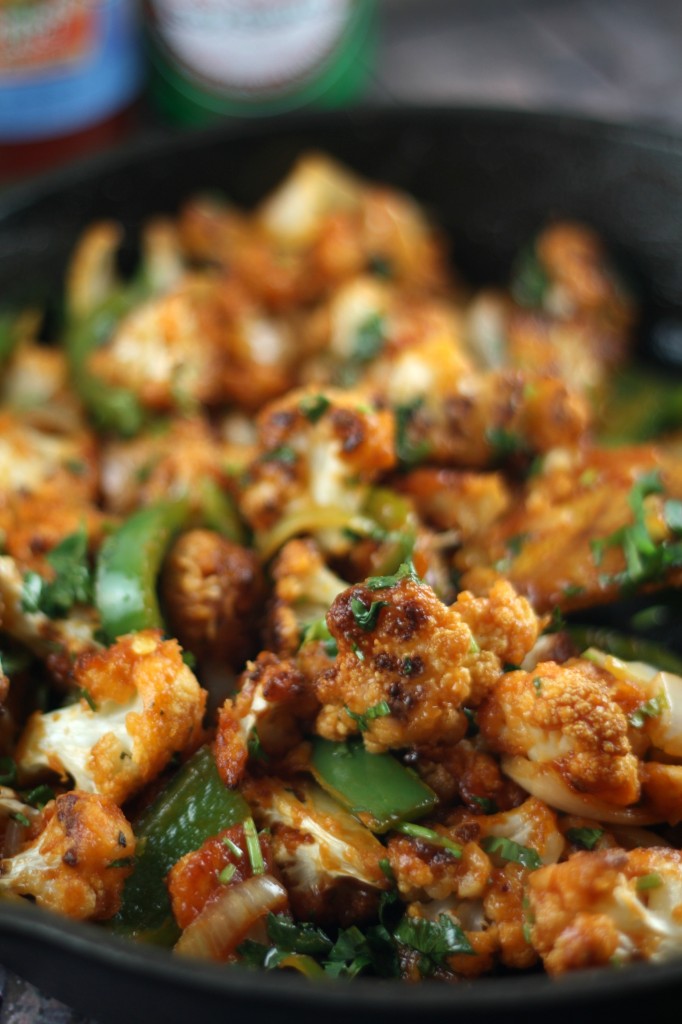
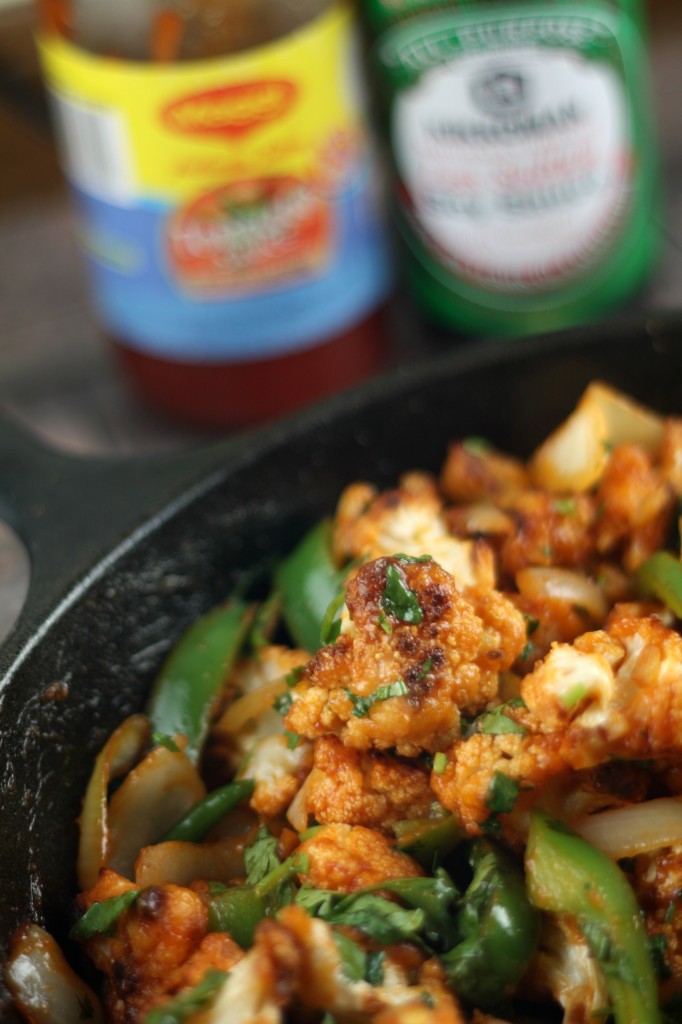
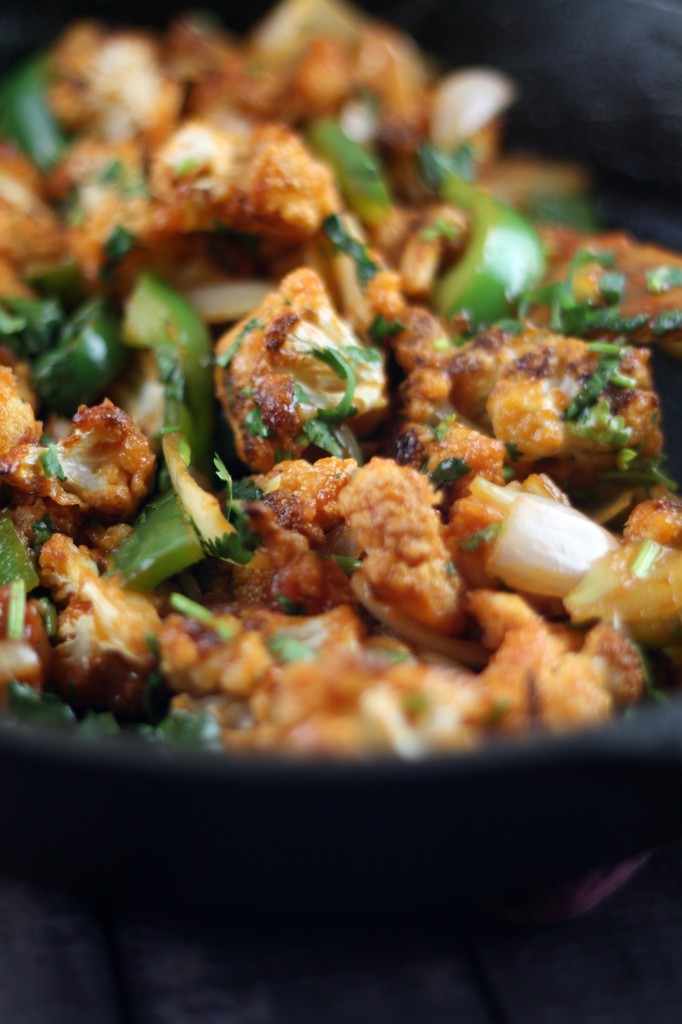
Learn how to make Gobi Manchoorian/ Gobi Manchoori

Gobi Manchoorian/ Manchoori is an Indo Chinese food which is quite popular in India. It is said to have been developed by the tiny Chinese community that lived in Kolkata for over a century. It is nothing but fried cauliflower tossed in a sweet and chili sauce. There are two different variants of it, dry and gravy. If I were frying I would use all purpose flour and cornstarch to make a thin batter; dip the florets in the batter and then deep fry. Once that is done follow the below mentioned sauce recipe. Few recipes even call for Ajinomoto (MSG) to increase the taste however I try to avoid it due to health reasons. Some add food colors to give the florets a bright red color, which is quite common in restaurants. I avoid that as well.
gOBI 2
In the past I have baked the same dish using different flours - chickpea,all purpose and even whole wheat flour. The problem was it wasn’t as crispy as I had expected it to be also there would a thin layer of batter stuck in the base of the florets. This used to put me off. That’s when dusting cornstarch came to my mind. I actually used about 3-3.5 tablespoon of cornstarch. The cauliflower florets baked beautifully, ending with a crispy texture. But the only thing was I could feel the cornstarch even after baking ( I realized I added a lot).The next time I would work with 1.5-2 tablespoons only. I know fried ones are the best but I wanted to try something that I could enjoy whole heartedly without worrying about calories. Making junk food healthy is a very smart idea:) .
Gobi 3
To me these tasted great, not as crispy as the fried ones but slightly close to it. Once they are coated in the sauce, I don’t see much of a difference. A good sauce is the key! If you plan to use them just as plain fritters, do season them with salt, pepper, cayenne and some turmeric (for the color) before baking. Also broil it for about 2-3 minutes towards the end to make it more crispier.

Baked Gobi Manchoori

Serving Size: 3

Baked Cauliflower with sweet and Chili sauce - healthy twist to a tasty junk food.

Ingredients

  • Baking Cauliflower
  • 1 large cauliflower, cut into florets about 5-6 cups
  • 2 tablespoon oil
  • 1-2 tablespoon cornstarch
  • For the Sauce
  • 1 teaspoon oil
  • 2-3 garlic pods, chopped
  • 1 teaspoon ginger, chopped
  • 2-3 thai green chillies, chopped
  • 1 onion, roughly chopped
  • ½ cup bell pepper, cubed
  • 2 tablespoon ketchup
  • 1 tablespoon soy sauce
  • Green chili/red chili sauce, as needed
  • 1 teaspoon lemon juice
  • 2 tablespoon cilantro , chopped
  • Salt as needed

Instructions

Preheat oven at 400F. Line a baking sheet with parchment. Cut the cauliflower into small florets. Wash and dry in a paper towel. Place all the cauliflower in a large bowl. Drizzle oil over the florets coating it well. Now add the cornstarch and toss it. Spread it evenly on the lined sheet. Bake for 20 minutes. Flip each floret. Increase temperature to 425F. Bake again for about 20 minutes. You will end with slightly crispy florets with a brownish tinge. Feel free to broil it for about 2 – 3 minutes for more crispier option, which I didn’t.

Sauce - Heat oil in a pan. Add garlic, ginger, chillies, onion and bell pepper. Saute until the onions turn pink. Do not overcook the veggies, do retain the crunchiness. Now add the ketchup and soy sauce. If you are using the chilli sauce, please add now( We don’t eat too spicy food, so I avoided the sauce). The mixture will start sizzling. Add the cauliflower,lemon juice and salt. Mix well. Garnish with cilantro.

http://www.thefoodielovers.com/2015/03/baked-gobi-manchoori/

If you are thinking of gravy please add some water mixed with very little cornstarch towards the end and then a quick boil will result in a semi gravy Manchoorian sauce. Serve as an appetizer or along with fried rice/noodles. Spring onions are a great choice too, if you have some handy do add it right at the end.

Enjoy guilt free!


Print
Recipe

rolls 1

Aparna’s pick for March’s Bread was simple rolls called the Kummelweck Rolls(Kimmelweck Rolls).They are made from basic ingredients – flour,yeast,milk,honey ,egg white and oil. Kummelweck is a hard roll with a crusty top sprinkled with sea salt and caraway seeds. I believe they are German in origin. Kummel means “caraway” and weck means “roll”.
roll 8
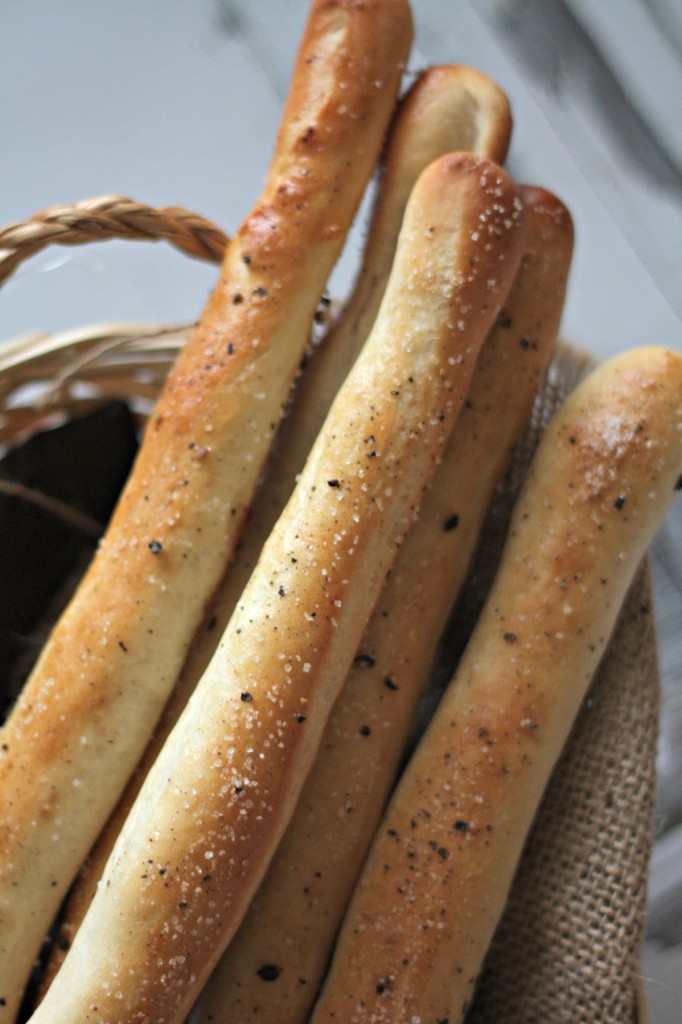
These rolls are great for Sandwiches or Burgers.They are best eaten fresh ; soft inside and crusty outside. The below mentioned recipe makes eight large burger bun sized rolls. I made four buns and six Salt & Pepper sticks.
roll 10
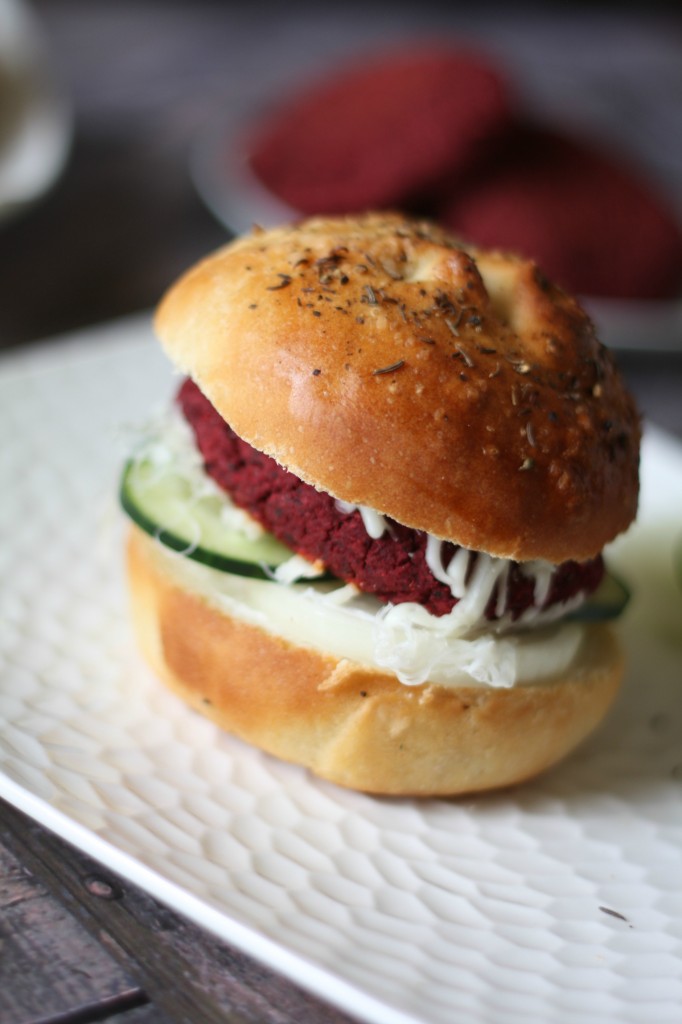
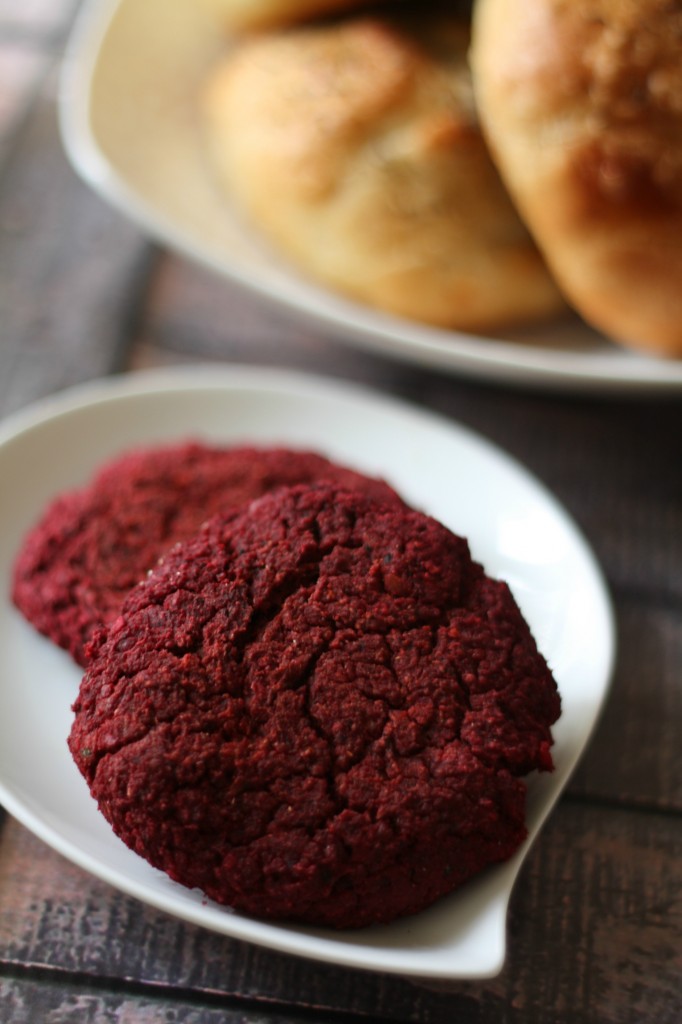
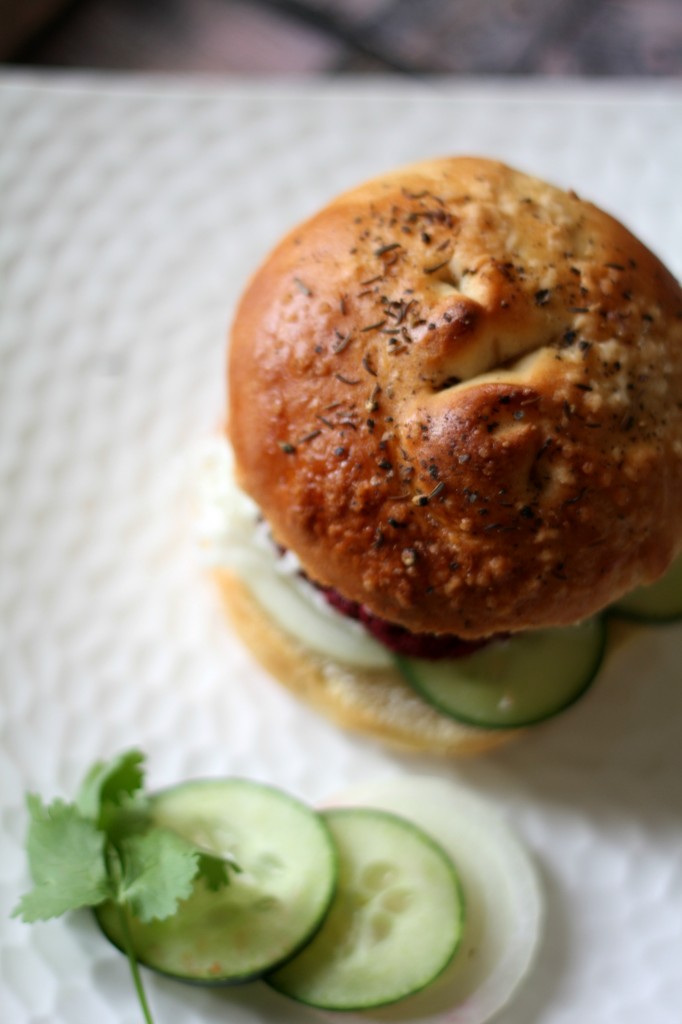
I used the buns to make a simple Burger with Beets & Chickpeas Patties. I wanted to keep the patties as healthy as possible. So I pureed a can of chickpeas in my food processor along with cooked Beets, cilantro, garlic, salt and cayenne pepper. I also added some cumin and coriander powder for flavour. Since it was a bit sticky I added some chickpea flour. I should have actually pan-fried the patties with a little oil, that way I could have retained the moisture and juiciness from the beets.Baking made them slightly dry.
roll 11
This recipe is adapted from - Adapted from http://www.jewishfood-list.com/recipes/bread/rollskimelweck01.html

Kummelweck Rolls, Salt and Pepper Sticks, Baked Beets and Chickpea Burger

Yield: 8 large buns or 12-13 salt and pepper sticks.

Ingredients

  • 2 1/2 teaspoon active dry yeast
  • 1/2 cup warm water
  • 1/2 cup warm milk
  • 2 tablespoon oil
  • 1 tablespoon honey
  • 1 egg white (optional)
  • 1 1/2 teaspoon salt
  • 3 to 3 1/4 cups bread flour*
  • Egg wash (optional)
  • Coarse sea salt and caraway seed
  • Beets and Chickpea Patties
  • 1 – 14oz canned garbanzo/chickpeas
  • 3 beets, cooked and grated
  • 2 garlic cloves
  • ½ cup cilantro,chopped
  • Salt,cayenne pepper,coriander powder, cumin powder
  • ½ cup chickpea flour or more as needed
  • Cooking spray/oil for baking /panfrying

Instructions

*To substitute for bread flour add 1 tablespoon of vital wheat gluten to 2 to 3 cups of all-purpose flour.

Mix together the warm water and the warm milk and stir in the yeast. Let it sit aside for about 5 minutes. Knead by hand or with the machine.

In the bowl of your machine, combine the yeast mixture, oil, honey, the egg white and stir.

Now add the salt and about 2 1/2 cups of flour and knead, adding as much more flour as required till you have smooth and elastic dough that is tacky but not sticky. Shape the dough into a ball, and place it in an oiled bowl. Cover loosely with cling film and let rise for about an hour, until it is almost double in volume.

Deflate the dough well (not kneading), shape into a round and and allow it to rise, covered, for 30 minutes more.

Divide the dough into 8 equal pieces and shape each into a smooth ball, then slightly flatten it. Place them on lightly greased or parchment lined baking sheets. Spray or lightly brush with oil, loosely cover and let the dough rise for 30 more minutes. Brush with eggwash (or something else that will make sure the topping sticks when baking), then cut slits ( like an +) on the top using a sharp blade or scissors.

Sprinkle the top of the rolls with sea salt and caraway seeds, and then mist with water. Bake the rolls at 425F for 5 minutes and then quickly mist with water again making sure you don’t keep the oven door open for too long. Bake for another 20 minutes or so until they’re brown and done. Cool on a wire rack. This recipe makes 8 large burger bun sized rolls.

If you would also like to try something different with this dough you can make a Vienna Loaf or Slat & Pepper Sticks according the recipes given below.

For the Vienna Loaf:

Follow the above recipe but with the following changes –

After the second rise, divide the dough in half and shape each half into an oval with tapered ends. After the final rise, apply the egg wash and then slash the top with a 1/2" deep lengthwise slit. Leave out the salt and caraway seeds. Bake at 400F for about 35 minutes, including the 5 minutes after spritzing with water.

For the Salt and Pepper Sticks:

Again follow the above recipe for the rolls, but make the following changes –

Leave out the second rise and do only the first rise. After that, divide the dough into 13 equal pieces. Roll each piece out into a 12" rope of even thickness, and place them 1-1/2" apart on the greased or lined baking sheet. Let them rise now. Apply the egg wash, but do not make any cuts. Sprinkle with coarse sea salt crystals and coarsely ground or cracked black pepper. Do not spritz with water and bake for about 15 to 20 minutes.

For the Patties:

Place the chickpeas in a food processor along with garlic and cilantro. Coarsely grind this mixture. Add the remaining ingredients except the chickpea flour ;pulse it until it comes together. Take this mixture in a wide bowl, add the flour. Mix everything and shape into six patties. Pan fry them with cooking spray/oil. I baked them at 375F for about 30 minutes (flipping in between).

http://www.thefoodielovers.com/2015/03/kummelweck-rolls-salt-and-pepper-sticks-baked-beets-and-chickpea-burger/

The Salt and Pepper Sticks make a perfect snack. My little one loved them.I also sprinkled some crushed pepper on the buns for an extra kick:)
Just when you are about to serve Slice the buns into half, spread some mayo on the bottom. Place sliced onions, cucumber, tomatoes, one patty, Cheese slice and close it with the other half. Enjoy!

Nina

Related Posts Plugin for WordPress, Blogger...
« Previous Entries Next Entries »

COPYRIGHT

MyFreeCopyright.com Registered & Protected

FAVORITE POST

Povitica Bread

Povitica - An East European Bread

Photobucket
BFS-logo
Proud member of FoodBlogs
my foodgawker gallery
Manage your shopping list and search for recipes from across the web at ZipList.com

SOCIAL MEDIA

ARCHIVES

Blogroll