Category Archives: Cakes

Print
Recipe

Wish you all a very Happy and a Prosperous New Year!

Phew! Time just flies. My husband and I were talking about the year that went by so quickly. The year for me started with the birth of my little nephew followed by an eventful spring and fun filled summer! We made sure we were out making hay every single day of the summer:-). There was a lot of traveling too this year as we explored a lot of new places. Last but not least, my friends helped me with my blog and gave it a much needed facelift! There is this stupid belief that I’ve been having over the years that whatever I do/ happens to me on the 1st of every year, it continues to happen throughout the year. For eg: If I am productive on day 1 of the year, It usually ends up being a good year for me. I know it sounds silly but this has been in my head for a very long time now. On the same note I hope I actively blog through out the year since I am posting this one on the first:-)

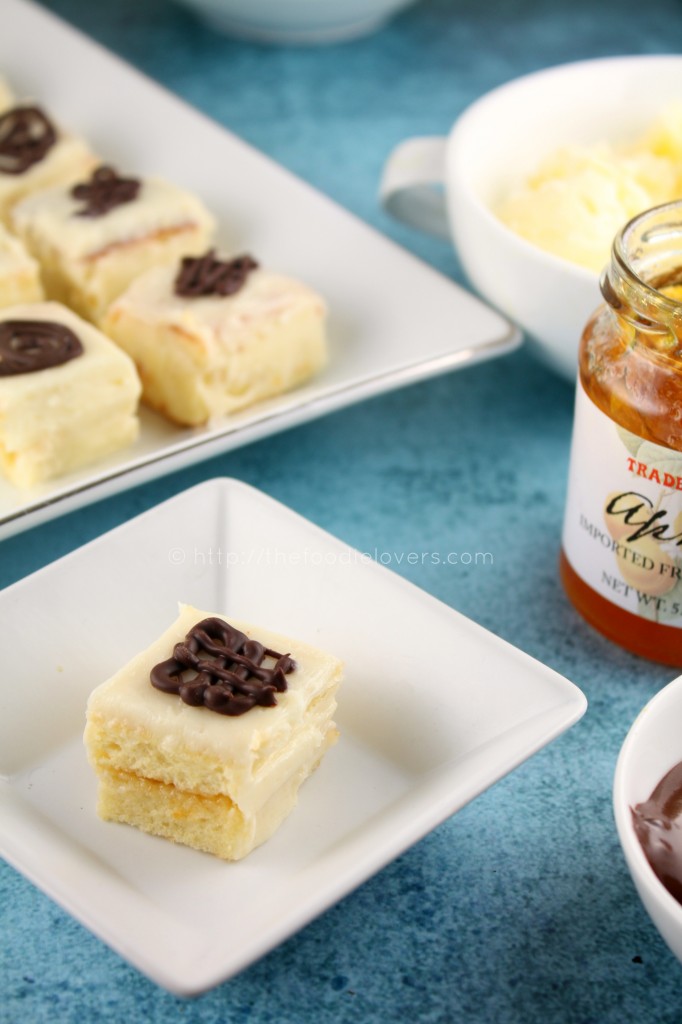
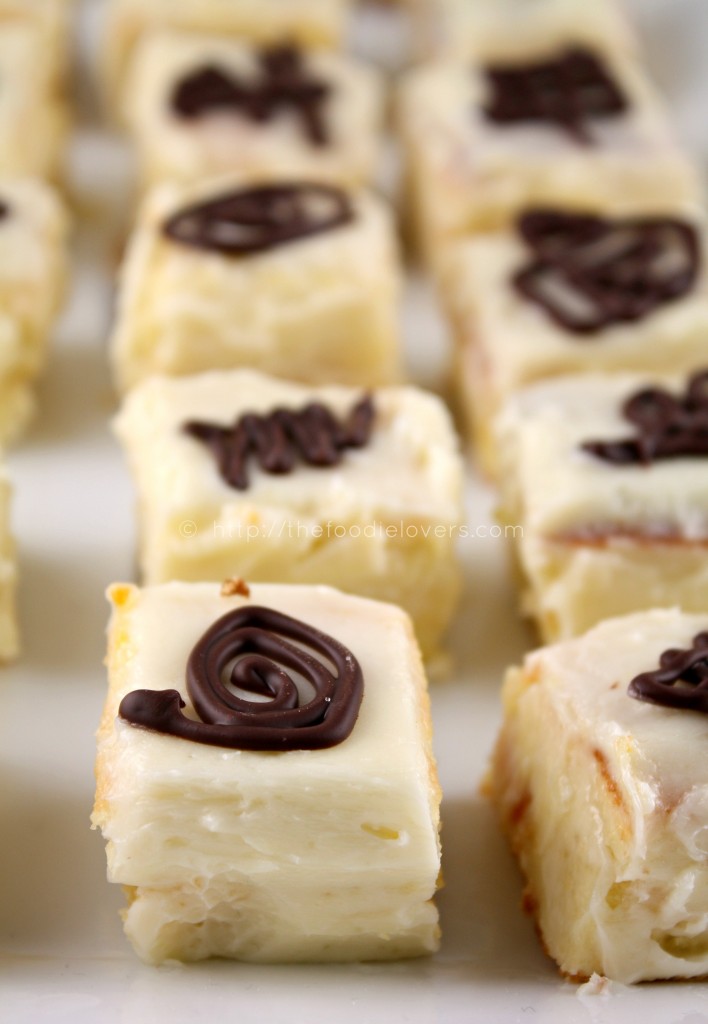
Just like Panettone, I’ve had a small obsession with Petite Fours. It all started mainly because of their looks. Who wouldn’t want to have tiny beautiful frosted little cakes? Umm…just one bite and its…..yumm truly delicious! A Petite Four can be virtually any miniature sweet thing never more than a bite or two - usually served our dinner or coffee. Though they are a bit time consuming, but once done they are such a treat to the eyes…delightful to look and fun to eat. Any sheet cake is good for making these little luxurious cakes. I made an Almond Flour Sponge Cake, drizzled with simple syrup, sandwiched them with Apricot preserves and frosted with buttercream icing and made simple chocolate filigree using melted chocolate for decoration. The Buttercream frosting was the best one I’ve ever made. It was so buttery and tasted yum…I think it was an apt frosting for the miniature cakes.

ALMOND FLOUR SPONGE CAKE

Makes 2 sheet cakes(13 by 7 by 3/8 inch) or 1 sheet cake (13 by 7 by ¾ inch); makes about 50-60 Petite Fours

Ingredients:

1 ½ cups almond flour
½ cup plus 1 tablespoon cake flour
¾ cup granulated sugar
4 eggs
6 egg whites
Pinch of cream of tartar
¼ cup apricot preserves
Confectioner’s sugar

SIMPLE SYRUP

2 tablespoon sugar
2 tablespoon hot water
Mix the two ingredients and using a pastry brush gently brush each layer with the syrup.

BUTTERCREAM
1.5 cups butter at room temperature
1 ¼ cup confectioner’s sugar
And dark chocolate melted for filigree decoration

In a stand mixer fitted with a paddle attachment,beat butter for 5 to 10 minutes until smooth and easy to work. Slowly add the sugar and beat until smooth,starting on low so the sugar does not fly around and then turning the mixer to high. Switch to the whisk attachment and beat until butter has the consistency of sour cream.

It gets firmer once it’s on the cake and chills somewhat.

CAKE - Preheat oven at 375F. Line the baking sheets with parchment paper. Combine almond flour,cake flour, ½ cup of granulated sugar in a food processor. With the motor running add the eggs,two at a time,until the mixture is smooth. Transfer the mixture to a bowl large enough to hold all the batter.

Beat the egg whites with cream of tartar on medium high speed in am stand mixer fitted with the whisk attachment until medium peaks form. Add the remaining granulated sugar and beat on high speed until stiff peaks form. Mix one-fourth of the egg white with the almond mixture until smooth, to lighten the mixture. Using a rubber spatula, fold this mixture with the remaining egg white mixture.

Transfer the batter to the sheet and bake for about 12-15 minutes. Watch out as it burns very quickly. Bake until its firm and they bounce back to the touch. Sprinkle two sheets of parchment paper with confectioner’s sugar. Run a knife on the edge of the sheet pan. Quickly flip out the cakes over the parchment as soon as they come out of the oven by placing the cakes right next to the parchment. Peel away the parchment from the bottom of the cake. Cut the edges on all sides. Flip the layers. Cut into half.

Using a knife gently spread the apricot preserves over one layer, sandwich with the other layer. Spread a thin layer of buttercream frosting on top of the cake. Reserve some butter cream for the sides. Cut the cake into 1 inch wide strips. Transfer the strips to a parchment lined sheet pan and refrigerate for 15 minutes. Spread the sides with thin layer of buttercream. Cut the strips into 1 inch cubes. Decorate the petite fours with chocolate filigree. You may also use colored royal icing for the same.

FILIGREE– Melt chocolate(about 1/ 2 cup should do) in the microwave/use a double boiler method. Pour the chocolate in a pastry bag/ a zip lock. Make a small hole on the bag and make small designs on a parchment paper. Keep it refrigerated for about ten minutes. Gently remove the chocolate from the parchment and place it on top of each miniature cakes.

Chill in the refrigerator before serving.

Note – I have adapted the recipe from James Peterson’s book BAKING.

Bon Apetite!

Nina


Print
Recipe

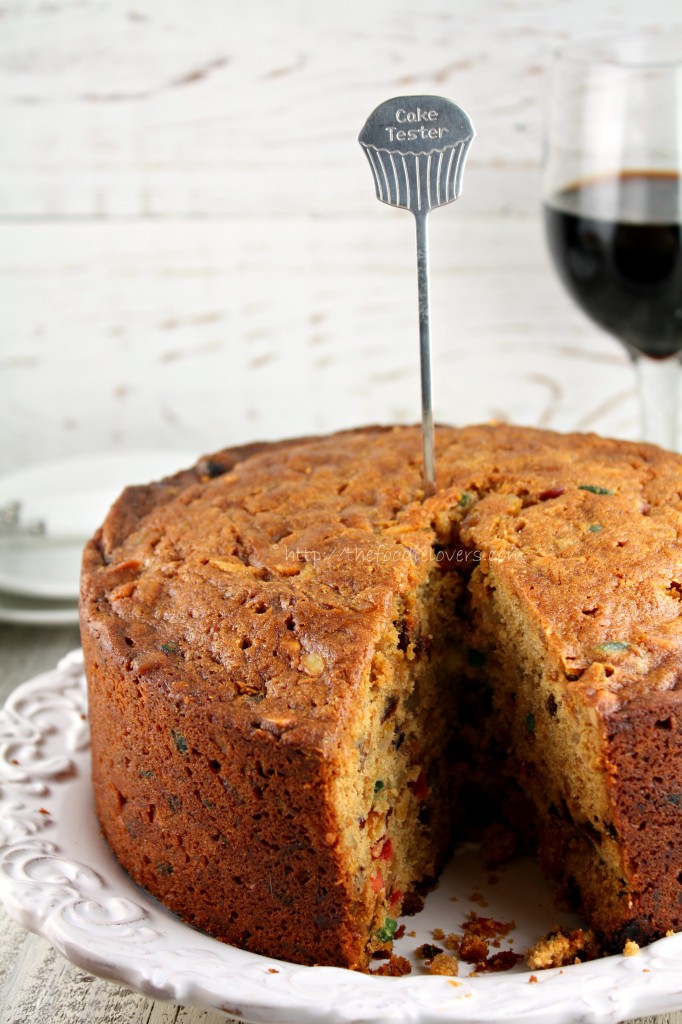
I love the Holiday seasonits fun,festive and everyone’s just happy during this time of the year.Starting from Costumes+Halloween party + Candies to thanksgiving+ doorbusters+blackfriday shopping to Cakes+ Santa+ lights +some more shopping and last but not the least the brand new year - A New beginning , a New Hope. Can this get any better??? When I think about Christmas the first thing that comes to my mind is the “Christmas Fruit Cake”. Is there anything better than this?:-)

Each one has their own recipe; some follow their traditional one, while others have recipe passed on from generations. They are made in a variety of ways - dark & light,with or without yeast,plain / frosted/glazed, some are dense,some are dry,with or without alcohol and so on.

This year, I started baking my cakes well in advance. Fruitcakes need a lot of care and pampering as they taste best when they age and mature. A good cake is the one which is fed well with alcohol either rum or brandy, thus allowing the flavors to set in and intensify. Feeding with alcohol gives the cake a unique flavor; moistness which in turn reduces sweetness and thus making it very rich and scrumptious. It’s a real cake loaded with all the goodness;-) . A traditional Cake contains sultanas, glace cherries, figs, apricots, currants, raisins, candied peel, prunes etc.

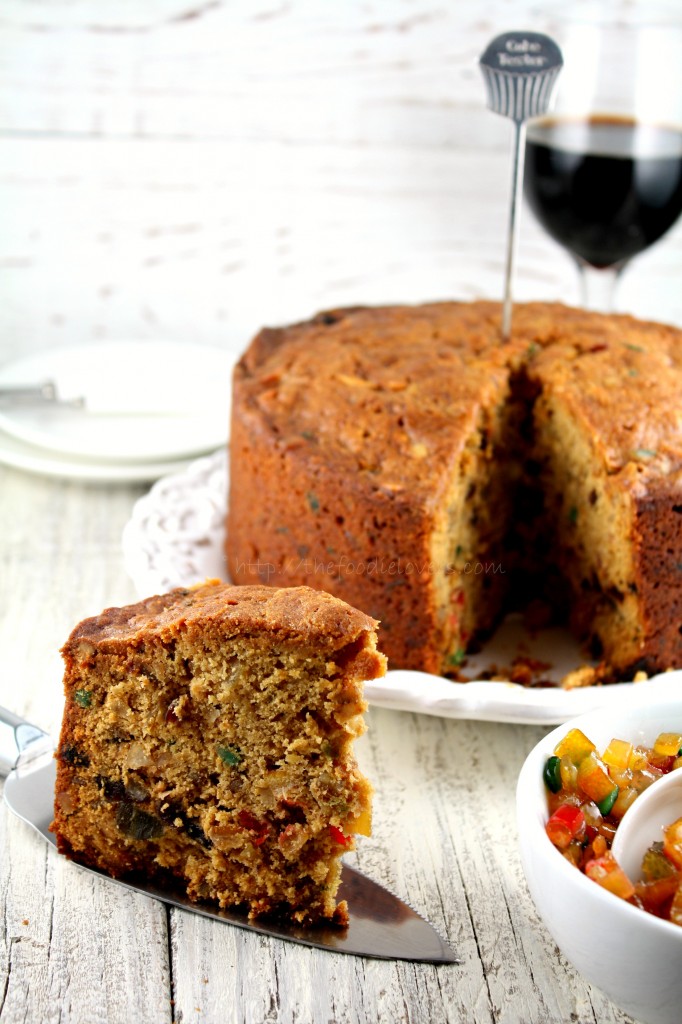
I found it easy to use the fruit cake mix (contains– orange and lemon peel,cherries,pineapple,citron, corn syrup) along with raisins, nuts, dried cranberries, sultanas and blueberries. Though there wasn’t any change to the taste; I think I baked my cake for little longer than required; as a result it wasn’t as soft as expected. Also, I felt that it was a little too sweet. Since the readymade fruit mix that I used already had corn syrup, I should have reduced the amount of sugar. The next time I would use ¾ to a cup.

Things to keep in mind while baking – These cakes should always be baked in low temperatures. And since it bakes for a long time, ensure to line the cake tin/pan with parchment on the base as well as the sides. Once baked you may also wrap the cake in cheesecloth before feeding it. For an alcohol free cake, use orange juice instead of rum/brandy. From my personal experience, I feel the batter needs to be heavy enough for the dried fruit and nuts to be suspended in it , if it is thin the fruits might sink in the bottom. Usually while baking cakes with nuts or dry fruits its suggested to toss them with a little bit of flour ( to avoid them to sink down), but in this case it’s not possible as we have soaked it in alcohol.

Once the cake was done, the most difficult part was the wait time. It was right in front of us for a week, the longer we looked, the stronger was our temptation. I wrote so much about feeding ….maturing…ageing and so on. Unfortunately mine didn’t last for more than a week for the entire process. Christmas is yet to come but my cake is gone!!! There isn’t a scrap left and all the flavors were truly delicious!. Guess its time to bake another one!

CHRISTMAS FRUIT CAKE

Makes one 8” round cake

Ingredients:

3 1/4 cup fruit mix

1/2 cup dried cranberries,blueberries and sultanas

1/2 cup raisins

1/3 cup rum + li’l more for feeding

2 cups all-purpose flour

½ teaspoon all spice mix

¼ teaspoon salt

1 teaspoon baking powder

1 cup butter, softened

1 ¼ cup brown sugar

4 eggs

2 tablespoon molasses

1 teaspoon vanilla extract

Zest of a lemon and orange

Directions : Place the fruitcake mix along with raisins, dried cranberries, sultanas and blueberries in a large bowl and pour rum over it. Mix well and cover and leave to stand overnight. I kept mine for almost 36 hours.

Preheat oven at 300F. Line the base and sides of an 8 x 3” round pan with parchment paper. Mix flour, baking powder, all spice powder & salt and set it aside. In the bowl of a stand mixer, beat butter and brown sugar until creamy. Gradually beat in the eggs. Once all the eggs are well incorporated, add vanilla extract, molasses, lemon and orange zest. Stir in the flour. When completely mixed, add the fruits and nuts ; do not over beat. Spoon the mixture into the prepared pan and bake for about 2 hours or until a skewer inserted to the center comes out clean .If the top of the cake starts to brown, cover it with a foil and bake.

Once done, remove the cake from the oven , allow it to rest and bring it to room temperature. Using a skewer gently poke a few holes on top of the cake. Feed the cake with rum, a tablespoon at a time once every week. You may also brush the cake with rum . Just before serving you may want to decorate it. Either sprinkle confectioner’s sugar or cover it with Marzipan or frost it the way you like….or simply eat it the way it is!

Bon Apetit!

Nina


Print
Recipe

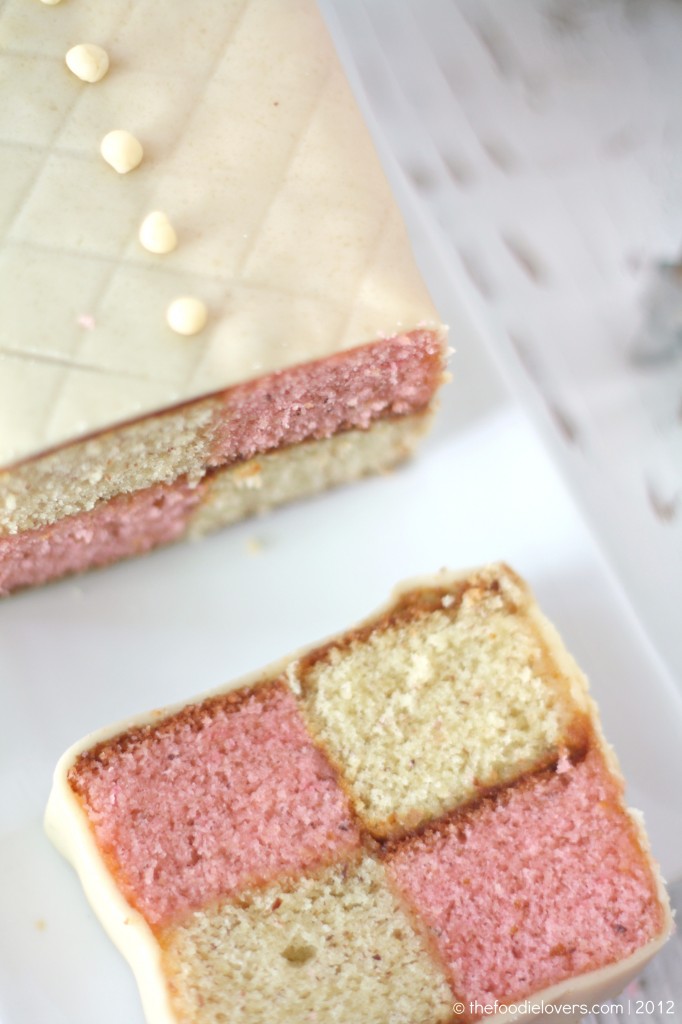
BATTENBERG CAKE is a very light sponge cake with checkered patterns. The cake is covered with Marzipan and when sliced you’ll see the different sponge colors. The very common one is with pink and yellow squares (said to represent the four princes of Battenberg).I have had this Cake earlier,but never knew it by its name.

I believe this cake was created as a wedding cake for royalty. The first Battenberg cake was made to celebrate the marriage of Queen Victoria’s granddaughter, Princess Victoria, to husband Prince Louis of Battenberg.It’s traditionally flavored with almond and has the signature Battenberg .The strips of sponge are glued together using jam (normally apricot) and the whole cake is covered in marzipan. Sometimes the edges are crimped and the top is patterned with a knife.
Although there are specialized Battenberg cake tins available, you don’t need one. This can be baked in a square baking tin and a divide made with foil to separate the two batters. This recipe really is all about simplicity.

Mandy of What The Fruitcake?! came to our rescue last minute to present us with the Battenberg Cake challenge! She highlighted Mary Berry’s techniques and recipes to allow us to create this unique little cake with ease.

The recipe was also fairly simple, we could whisk together the dry ingredients; combine with the wet ingredients and beat together just until the ingredients are combined and the batter is smooth. I wasn’t too sure about the outcome, so followed my own method.

TRADITIONAL BATTENBERG CAKE

Serves-8
Time Taken–1 hr including baking time( excluding cooling time)
Ingredients
¾ cup unsalted butter, softened & cut in cubes
¾ cup caster Sugar
1¼ cups self-raising flour
3 large eggs, room temp
½ cup ground almonds
3/4 tsp baking powder
½ tsp vanilla extract
1/4 tsp almond extract
red food colouring, paste, liquid or gel ( I used Wilton’s burgandy color)

To Finish
1/3 cup apricot Jam
1 cup / 8 oz marzipan

Preheat oven to moderate 350°F. Grease an 8”/20cm square baking tin with butter. Line the tin with parchment paper, creating a divide in the middle with the parchment (or foil).
In a stand mixer fitted with a paddle attachment, cream butter and sugar until creamy. Add the eggs one by one and beat until pale yellow; add the extract. Mix all the dry ingredients together. Now add it to the above mixture. Beat on medium speed until mixed. Spoon half the mixture into the one side of the prepared baking tin. Add a few drops of the food color to the remaining batter, stir until the color is thoroughly distributed, add more color if needed.
Spoon the pink batter into the other half of the prepared baking tin. Smooth the surface of the batter with a spatula, making sure batter is in each corner

Bake for 25-30mins until the cake is well risen, springs back when lightly touched and a toothpick comes out clean (it should shrink away from the sides of the pan). Leave to cool in the tin for a few minutes before turning out to cool thoroughly on a wire rack.

Once completely cool, trim the edges of the cake with a long serrated knife. Cut each colored sponge in half length ways so that you are left with four long strips of sponge. Neaten the strips and trim as necessary so that your checkered pattern is as neat and even as possible. Gently heat the apricot jam and pass through a small sieve. Brush warmed jam onto the strips of cake to stick the cake together in a checkered pattern (one yellow next to one pink. On top of that, one pink next to one yellow). Dust a large flat surface with icing sugar then roll the marzipan in an oblong shape that is wide enough to cover the length of the cake and long enough to completely wrap the cake. Brush the top of the cake with apricot jam. Place the cake on the marzipan, jam side down
- Tip: Either in the middle or to the one side of the marzipan

Brush the remaining three sides with jam. Press the marzipan around the cake, making sure the join is either neatly in the one corner, or will be underneath the cake once turned over. Tip: If you put the sponge to the one side of the marzipan, I found it easiest to “roll” the sponge over and over onto the marzipan instead of lifting the marzipan up onto the sponge. Carefully flip the cake over so that the seam is under the cake and score the top of the cake with a knife, you can also crimp the top corners with your fingers to decorate. Neaten the ends of the cake and remove excess marzipan by trimming off a small bit of cake on both ends to reveal the pattern.

Even though it was just a regular sponge cake, the technique is what mattered. I would love to try this again with more flavors. Overall an easy challenge; it has been a good learning too:). Thanks Mandy for a lovely challenge!

Bon Appetit!

Nina

Print
Recipe

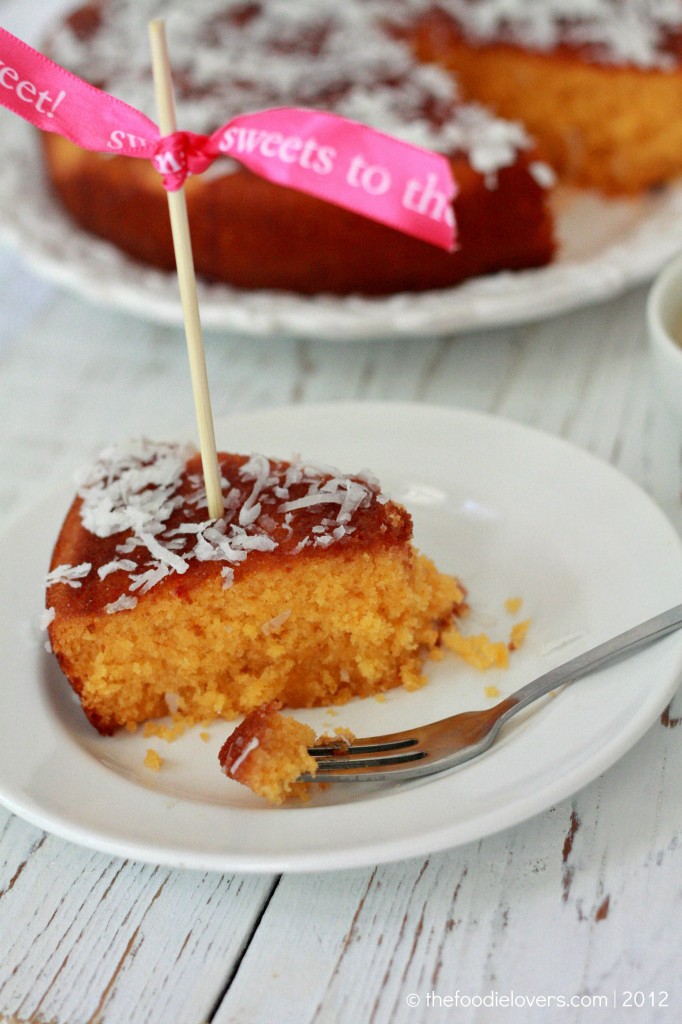
HONEY CAKE brings back a lot of fond memories. There was always a competition in studies between my brother and me. Who ever scored higher marks would always be treated with the yummiest Honey cakes. I dont know why but back then my family was crazy about these cakes. So on the day of our results I would anxiously wait for Dad to come home with these delicious treats:). Aww gone are the days - now I feel so old. I am married,have a little kid,lot of responsibilities….gosh time just flies. I wish there was a rewind button in life…I would love to go back to my younger days:). Anyways I really wonder why on earth I didn’t even think of baking them until today.

I was happy when I saw “Honey” as the theme for this months Monthly Mingle. And the first thing that came into my mind was “Honey Cake”.

HONEY CAKE

Ingredients:

4 tablespoon butter, softened
1 1/4 cup sugar
2 large eggs
2 tablespoon honey
1 teaspoon vanilla extract
1 teaspoon orange zest
1/2 cup orange juice
1/4 cup milk
1 1/4 cup flour
a pinch of salt
1 1/4 teaspoon baking powder
just a little orange food color ( optional)
unsweetened/sweetened coconut flakes for decoration(optional)

Syrup:

1/2 cup honey
1/4 cup water
2 tablespoon sugar

Preheat oven at 350F. Combine the dry ingredients ie., flour,salt and baking powder and set aside. In the large bowl of a stand mixer fitted with paddle attachment, cream butter and sugar until fluffy. Add the eggs one at a time,beating well after each addition. Add the vanilla extract,honey and orange zest. Pour the milk and beat until well incorporated. Now add the flour mixture alternately with the orange juice. Add in the food color if using.

Pour onto a greased 8′ round pan and bake for about 30-40minutes or until a toothpick inserted comes out clean. Once done allow the cake to cool for about 15 minutes. In the meanwhile make the syrup.

Syrup - Mix all the ingredients and bring it to a boil on medium heat. Once it thickens remove it and allow it to cool.

When the cake is warm, take a toothpick and prick all over it. Using a spoon slowly drizzle the syrup all over. The cake will absorb all the liquid. Allow it to set…for about 3 hours. Now turn it upside down. Sprinkle coconut flakes(not fresh ones) all over the cake. Cut them into slices and enjoy!

My cake had a nice brown layer in the bottom so it looked good when I flipped them. Some heat mixed fruit jam with little water and spread it on the cake to give that dark color on top. That taste well too:). Also I ran out of orange food color,so used up yellow and very little orange color. The cake was super moist and tasted delicious:)

This is off to the Monthly Mingle event hosted by Sneh of the Cook Republic. Thanks for a great theme Sneh:)

Related Posts Plugin for WordPress, Blogger...
« Previous Entries Next Entries »

COPYRIGHT

MyFreeCopyright.com Registered & Protected

FAVORITE POST

Povitica Bread

Povitica - An East European Bread

Photobucket
BFS-logo
Proud member of FoodBlogs
my foodgawker gallery
Manage your shopping list and search for recipes from across the web at ZipList.com

SOCIAL MEDIA

ARCHIVES

Blogroll