Category Archives: Daring Bakers Challenge

Print
Recipe

Yay I finally made it on time . It has been ages that I completed a Daring Baker’s Challenge on the revealing day. The name says it all - Beautiful Bread.
Bbread1
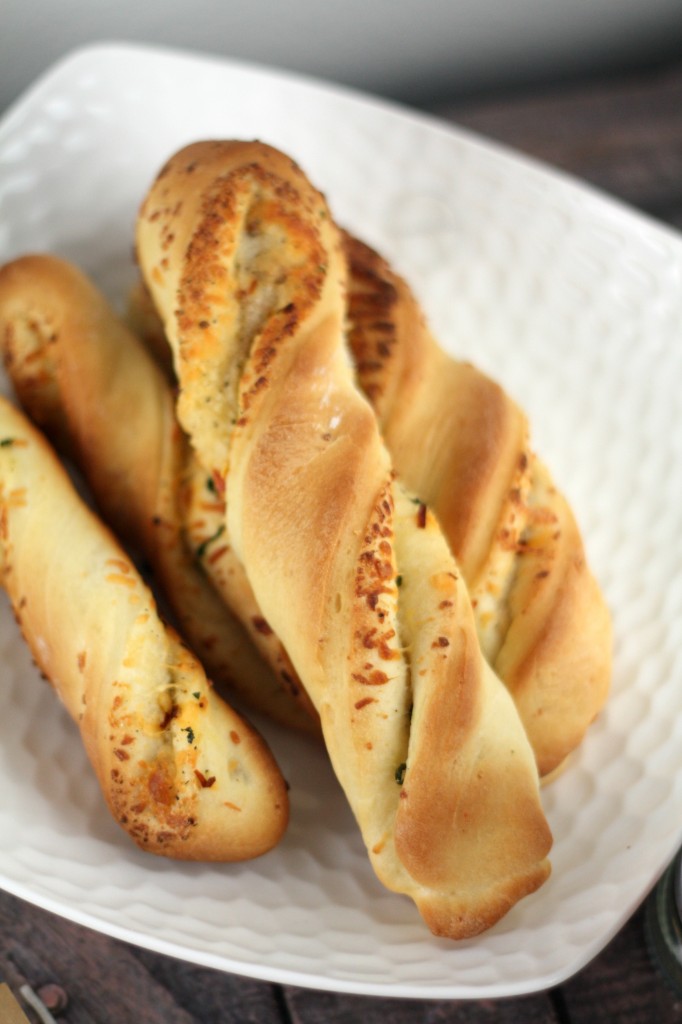
Beauty surrounded the Daring Bakers this month as our host, Sawsan, of Chef in Disguise, challenged us to make beautiful, filled breads. Who knew breads could look as great as they taste?
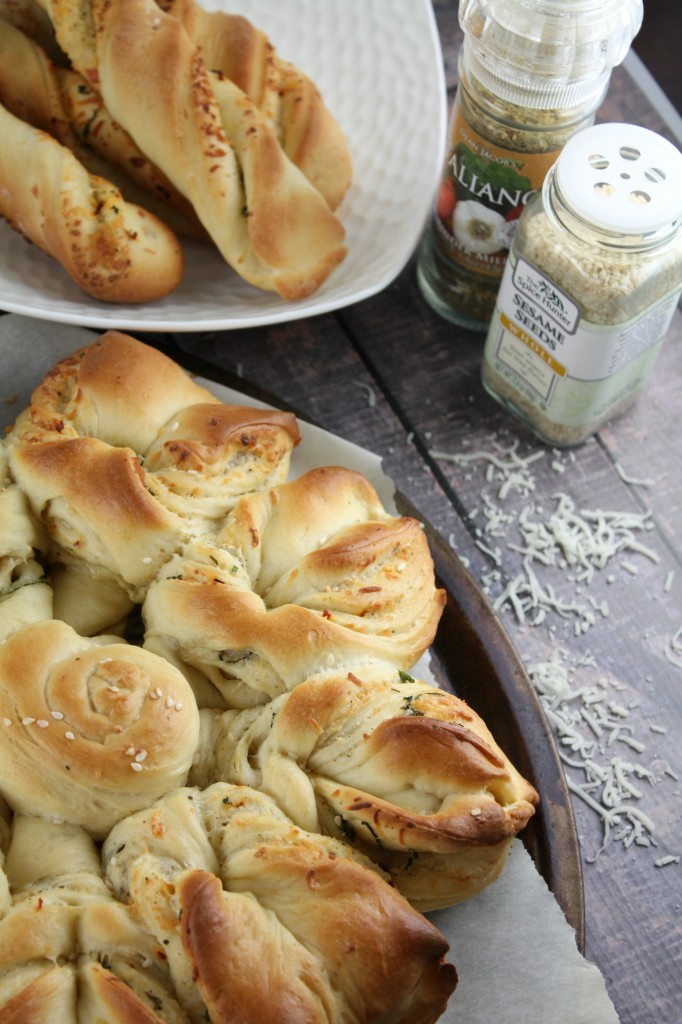
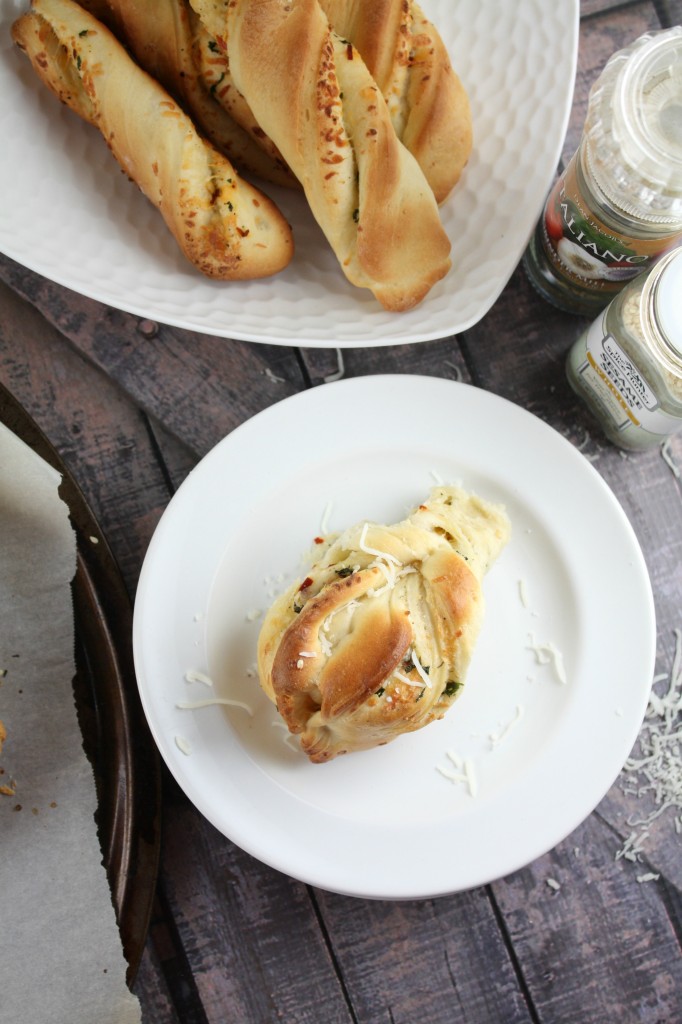
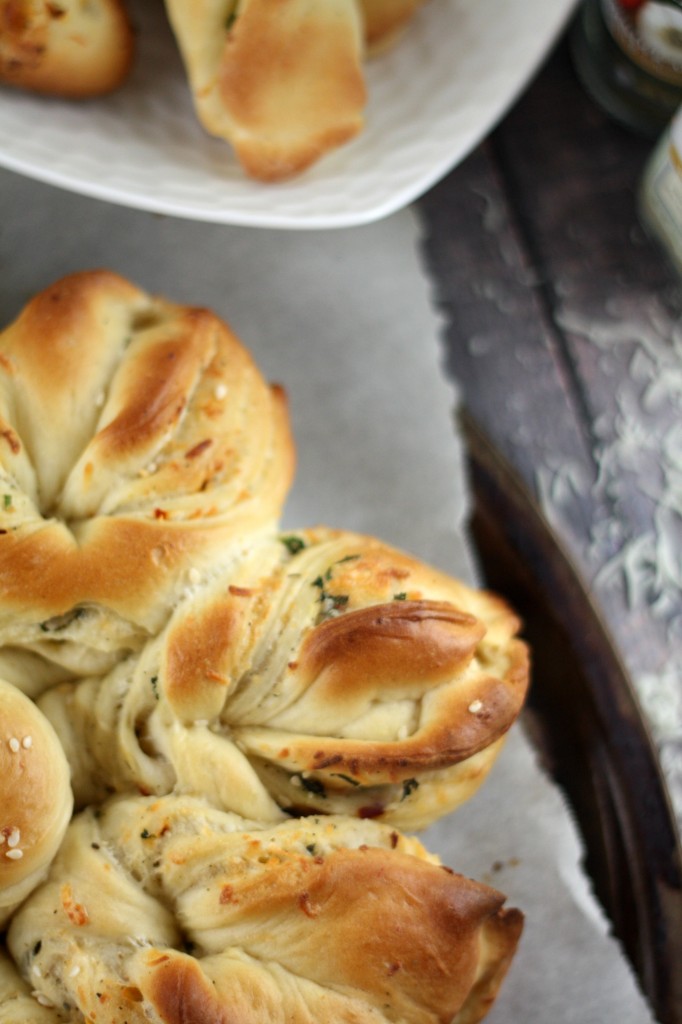
bbread3 As Sawsan mentioned this challenge seems complicated and intimidating but trust me it is not, its very easy. The original recipe was a sweet bread with cinnamon and sugar filling. We were allowed to make any kind of filling, I decided to use cheese( Italian cheese blend), seasoning and chili flakes. The bread tasted good but lacked little salt. The next time I would add more salt to the bread and also add some to the filling.

bbread4

You can come up with any kind of filling - just plain cheese, nutella,coco powder, dry coconut etc. The possibilities are endless. It takes less than ten minutes to prepare the dough and about fifteen minutes to shape them. So its definitely an easy one to try:)

bbread5

After shaping the bread I was left with some dough, so I decided to make rolls. I rolled the dough into a rectangle, sprinkled the filling on one half side ; folded the dough; cut into strips;twisted them and finally baked it until golden brown.
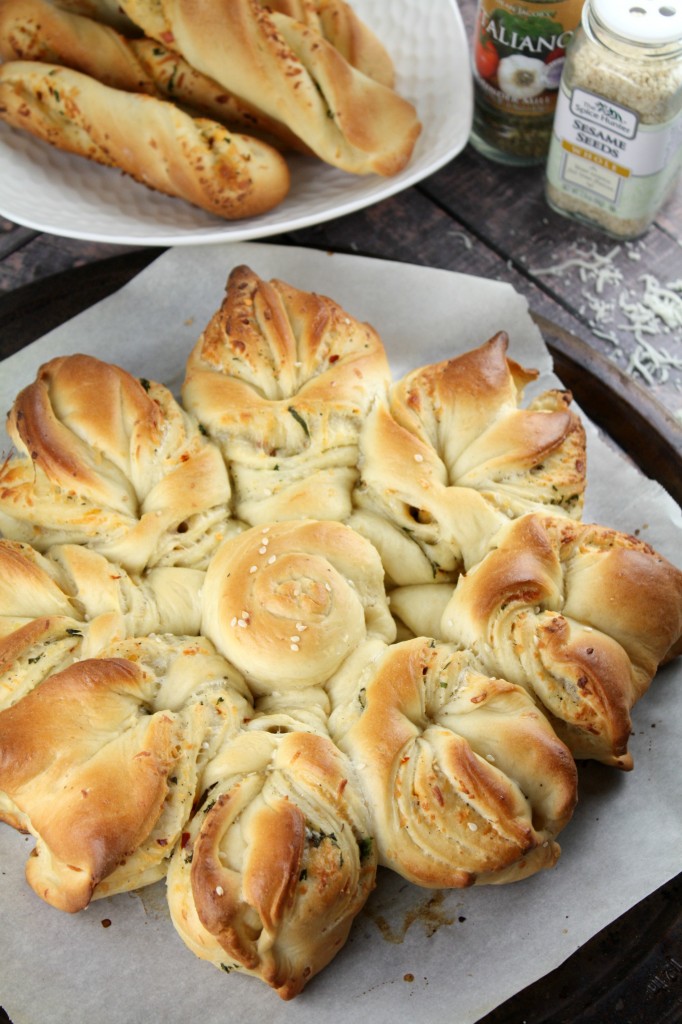
bbread2 Thanks Sawsan for the Beautiful Bread. Here is the recipe.

Beautiful Bread – Daring Baker’s Feb’13 Challenge

Serving Size: Serves 8

Ingredients

  • 1/4 cup warm water
  • 3/4 cup warm milk
  • 1 large egg
  • 1/4 cup butter, softened
  • 1/4 cup white sugar
  • 1/2 teaspoon salt
  • 3-1/4 cups plain (all-purpose) flour, approximately
  • 2 teaspoons dry yeast
  • 1/4 teaspoon cardamom, optional
  • For topping
  • 1/4 cup of milk
  • 1 tablespoon sugar
  • Between the layers
  • 1/2 stick (4 tablespoons) butter
  • ½ cup cheese,herbs( I used Italian cheese blend and a teaspoon of Italian seasoning and little chili flakes)

Instructions

In a bowl whisk the egg with milk, water, sugar, butter and yeast. Set aside . In another bowl sift the flour with the salt and the optional cardamom. Add the liquid ingredients to the dry ingredients and knead until you get a smooth dough.

Place it in a bowl you have brushed with some oil and cover it with a wet cloth and leave it in a warm place to double (If you are tight on time you can heat your oven to 390°F then turn it off and place your dough in a glass bowl and place it in the warm oven with the wet cloth covering the bowl).

Turn the dough out onto a lightly floured surface.Divide the dough into 4 parts.

Roll each part into a circle at least 20 cm (8 inch) in diameter.

Brush the first layer with butter then sprinkle with cheese,herbs and chili flakes. Place the second layer on the first layer repeat the brushing and sprinkling and then do the same with the third layer. Top with the fourth layer, this time only brush it with butter.

Using a knife make cuts that divide the dough circles into 8 triangles.Make cuts that go 2/3 of the way in the middle of each triangle.The cuts should not reach the base of the triangle nor the tip.

Take the tip of each triangle and insert it into the cut you made and pull it from the underside. Arrange the triangles on your baking sheet.Pinch the two angles at the base of the triangle together Note: If you would like to add the little bread coil in the center simply roll a piece of dough into a rope then form it into a little coil and place it in the center where the heads of the triangles meet .

Brush the dough with milk. Allow to rest for 15 minutes during which you would heat your oven to very hot 500°F (rack in the middle). (Go for the hottest your oven will do). Bake for 5 minutes on very hot 500°F, then lower the temperature to moderately hot 400°F and bake for 15-20 more minutes (ovens do differ greatly, so the time may differ…..what you want is to bake it until the under side is golden brown).

If you have a broiler (grill) in your oven. Turn on the broiler (grill) for a couple of minutes until the bread is golden brown on top(I did not do this). Take it out of the oven and allow to cool for 5 minutes.

http://www.thefoodielovers.com/2014/02/beautiful-bread-daring-bakers-feb13-challenge/

If you plan the sweet one, instead of herbs and cheese use cinnamon(4 tablespoon) and sugar(1/2 cup) also after baking just drizzle condensed milk (1 can) on top when warm. Also, I must say it would be alot easier to shape the bread if you are using simple sugar and cinnamon as filling. With the cheese filling, I felt it was slightly tricky to shape them.

Enjoy!

Nina

Print
Recipe

Baum1

Jeff Foxworthy says - If you know all four seasons: almost winter, winter, still winter and road construction, you might live in Minnesota. I can’t believe how depressing the winter gets and the impact it has on our daily lives. The weather has to be factored in for every single outdoor activity however seeming simple it may appear. I am so paranoid that the first thing I check every morning is not my mail nor my blog but the weather forecast for the day! That said, there is an old saying that goes something like this “When winter is here, can Spring be far behind” ? I am optimistic and so looking forward for sunny days ahead :)

Baum 3

On that positive note I plan to resume my blogging though I can’t make promises! To start with I am planning to work on all the Daring Baker’s challenge recipes and also recipes from events that I have missed so far. I was quite fascinated with the January’s DB challenge – A beautiful Baumkuchen(Tree Cake), layered cake. It’s a traditional dessert in many countries across Europe and a popular dessert in Japan. The challenge was to use the Baumkuchen (tree cake) and Schichttorte technique of smearing thin layers of batter on top of each other, and baking them one by one, so creating a layered cake structure.

The January 2014 Daring Bakers’ challenge was hosted by Francijn of “Koken in de Brouwerij”. She challenged us all to bake layered cakes in the tradition of Baumkuchen (tree cake) and Schichttorte (layered cake).

Baum 4

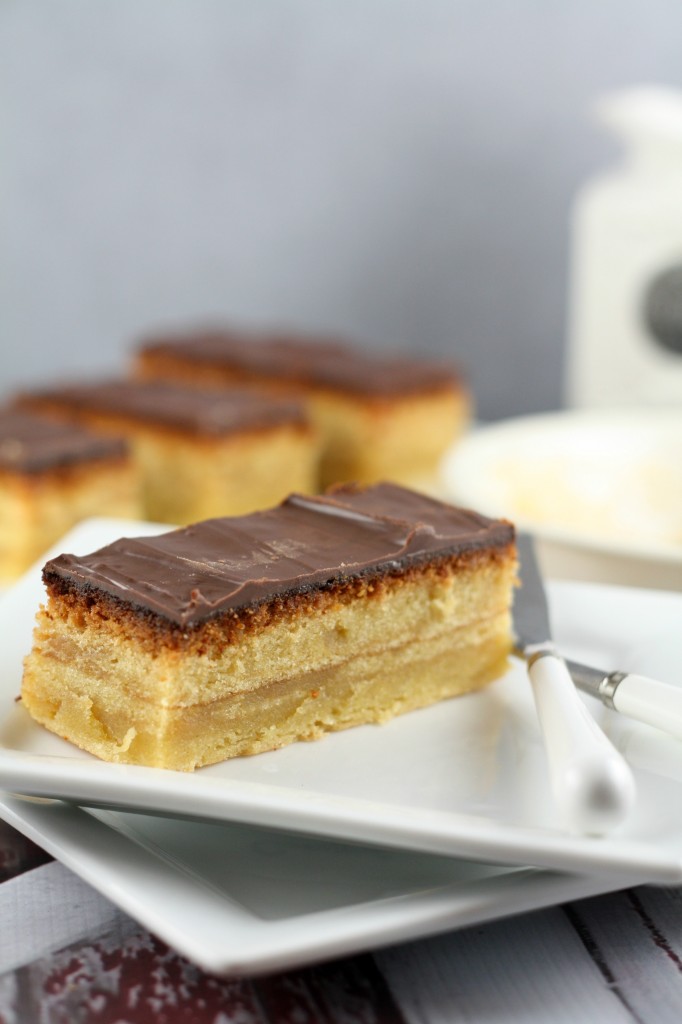
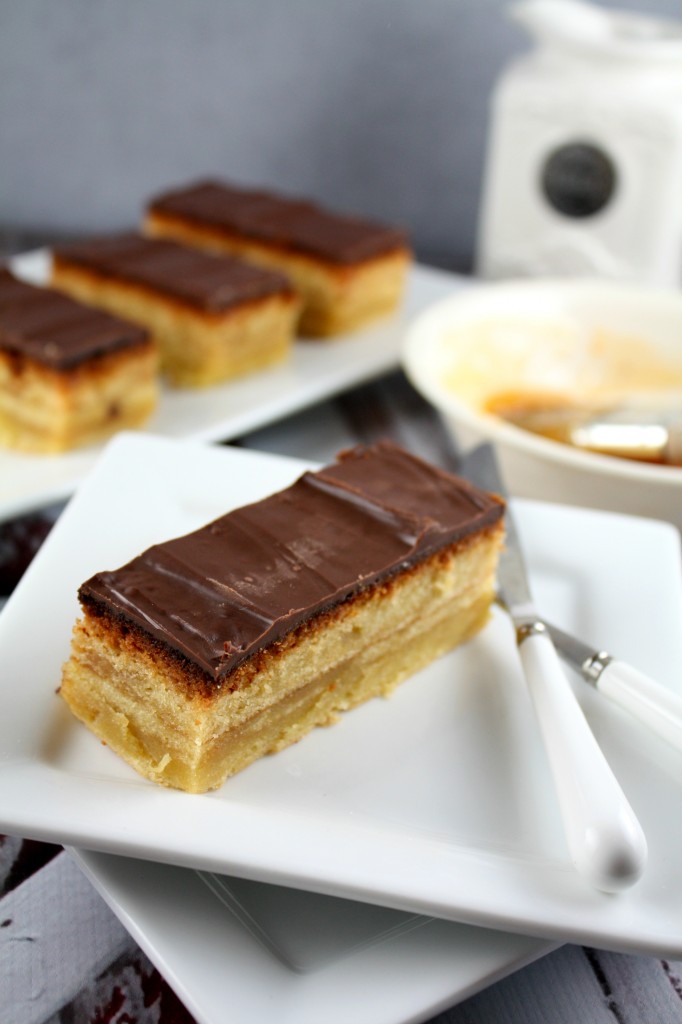
I believe a commercial Baumkuchen is cooked layer on layer in a big spit above a large container containing the batter, with a broiler (grill) next to it. The batter is poured over the spit, and when cooked, the next layer gets poured and cooked, this is repeated; until you have 15, 20, or even 25 layers of cake.The little brown lines between the layers of cake are the reason we call this cake “tree cake”. However I didn’t get the distinctive lines as expected - I am pretty sure its because I under-baked each layer.

Now onto the challenge recipe, which is Schichttorte (layered cake, Schicht means layer). This is a simple version of Baumkuchen, with horizontal layers. The layers in Schichttorte are not dipped, but smeared, and the cake is not baked on a spit, but in a baking mould (tin) (pan) producing a flat multi-layered cake.

Baumkuchen(Tree Cake) – January’14 Daring Baker’s Challenge

Prep Time: 20 minutes

Cook Time: 60 minutes

Yield: Makes one 8" cake

Ingredients

  • Batter:
  • 6 large eggs (room temperature)
  • pinch of salt
  • 1/2 cup plus 2 tablespoons granulated sugar
  • 2/3 cup marzipan
  • 1 cup minus 2 tablespoons softened unsalted butter
  • 3/4 cup confectioner's (icing) sugar
  • 2 teaspoons vanilla sugar
  • 2/3 cup all-purpose (plain) flour (sifted)
  • Glaze:
  • 1/3 cup apricot jam
  • 2 tablespoons orange liqueur (optional)
  • 1 cup dark chocolate couverture chunks
  • 1 tablespoon pure coconut oil

Instructions

Preheat your oven to hot 450°F. Line your cake tin with parchment paper, grease both paper and tin.

Divide the eggs. Beat the egg whites with the salt until nearly stiff, add the sugar and beat until really stiff.

Crumble finely the marzipan. Beat it with the softened butter, confectioner's (icing) sugar and vanilla sugar until soft and creamy. Add the egg yolks one by one and beat well between each addition. Add the stiff egg whites and flour and gently fold it into the batter. Trying not to lose too much air.

Smear 1/12th to 1/10th of the batter on the bottom of the pan, keep the sides of the pan clean, and bake for (about) 4 minutes in the oven, until it is cooked and brown. Take the pan out of the oven, smear the next portion of batter carefully over the first, and bake for another 4 minutes or until cooked and brown. Repeat until all batter is used. If you need to flatten a bubble insert a tooth pick or similar to deflate the bubble.

Let the cake cool down for a few minutes, take it out of the pan, remove the parchment paper and let the cake cool completely on a wired rack. Trim the edges.

Heat the jam a little, pass it through a sieve, and add the orange liqueur (optional). Cover the cake with the jam and let it cool.

Melt the couverture with the coconut oil in a bowl above warm water. Pour it over the cake to cover completely, move the cake to a cool place and wait until the glaze is dry.

http://www.thefoodielovers.com/2014/02/baumkuchen-tree-cake-january14-daring-bakers-challenge/

Also the other blunder that I made was - once the cake was baked, I cooled it down and inverted it from the pan. I covered it with Jam and then with melted chocolate. I completely forgot to invert the cake back before I did this step. So my cake was upside down. I realized my mistake only when I took a bite, the base was soft and the top was slightly hard(thanks to the thick coat of chocolate). Nevertheless it tasted great !. The cake had a nice vanilla flavor, it was very soft and moist too. I truly enjoyed each and every bite of it!. Thanks Franscijn for a lovely challenge!

Enjoy!

Nina


Print
Recipe

Mawa Cake 1 main

Aparna of My Diverse Kitchen was our August 2013 Daring Bakers’ hostess and she challenged us to make some amazing regional Indian desserts. The Mawa Cake, the Bolinhas de Coco cookies and the Masala cookies – beautifully spiced and delicious!

I was really kicked about the Mawa Cake and worked on it as soon as I read the post. In a hurry I ended making a stupid mistake. I read 4 cups of milk as 4 litres of milk(that was alot of MILK!!!). Mawa requires patience and lot of stirring. Mine took almost 3-4 hrs; that’s when I felt something was wrong;logged into the DBC site to check and that’s when I realized how dumb I was!!!.Now that I was left with a huge batch of Mawa,I saved up a cup for the cake and added a little sugar to the remaining. Mixed it well and made small flat disc and refrigerated it for sometime. These are called Pedas and they make agreat dessert. But yes…not to forget they are made with whole milk so very very HIGH in calories.

Mawa Cake 2 main Mawa Cakes are a speciality cake that is the hallmark of Irani cafe’s in India. Mawa (also known as Khoya/ Khoa) is made by slowly reducing milk (usually full-fat) until all that remain is a mass of slightly caramelized granular dough-like milk solids. Mawa is used in a wide variety of Indian sweets like Gulab Jamun and Peda, to mention just two. Mawa is pronounced as Maa-vaa; Khoya is pronounced as KhOh-yaa.
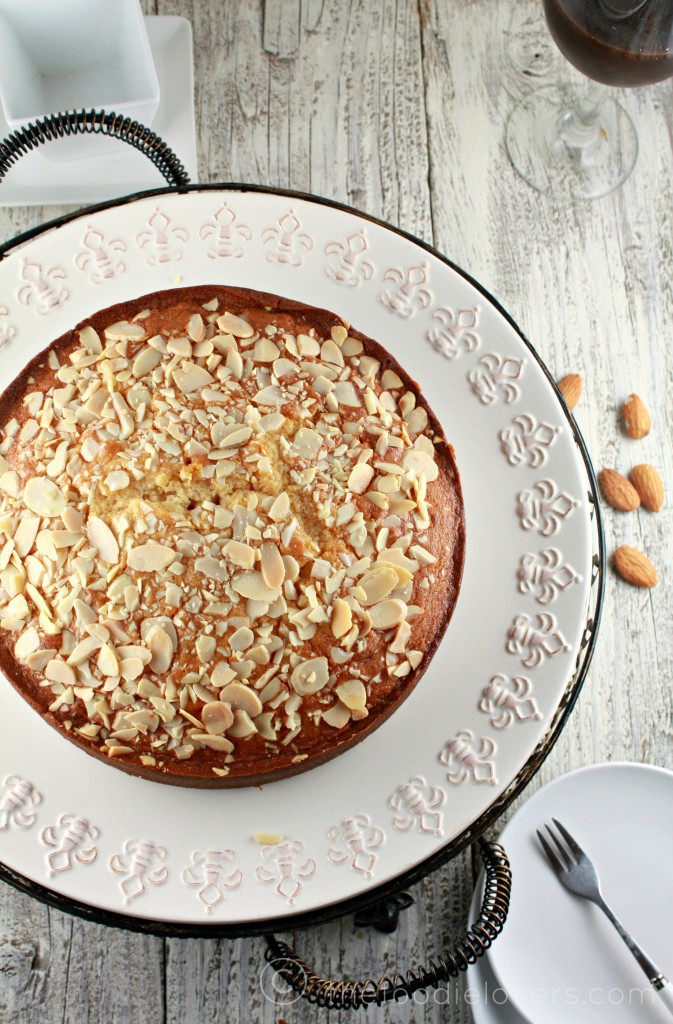
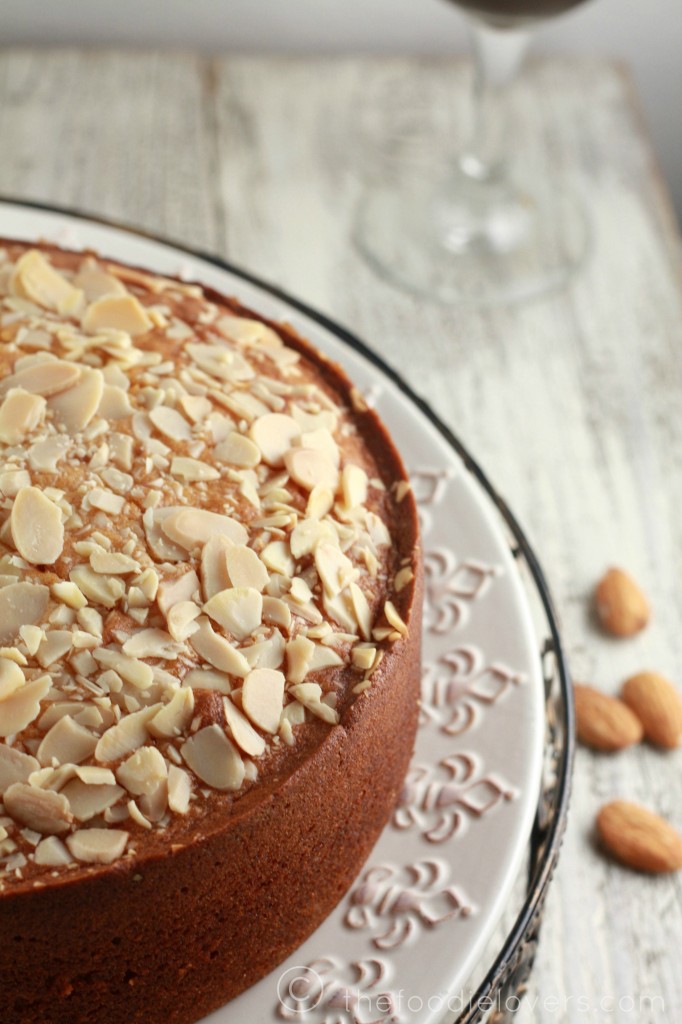
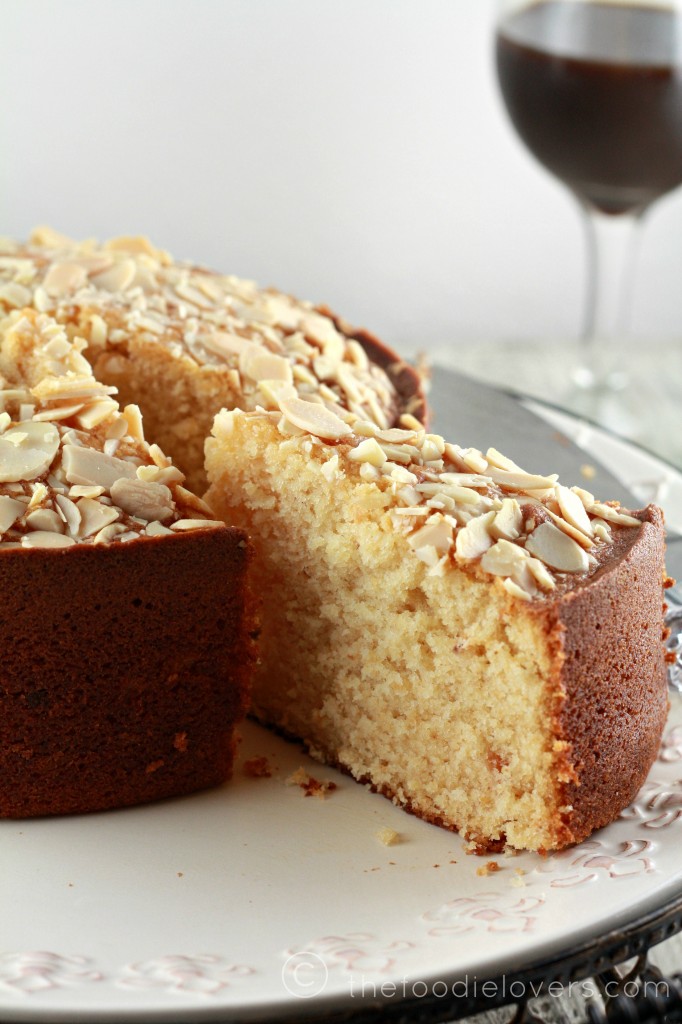
Mawa Cake 3 main In this cake, Mawa lends a rich and a caramelized milky taste to this cake which is slightly dense and reminiscent of a pound cake. Cardamom and cashewnuts are typical of a Mawa Cake; but almonds can be used too. I had a whole pack of blanched sliced almonds from Trader Joe’s that came into use. The batter can be used to make Cupcakes as well. They were totally moist and the cardamom flavor was to die for. Even my little enjoyed this cake. Masala Cookies 2 main
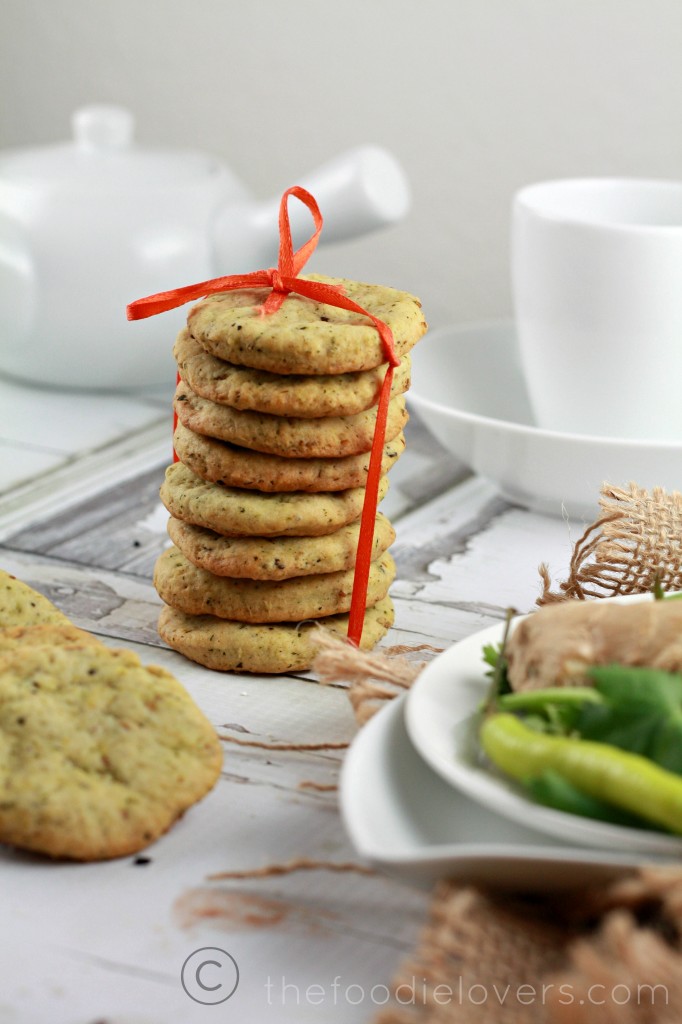
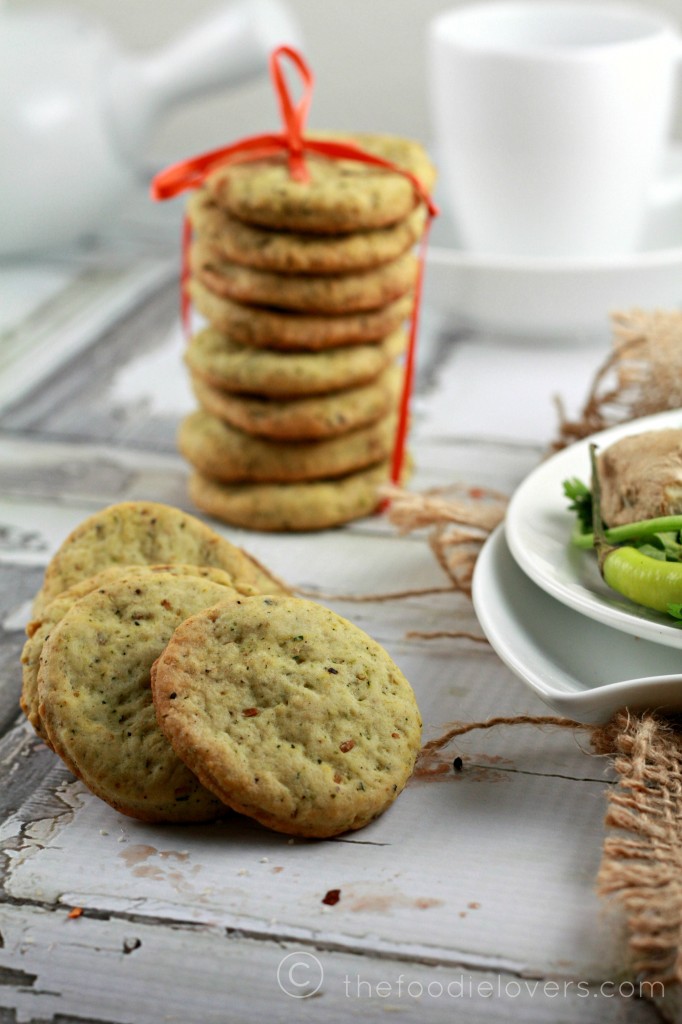
Masala cookies are something that features very often at home. So these were not something new; however I just baked them with the flavors I like.The word Masala means “Spice Mix”, they are savory and spicy Indian snack. These were quite spicy because of the chilies and pepper that went into them. They are loaded with flavors and are super crunchy on the outside;soft and flaky in the inside. I used Mint and Dill leaves which added a zing to the cookies. Masala Cookies 1 main I made the Mawa two days ahead of time and stored it in an airtight container in the refrigerator. Allow it to come to room temperature before you make the cake. Instead of cardamom you may choose to use nutmeg also.For the Masala cookies I didn’t have curry leaves handy; Cilantro,Dill and Mint leaves did their flavoring magic:)

Mawa Cake

Serving Size: Makes One 8 inch Cake

Ingredients

  • For the Mawa:
  • 1 litre (4 cups) full fat milk
  • For the cake:
  • 1/2 cup unsalted Butter (soft at room temperature)
  • 3/4 cup packed crumbled mawa
  • 1-1/4 cups castor sugar
  • 3 large eggs
  • 5 to 6 cardamom pods, powdered, (about 1-1/2 tsp powdered cardamom)
  • 2 cups cake flour
  • 1 teaspoon baking powder
  • 1/4 teaspoon salt
  • 1/2 cup milk
  • 1 teaspoon vanilla extract (optional)
  • Blanched Sliced Almonds / Cashewnuts to decorate

Instructions

First make the “Mawa”. Pour the milk into a heavy bottomed saucepan, preferably a non-stick one. Bring the milk to a boil, stirring it on and off, making sure it doesn’t stick to the bottom.

Turn down the heat to medium and keep cooking the milk until reduces to about a quarter of its original volume. This should take about an hour to an hour and a half.

The important thing during this process is to watch the milk and stir it frequently to make sure it doesn’t stick to the sides or bottom of the pan and get burnt. The danger of this happening increases as the milk reduces and gets thicker.

Once the milk it has reduced to about one fourth, 1/4 quantity, lower the heat to low and let cook for a little while longer. Keep stirring regularly, until the milk solids (mawa) take on a lumpy appearance. There should be no visible liquid left in the pan, but the mawa should be moist and not stick to the sides of the pan.

Remove the pan from heat and transfer the mawa to a bowl and let it cool completely. Then cover and refrigerate it for a day or two (not more) till you’re ready to make the cake. It will harden in the fridge so let it come to room temperature before using it.You should get about 3/4 to 1 cup of mawa from 1 litre (4 cups) of full-fat milk.

Now start preparations for the cake by pre-heating your oven to moderate 350°F . Beat the butter, the crumbled mawa and the sugar in a largish bowl, using a hand held electric beater, on high speed until soft and fluffy.

Add the eggs, one at a time, and beat on medium speed till well incorporated. Add the vanilla and milk and beat till mixed well.

Sift the cake flour, baking powder, cardamom, and salt onto the batter and beat at medium speed and well blended. If you cannot find cake flour, place 2 tablespoon of cornstarch in the bottom of your 1-cup measure and then fill it with all-purpose (plain) flour to make up to 1 cup.

Grease and line only the bottom of an 8 inch (20 cm) spring form pan. Pour the batter into this and lightly smooth the top. Place the cashew nuts (or blanched almonds) on top of the batter randomly. Do not press the nuts down into the batter. A Mawa Cake always has a rustic finished look rather than a decorated look.

Bake in a preheated moderate oven for about 1 hour until the cake is a golden brown and a skewer pushed into the centre comes out clean. Do not over bake the cake or it will dry out. If the cake seems to be browning too quickly, cover it will aluminium foil hallway through the baking time.

Remove from oven and allow it to cool for 10 min in the tin. Release the cake, peel off the parchment from the base and let it cool completely.

http://www.thefoodielovers.com/2013/09/mawa-cake-and-masala-herb-cookies-daring-bakers-august13-challenge/

Masala Herb Cookies

Yield: Makes 2 1/2 dozen cookies

Ingredients

  • 1-3/4 cup all-purpose (plain) flour
  • 2 tablespoons fine white or brown rice flour (optional)
  • 1 teaspoon baking powder
  • 1/4 teaspoon baking soda
  • 1/2 teaspoon salt (or according to your taste)
  • 1/2 cup chilled butter, cut into small pieces
  • 3 green chillies, deseeded and chopped
  • 3/4 inch piece of ginger, finely grated
  • 1-1/2 teaspoon whole peppercorn, crushed coarsely
  • 1-1/2 teaspoon cumin seeds, toasted and crushed coarsely
  • 1 tablespoon granulated sugar
  • 1-1/2 tablespoons finely chopped curry leaves
  • 1 tablespoon each finely chopped fresh cilantro,mint and dill leaves
  • 3 to 4 tablespoons cold yogurt
  • A little oil to brush the tops of the biscuits/ cookies

Instructions

Put both flours, salt, baking powder and baking soda into the bowl of a food processor and add the pieces of chilled butter. Pulse until the mixture takes on the texture of breadcrumbs.

Now add the chopped green chillies, finely grated ginger, crushed peppercorn and cumin, sugar, the chopped curry leaves and coriander leaves. Pulse a couple of times to mix well.

Then add 2 tablespoons of yogurt and pulse again. Add one more tbsp of yogurt (or two, as much as needed), and pulse again until the dough just comes together and clumps together. You want a moist dough, not a wet one – somewhat like pie dough.

Do not over process or knead. The dough should be just moist enough for you to use your hands and bring everything together to shape into a ball. Flatten it into a disc and cover the dough with plastic wrap and let it rest in the refrigerator for at least hour. You can also leave it overnight (up to about 24 hours) and work on it the next day.

Pre-heat your oven to moderate 350°F and line your baking trays with parchment or grease them with oil.

Lightly dust your working surface and roll out the dough to 1/8”(3 mm) thickness, not more or your biscuits/ cookies will not be crisp. If using Sesame seeds, sprinkle it uniformly over the dough and use your rolling pin, very lightly, to press them in.Using cutters of your choice (about 2-1/4 inch in size), cut out biscuits/ cookies and place them on lightly greased baking trays. Brush a very thin coat of oil over them. This will help them brown while baking. Bake them in a preheated moderate oven for about 20 to 25 minutes or till they’re done and golden brown on the top. Remember the baking time will depend on the thickness and shape of your biscuits/ cookies. Let them cool on the trays for about 5 minutes and then cool them on racks. Once they’re completely cool, they should be a bit crunchy and not chewy.

http://www.thefoodielovers.com/2013/09/mawa-cake-and-masala-herb-cookies-daring-bakers-august13-challenge/

Note - I was traveling so posting very late. Its better late than never:)

Bon Appétit
Nina

Print
Recipe

Pie 6 main
I am glad to do the Daring Baker’s Challenge this month. Considering all that’s been going around me…Oh life can’t get any busier? Just when I think its time to relax something else pops up. I am a stay at home Mom and feel that I am more occupied than my Husband. There are days I wish I was given a “time out” lol!
Pie 1 main
Rachael from Pizzarossa was our lovely June 2013 Daring Bakers’ host and she had us whipping up delicious pies in our kitchens! Cream pies, fruit pies, chocolate pies, even crack pies! There’s nothing like pie.

Pies and Tarts have always been everyones favorite at home. After all the strawberry picking that we do every year, Strawberry Pies and Tarts are the first thing that comes to my mind.I was completely intrigued by the recipe of “Momofukus Milk Bars” famous “CRACK PIE”. The name itself sounds interesting.
Pie 2 main
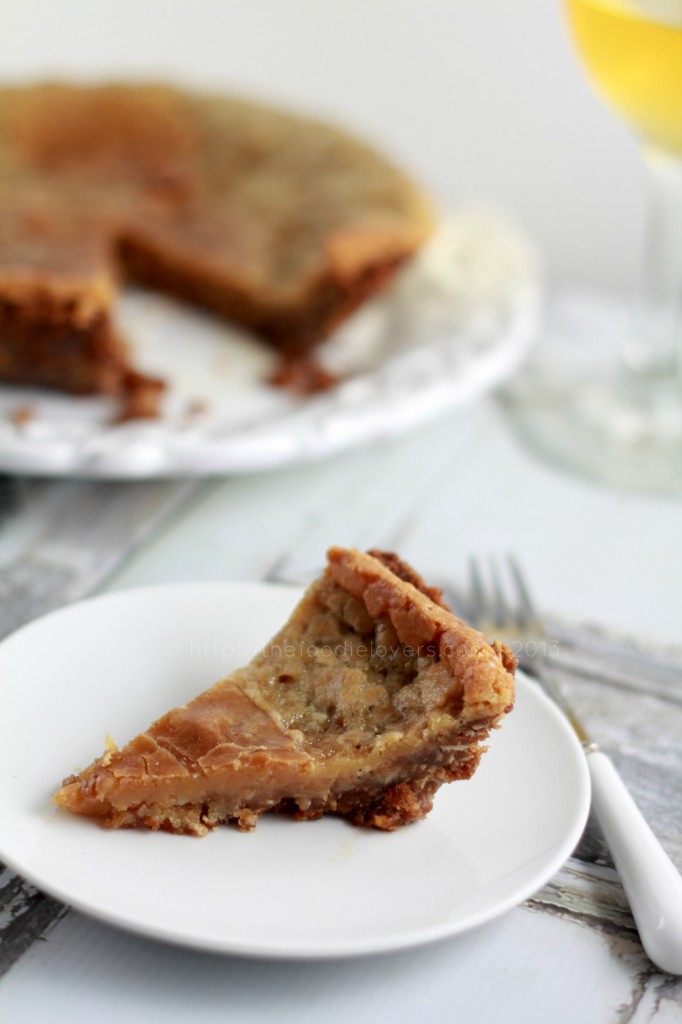
Bon Appetit says about Crack Pie, “Anyone who has taken a bite of this Milk Bar best seller immediately knows the reason for the sassy name. Once you start eating this rich, salty-sweet pie with its oat cookie crust, you won’t be able to stop.” A thick, chewy crust filled with an outrageously sweet gooey filling, it’s a wicked sugar-rush. You’ll want small servings!
Pie 5 main
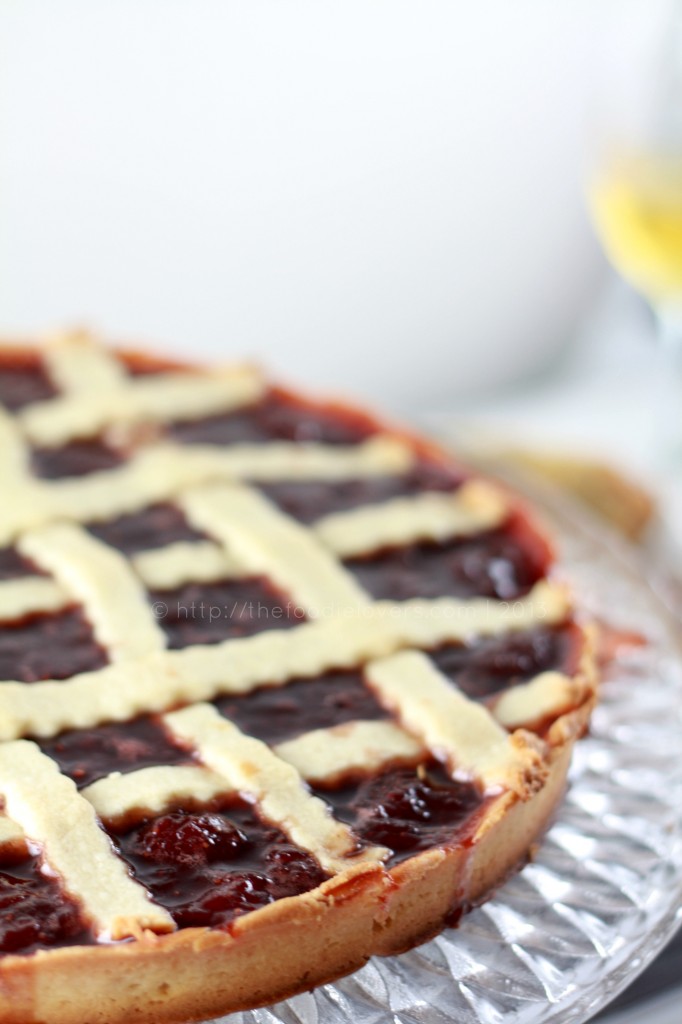
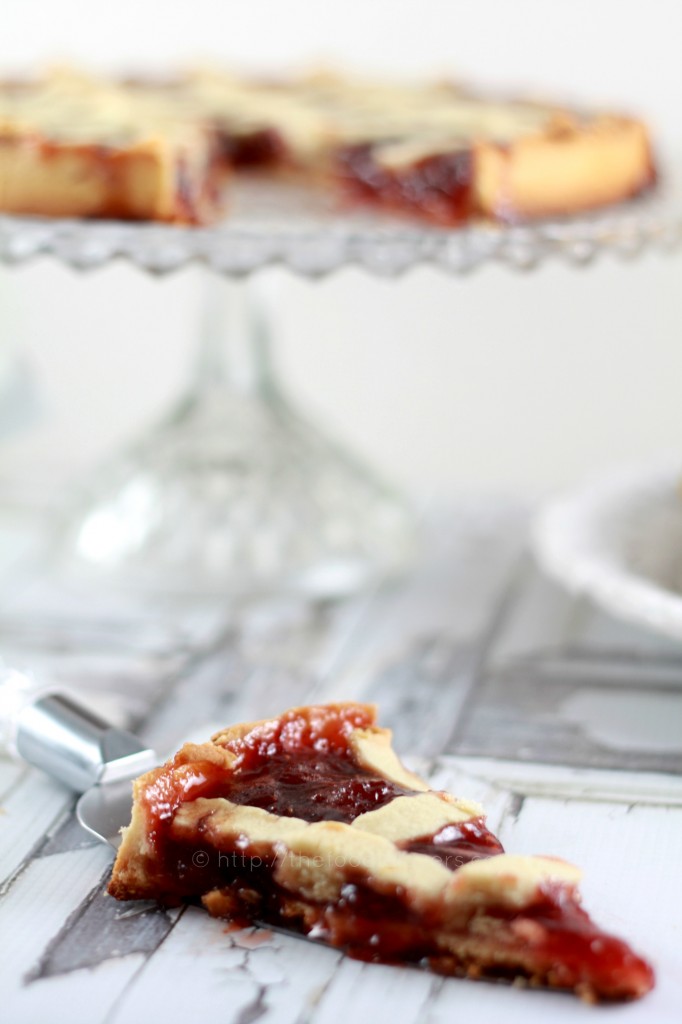
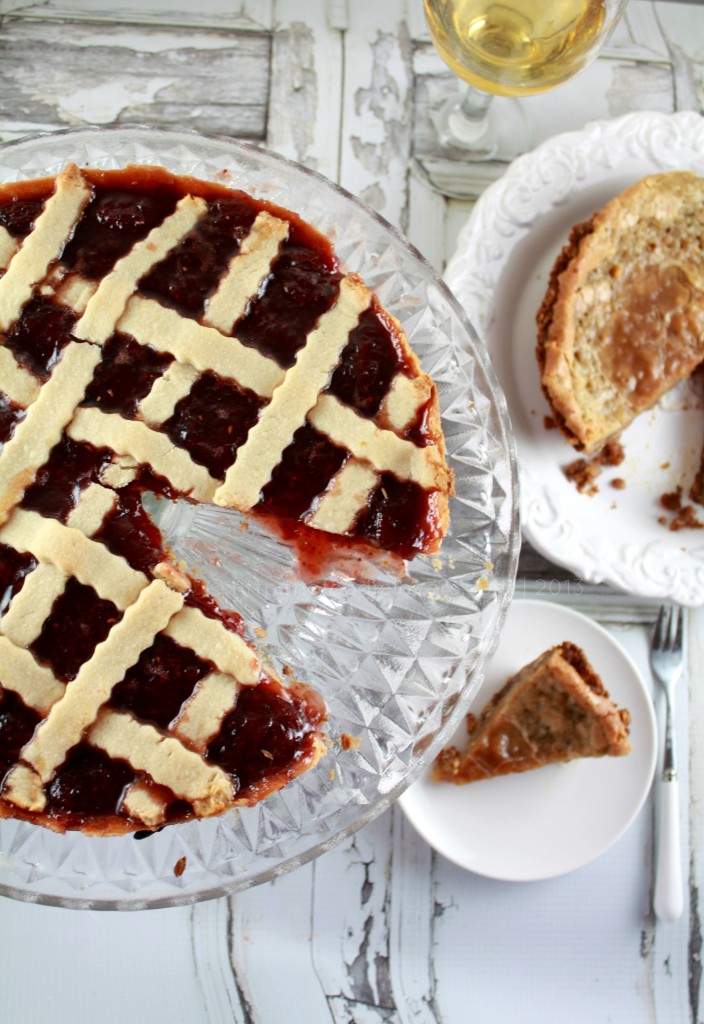
Crostate are traditional Italian sweet treat most often filled with Jam, preserved or fresh fruit or any nut based fillings or pastry cream. Since I had lot of Strawberry Preserves at home I decided to make a “Strawberry Crostata”.

I decided to make a small Crack Pie. So I halved the recipe and followed the instructions. Though I loved this Pie, but it was definitely too very sweet for me. I had infact reduced the amount of sugar by two tablespoon but looks like that wasn’t good enough. Having said that, this has by far been one of the most delicious Pies I have ever baked. The goey filling which tasted like caramel with an oats cookie crust was to die for. I had this with some whipped cream on top…ummm sinful:)

Crack Pie

Ingredients

  • Oats Cookie Crust
  • 4 1/2 tablespoons unsalted butter, room temperature, divided (3 & 1 1/2 tbsp)
  • 2 1/2 tablespoons light brown sugar, divided (2 & ½ tbsp)
  • 1 tablespoon white sugar
  • 1 large egg
  • 1/2 cup old-fashioned oats
  • 1/4 cup all-purpose flour
  • a pinch baking powder
  • a pinch baking soda
  • 1/8 teaspoon salt
  • Filling
  • 1/4 cup + 1 tablespoon white sugar
  • 2 tablespoon light brown sugar
  • 1/2 tablespoon dry milk powder
  • 1/8 teaspoon salt
  • 1/4 cup unsalted butter, melted, cooled slightly
  • 3 1/4 tablespoons heavy whipping cream
  • 2 large egg yolks
  • 1/2 teaspoon vanilla extract
  • Powdered sugar for dusting

Instructions

Oat Cookie Crust

1. Position rack in center of oven and preheat to moderate 350°F. Line a 18" square baking pan with parchment (baking) paper. Lightly spray or butter 4" pie dish.

2. Combine 3 tablespoons of the softened butter, 2 tablespoons of the brown sugar and the white sugar in medium bowl. Using an electric mixer, beat until light and fluffy, about 2 minutes.

3. Beat an egg, discard half of it, add the remaining to the mixer and beat until pale and fluffy, about 1 minute.

4. Add oats, flour, baking powder, baking soda, and salt and beat until well blended, about 1 minute.

5. Dump oat mixture into prepared baking pan and press out evenly to edges of pan.

6. Bake until light golden, might take around 12 minutes. Transfer baking pan to wire rack and cool cookie completely, about an hour.

7. Using your fingertips, crumble the cookie a into large bowl - there should be no identifiable pieces of cookie remaining. Add the remaining 1 1/2 tablespoons butter and 1/2 tablespoon brown sugar. Rub in with your fingertips until the mixture is moist and sticks together when pressed between your fingers.

8. Transfer cookie crust mixture to pie dish. Using your fingers, press mixture evenly onto bottom and up sides of pie dish (about 1 inch/2.5cm up the sides if your pie dish is deep). If your pie dish is shallow, place it on a baking sheet in case of overflow.

Filling

1. Position rack in center of oven and preheat to moderate 350°F. If possible, use bottom-only heat, or the filling may brown too quickly.

2. Whisk both sugars, milk powder, and salt together in a medium bowl.

3. Add melted butter and whisk until blended.

4. Add cream, then egg yolks and vanilla and whisk until well blended.

5. Pour filling into crust.

6. Bake 25 minutes (filling may begin to bubble up). Reduce oven temperature to 325°F. Continue to bake until filling is brown on top and set around edges but center still jiggles slightly, about 20 minutes longer.

7. Cool pie completely in pie dish on wire rack. Chill uncovered overnight.

8. Sift powdered sugar lightly over top of pie. Cut pie into thin wedges and serve cold.

http://www.thefoodielovers.com/2013/06/crack-pie-crostata-di-marmellata-daring-bakers-june-13-challenge/

Crostata Di Marmellata

Ingredients

  • Pasta Frolla ( Basic Italian Pie Pastry)
  • 2/3 cup unsalted butter, room temperature
  • 1/3 cup sugar
  • 1 large egg, room temperature
  • 1 teaspoon vanilla extract
  • grated zest of 1 medium lemon
  • 1-2/3 cups all-purpose (plain) flour
  • pinch salt
  • Filling
  • 2 cups Strawberry Preserves
  • Glaze
  • ¼ cup apricot jam
  • 1-2 teaspoons freshly squeezed lemon juice

Instructions

1. Using a paddle attachment on a stand mixer or an electric hand mixer or whisk, cream the butter and sugar until pale and fluffy, 2 - 5 minutes. The amount of time you cream the butter will affect the final dough - longer means lighter which in turn means a softer, more fragile dough which is less easy to work, but I prefer the texture of the cooked pastry this way because it's lighter too. If you want to do a more intricate lattice, I'd recommend a shorter creaming time so you have a firmer dough.

2. Add the egg, vanilla and lemon zest, one at a time, mixing thoroughly after each addition.

3. Add the flour and salt and mix until the dough comes together but remains soft, about 1 minute using a stand or electric mixer or a wooden spoon if mixing by hand. Don't over-mix.

4. Wrap dough in plastic wrap and refrigerate for 30 minutes to one hour.

5. When getting ready to bake, rest dough at room temperature for about 30 minutes.

6. Lightly grease a shallow 9"/24cm metal pie dish.

7. On either a piece of parchment or a lightly floured surface, roll 2/3 of the dough (I weighed my dough and 2/3 was about 12oz/340g) out to a circle to generously line the pie dish. I prefer to use parchment with a circle traced on it so I can roll it as quickly as possible, before the dough gets too soft to handle, then use the parchment to transfer it to the dish.

8. Transfer the dough to the pie dish, press in gently and roll the edges to form a good surface for attaching the lattice later. Prick all over the bottom with a fork.

9. Refrigerate the dough-lined pie dish for 30 minutes to reduce shrinkage during baking.

10. Preheat oven to moderate 350°F/180°C/gas mark 4..

11. Line pastry with parchment and fill with dry beans or pie weights. Bake until set, around 15 minutes.

12. Remove the weights and parchment and allow to cool. If using a springform or loose based pie dish, remove the side of the pan.

13. Preheat oven to moderately hot 400°F/200°C/gas mark 6.

14. Roll the remaining dough to fit the pie dish and cut it into roughly half inch/1.5cm-wide strips.

15. Spread the filling over the par-baked crust.

16. Arrange the strips of dough in a lattice over the filling (see links below for some how-to guides - you can do an intricate intertwined lattice or a very simple overlay one like I've done), trim as needed and lightly pinch the ends onto the rolled edge of the bottom crust.

17. Place pie dish on a baking sheet and place in center of oven. Bake until lattice is golden, around 20 minutes. Meanwhile, prepare the glaze.

Glaze

1. Heat the jam and water in a small saucepan over medium heat until mixture comes to a boil. Alternatively, you can heat it on medium-high in a bowl in the microwave for about 2 minutes, stirring halfway.

2. Strain through a fine mesh sieve if it's chunky.

3. While glaze and pie are both still warm, brush over lattice crust.

4. Allow pie to cool completely before serving.

http://www.thefoodielovers.com/2013/06/crack-pie-crostata-di-marmellata-daring-bakers-june-13-challenge/

Thanks Rachael for the lovely challenge!

Bon Appétit

Related Posts Plugin for WordPress, Blogger...
« Previous Entries Next Entries »

COPYRIGHT

MyFreeCopyright.com Registered & Protected

FAVORITE POST

Povitica Bread

Povitica - An East European Bread

Photobucket
BFS-logo
Proud member of FoodBlogs
my foodgawker gallery
Manage your shopping list and search for recipes from across the web at ZipList.com

SOCIAL MEDIA

ARCHIVES

Blogroll