Category Archives: Eggless

Print
Recipe

seed 1
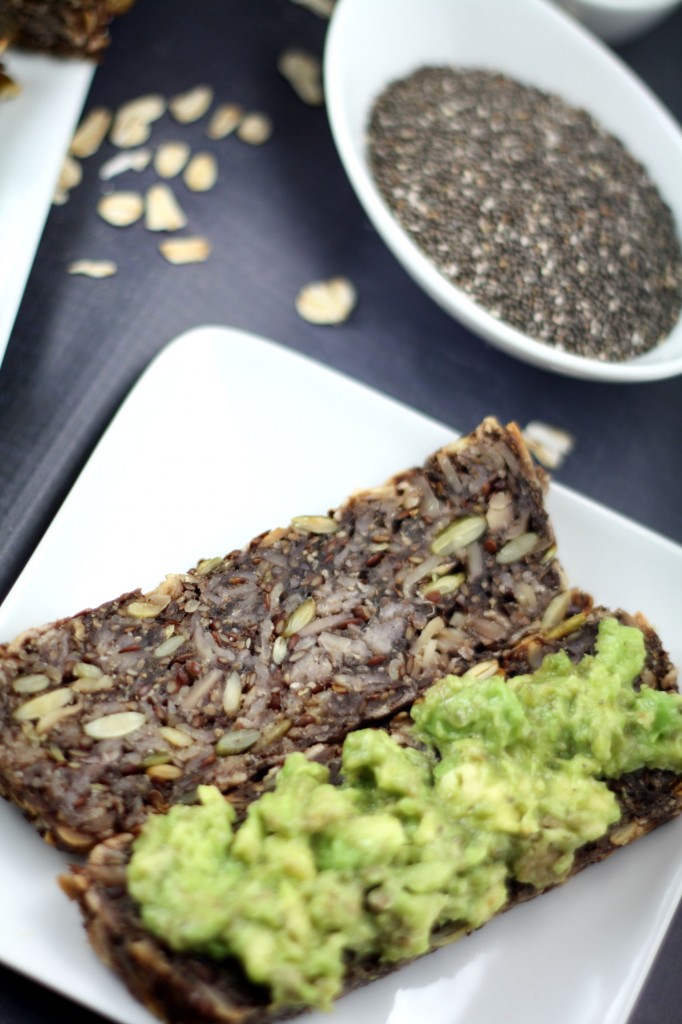
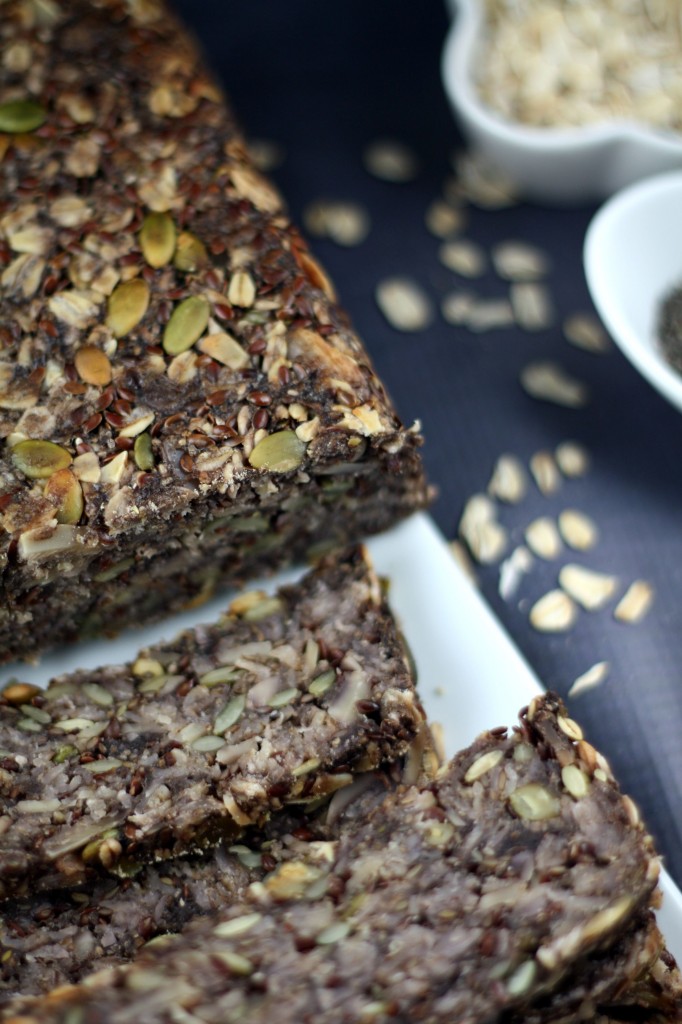
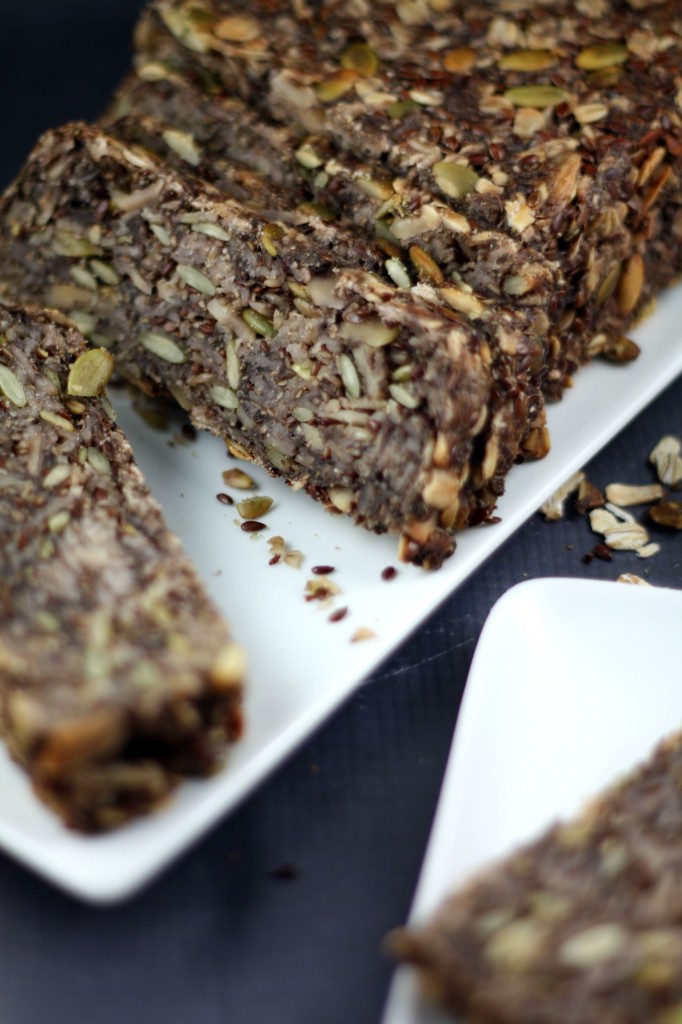
I got very excited to see a healthy recipe this time in the Daring Baker’s Challenge. A nutritious Seed and Nut loaf which also happens to be gluten-free.

For the August challenge Susan from The Kiwi Cook dared us to make Seed & Nut Loaf – a super healthy and gluten free alternative to standard wheat based bread.
seed 5
Some notes from Susan - The psyllium hulls is the ingredient that binds the loaf together in the absence of flour. If you have a nut allergy, you could make the loaf exclusively seeds. If you use ground flax seeds instead of whole, you will need to add more water to the mix. Oats are inherently gluten free, however they can be cross contaminated with wheat products. If you are gluten-sensitive, ensure your oats are certified gluten free. Buckwheat or spelt flakes make a good alternative. While you can use any nut you prefer, it’s best to chop them fairly finely; if the nuts are too big, it’s harder for the loaf to hold together around them and you might end up with a very crumbly loaf. I find sliced almonds work really well. A silicon loaf pan is ideal for this recipe, as you can check whether the loaf is holding together before removing it from the pan. While I have used a nonstick pan successfully, once or twice some of the mixture has stuck in the pan when I’ve inverted the loaf as such, if you don’t own a silicon pan, It’s important that you line the pan with baking paper, then peel the paper off once you extract the loaf from the pan prior to baking it further. While the idea is that you can mix all the ingredients in the loaf pan itself, I found it easier (and less messy) to combine the wet and dry ingredients in a large bowl, before transferring it to the loaf pan. While you can ‘rest’ the mixture for a minimum of 2 hours, she recommends resting it overnight as it sets up much more firmly and is easier to extract from the pan during baking. All that soaking also ensures optimal nutrition and digestion.
seed 7
Recipe Source - www.mynewroots.org

Gluten – free Seed & Nut Loaf – Daring Baker’s August 2015 Challenge

Ingredients

  • 1 cup sunflower seeds
  • ½ cup flax seeds
  • ½ cup sliced almonds (or whatever nut you prefer)
  • 1½ cups gluten free rolled oats (or try buckwheat flakes or rolled spelt flakes)
  • 2 tablespoon chia seeds
  • 4 tablespoon psyllium seed husks (3 tablespoons if using psyllium husk powder)
  • 1 teaspoon fine grain sea salt (it’s fine to reduce this if you prefer)
  • 1 tablespoon pure maple syrup (or liquid honey; for sugar free diets, use a pinch of stevia)
  • 3 tablespoons coconut oil or ghee, melted
  • 1½ cups water

Instructions

In a standard sized silicone, nonstick, or greased and lined loaf pan, combine all the dry ingredients It’s easier and less messy to combine in a large bowl first. Whisk maple syrup, oil and water together in a separate bowl. Add mixture to the dry ingredients and combine until everything is completely soaked and dough becomes very thick (while the mixture will be wet, there should be no excess liquid).Transfer the mixture to the loaf pan and smooth the top with a spatula. Cover the pan lightly with plastic wrap and let it sit at room temperature for at least 2 hours or overnight. The

mixture should feel very firm to the touch. Preheat oven to moderate 350°F.Then bake bread initially for 20 minutes. Take the loaf out of the oven, place a wire rack over top and invert to remove the bread (if you’ve lined the loaf tin, you should remove the lining at this point). Put the now inverted loaf on its wire rack into the oven again and bake for another 30-40 minutes (it should sound hollow when tapped). The loaf should be starting to brown on the outside - this gives a lovely nutty crunch to the finished loaf. Let the loaf cool completely before slicing.

http://www.thefoodielovers.com/2015/08/gluten-free-seed-nut-loaf-daring-bakers-august-2015-challenge/

Using a fine serrated knife for slicing worked better than a typical bread knife with its more exaggerated serrated edge, which made for a very crumbly slice. You can store the loaf in an airtight container (or wrap it in plastic wrap) for up to 5 days. You can also freeze it for at least 3 months (it helps to slice it first before freezing so you can enjoy that occasional piece of toast!)

This ‘bread’ makes fabulous toast! Toasted with almond butter and slices of Banana or with some avocado is truly delicious!!!

Print
Recipe

patties 1
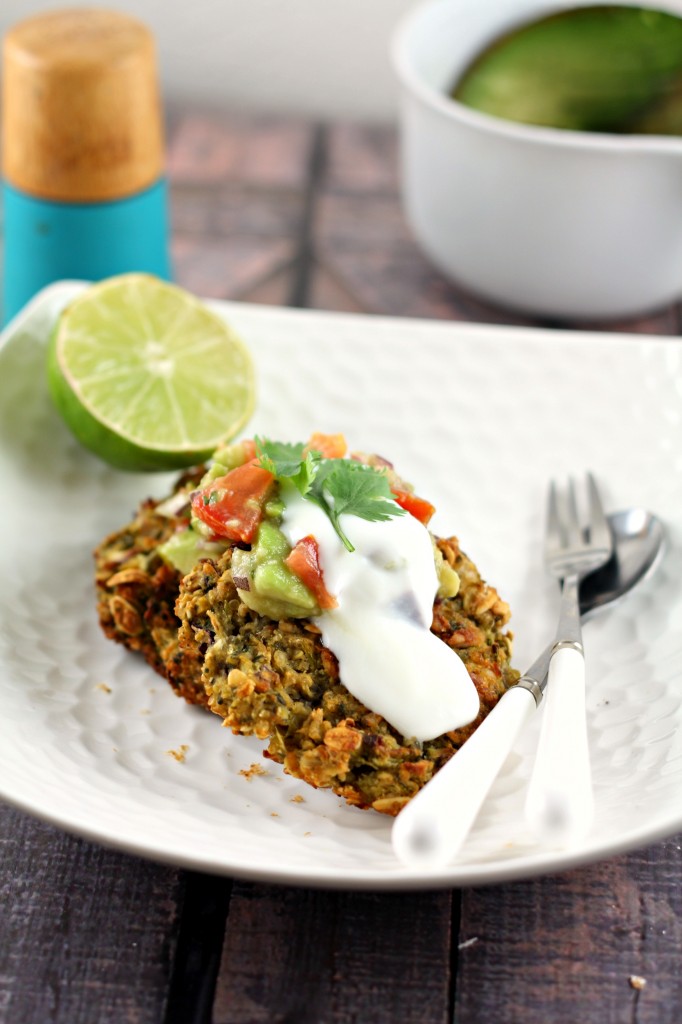
Nothing excites me more in summer than shopping in the Farmer’s market! The vibrantly colored produce… bundles of flowers…fresh greens …to tasting samples …to the baked goods smell. I just get carried away and always end up buying more than it’s required for our small family. The prices are reasonable and the quality of the products is far superior. I make sure to visit several markets even if it means driving across the town! Each of these markets has something unique to offer and is an experience in itself. During my last visit, I bought two large Zucchinis which were lying in the refrigerator for more than a week. I usually make Baked Zucchini fries or Roasted Veggies or Zucchini Chutney. As I enjoy mixing different things to create something tasty, this time around I decided to blend Quinoa and Zucchini and see what I could come up with.
patties 2
Of late we have been making a change in our daily habits to incorporate healthy food. We are trying our best to cut down on processed food as well. Embracing healthy habits has taught me lot about my limits and what I need to do about it. If I had to bake Zucchini Fries, I would have to use breadcrumbs and may be an egg( I know milk can be used instead:P). So there is the extra carbs from the bread -I would love to avoid. Roasted Zucchini - well how do I use Quinoa in this? So after enough deliberation I zeroed on these healthy Patties. I did not have Hamburger buns handy so just made simple patties and topped it with chunky guacamole and sour cream. This one made a perfect snack! I don’t claim this to be a low carb food, but less than 15 g of carb is not bad at all:)

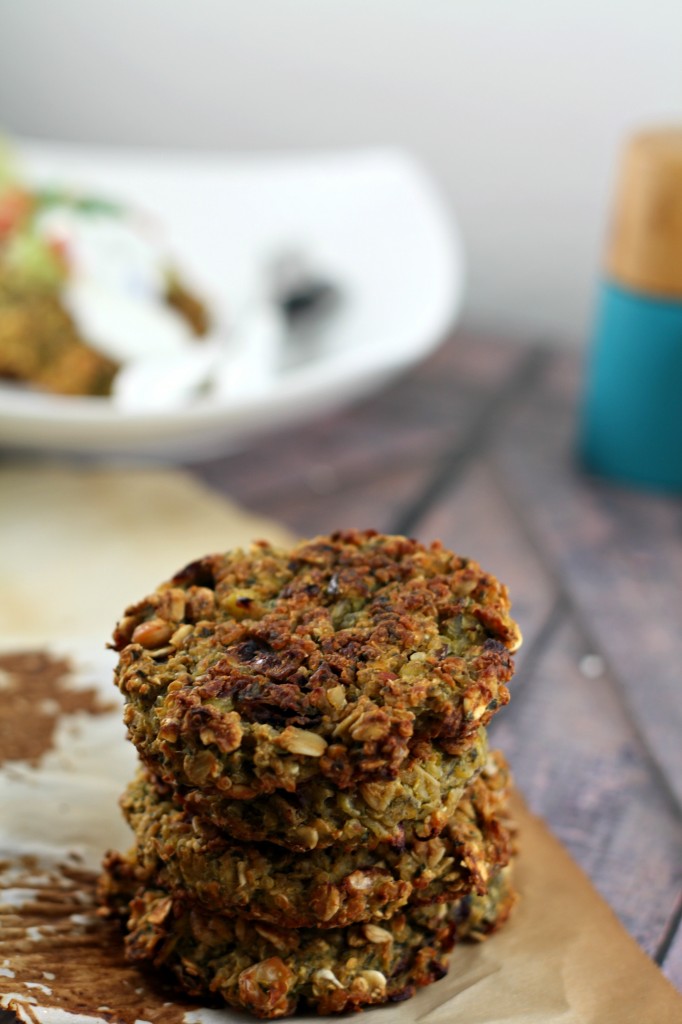
I grated Zucchini and squeezed it well to remove all the water. Added Quinoa, bell pepper,onion and a whole can of white beans to make it protein rich food(Kidney beans should work too). Since the mixture was mushy I added Chickpea flour but it was still too sticky. Ideally breadcrumbs could have done the job but I wanted to avoid it. So added a whole cup of rolled oats. Now I was able to shape them. It baked well…you may want to use just a drop of oil on top or simply use oil spray over the patties. On hindsight I should have powdered the oats, but would it be still crunchy?? Well I don’t know about it. Let me know if you’ve tried that. Here is how I made them:)

Baked – Quinoa and Oats Patties with White Beans

Yield: 15 patties

Calories per serving: 75cal each

A healthy snack made with Quinoa and White Beans along with vegetables!

Ingredients

  • 2 cups zucchini,grated
  • ¾ cup cooked quinoa
  • one 15oz organic white beans can(I used Northern White Beans from Trader Joe’s)
  • ½ cup sweet corn kernels
  • 1 small bell pepper, chopped
  • 1 Onion, chopped
  • ¾ cup chickpea flour
  • 1 cup rolled oats
  • 2 -3 thai green chillies , chopped
  • ¼ teaspoon black pepper
  • chat masala(optional)
  • Salt to taste
  • 1 teaspoon canola oil/oil spray
  • GUACAMOLE
  • 1 avacado, cut and flesh removed
  • ½ cup of red onions, chopped
  • 1 roma tomatoes,chopped
  • 1-2 jalapeno/green chillies, chopped
  • A tablespoon cilantro,chopped
  • 1/2 teaspoon Lemon juice
  • salt as needed
  • Light Sour cream for garnishing

Instructions

Squeeze all the water from the grated Zucchini. Rinse and drain the canned beans; mash it with a fork. Add the remaining ingredients(excluding the oil) and shape them into small balls; flatten them. Place it on a baking sheet and refrigerate for about an hour. It should be a little hard.( I like to freeze it for about 30 mins)

Preheat oven at 375F. Add just a drop of oil/use an oil spray on each patty and rub it gently on the top. Bake until golden brown and crispy.( Flip halfway through). It might take about 35-40 mins.

To make the Chunky Guacamole – Mix all the ingredients. Mash them using a fork.

To Serve – Place two patties on a plate, top it with some guacamole and sour cream. Enjoy!

http://www.thefoodielovers.com/2014/09/baked-quinoa-and-oats-patties-with-white-beans/

My husband usually believes tasty food and healthy food are mutually exclusive! So the minute I told him I baked them and it’s healthy, he didn’t seem excited. I persuaded him to try some and guess what??? he ended up asking for an extra serving:). I felt good to prove that his theory was wrong! Each patty contains about 75 cal; 13g carb;1g fat;4g protein.

These are crunchy and best when it’s right out of the oven and definitely fills you up. Just the patty taste fine, but the topping gives it a nice kick..so don’t miss out on that!

Enjoy!

Nina

Related Posts Plugin for WordPress, Blogger...

COPYRIGHT

MyFreeCopyright.com Registered & Protected

FAVORITE POST

Povitica Bread

Povitica - An East European Bread

Photobucket
BFS-logo
Proud member of FoodBlogs
my foodgawker gallery
Manage your shopping list and search for recipes from across the web at ZipList.com

SOCIAL MEDIA

ARCHIVES

Blogroll