Category Archives: Herb

Print
Recipe

Mawa Cake 1 main

Aparna of My Diverse Kitchen was our August 2013 Daring Bakers’ hostess and she challenged us to make some amazing regional Indian desserts. The Mawa Cake, the Bolinhas de Coco cookies and the Masala cookies – beautifully spiced and delicious!

I was really kicked about the Mawa Cake and worked on it as soon as I read the post. In a hurry I ended making a stupid mistake. I read 4 cups of milk as 4 litres of milk(that was alot of MILK!!!). Mawa requires patience and lot of stirring. Mine took almost 3-4 hrs; that’s when I felt something was wrong;logged into the DBC site to check and that’s when I realized how dumb I was!!!.Now that I was left with a huge batch of Mawa,I saved up a cup for the cake and added a little sugar to the remaining. Mixed it well and made small flat disc and refrigerated it for sometime. These are called Pedas and they make agreat dessert. But yes…not to forget they are made with whole milk so very very HIGH in calories.
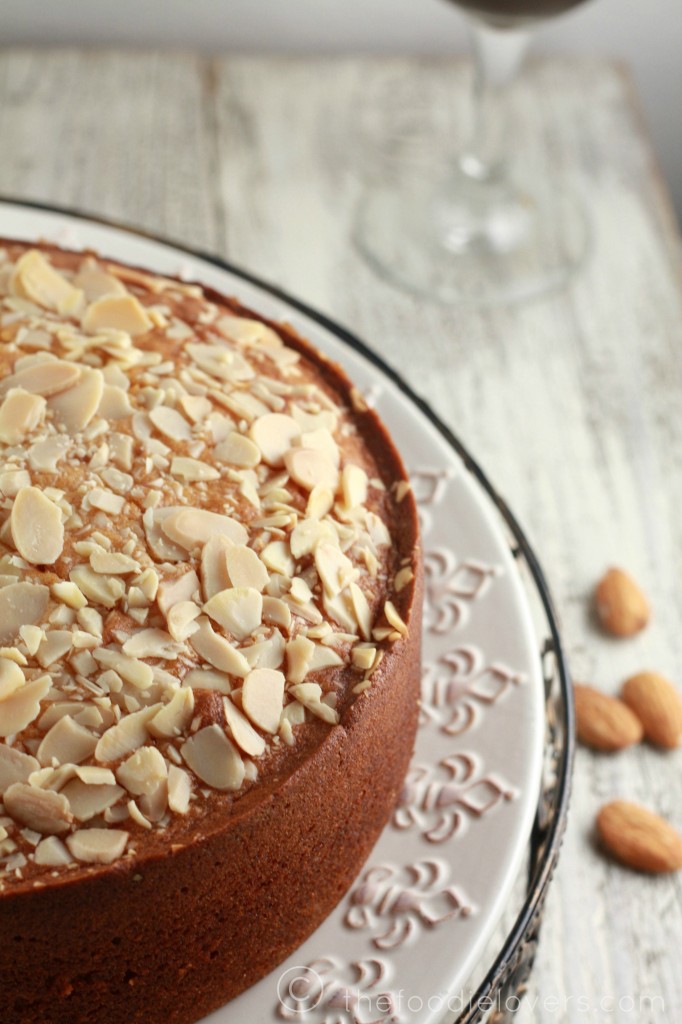
Mawa Cake 2 main Mawa Cakes are a speciality cake that is the hallmark of Irani cafe’s in India. Mawa (also known as Khoya/ Khoa) is made by slowly reducing milk (usually full-fat) until all that remain is a mass of slightly caramelized granular dough-like milk solids. Mawa is used in a wide variety of Indian sweets like Gulab Jamun and Peda, to mention just two. Mawa is pronounced as Maa-vaa; Khoya is pronounced as KhOh-yaa.
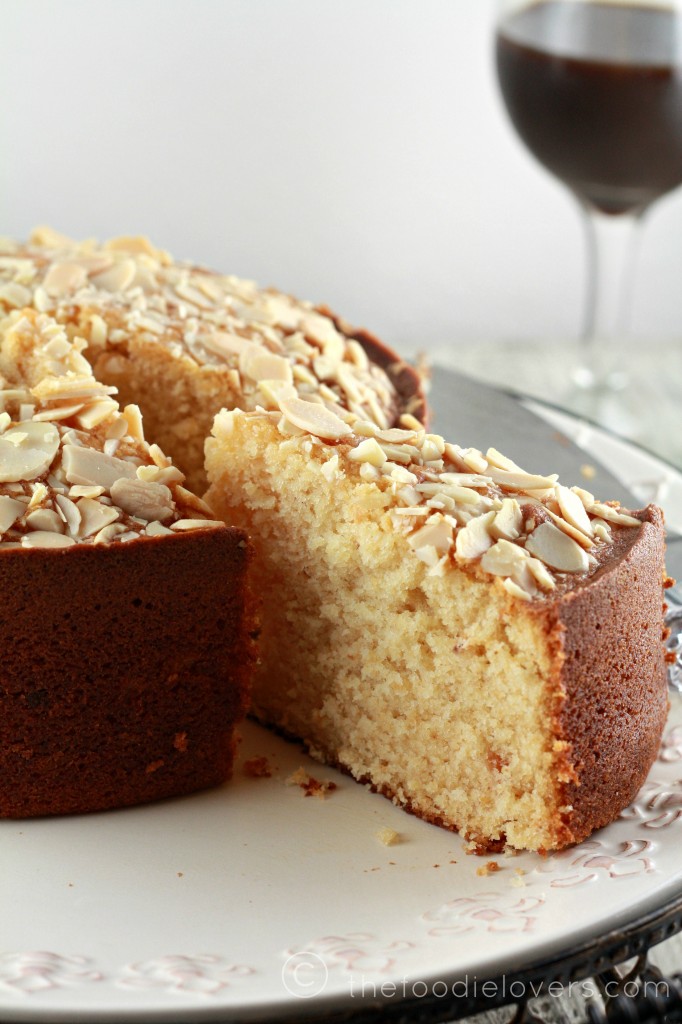
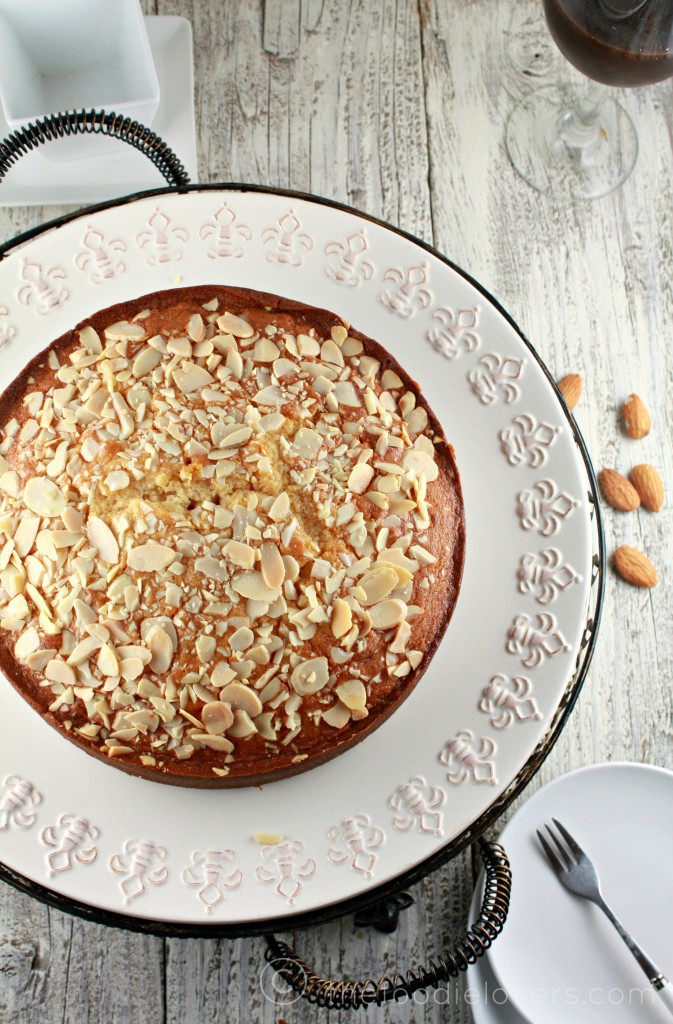
Mawa Cake 3 main In this cake, Mawa lends a rich and a caramelized milky taste to this cake which is slightly dense and reminiscent of a pound cake. Cardamom and cashewnuts are typical of a Mawa Cake; but almonds can be used too. I had a whole pack of blanched sliced almonds from Trader Joe’s that came into use. The batter can be used to make Cupcakes as well. They were totally moist and the cardamom flavor was to die for. Even my little enjoyed this cake. Masala Cookies 2 main
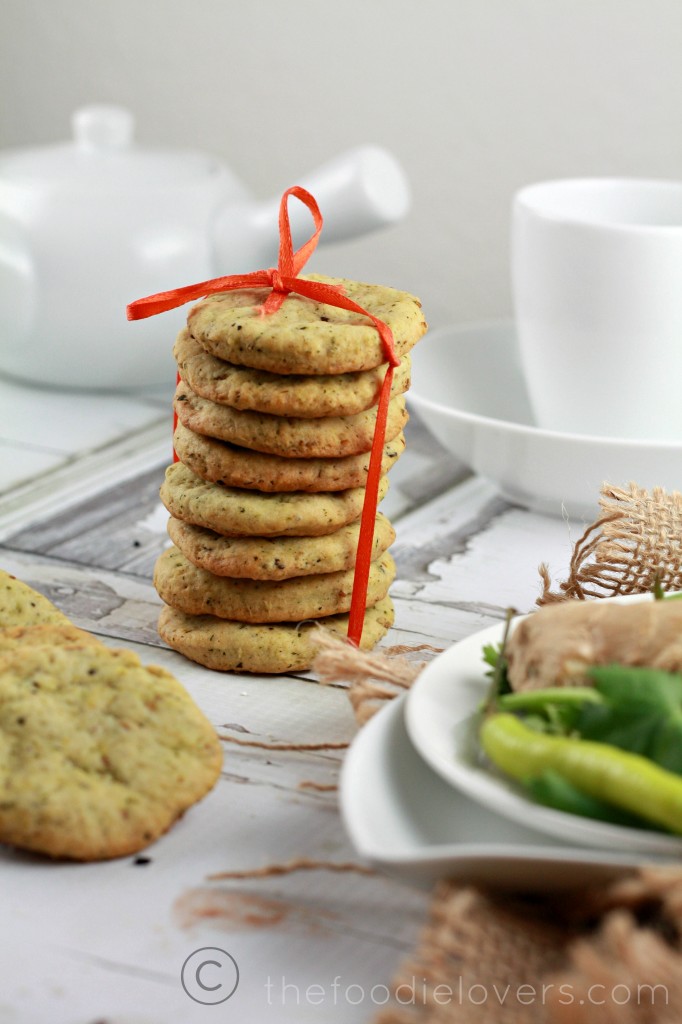
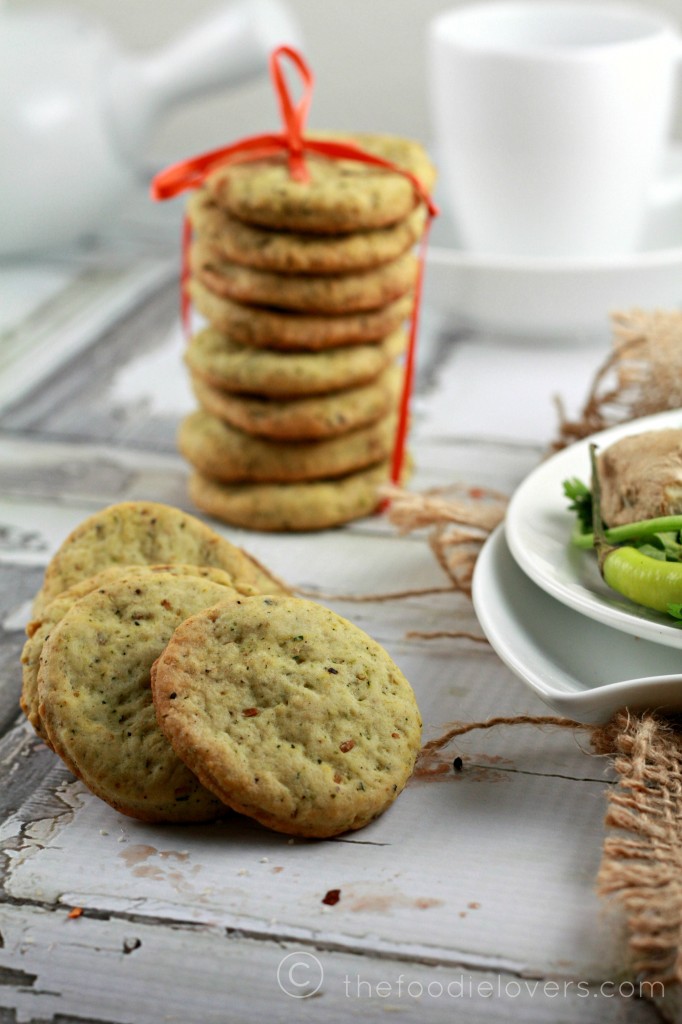
Masala cookies are something that features very often at home. So these were not something new; however I just baked them with the flavors I like.The word Masala means “Spice Mix”, they are savory and spicy Indian snack. These were quite spicy because of the chilies and pepper that went into them. They are loaded with flavors and are super crunchy on the outside;soft and flaky in the inside. I used Mint and Dill leaves which added a zing to the cookies. Masala Cookies 1 main I made the Mawa two days ahead of time and stored it in an airtight container in the refrigerator. Allow it to come to room temperature before you make the cake. Instead of cardamom you may choose to use nutmeg also.For the Masala cookies I didn’t have curry leaves handy; Cilantro,Dill and Mint leaves did their flavoring magic:)
Mawa Cake

Serving Size: Makes One 8 inch Cake

Ingredients

  • For the Mawa:
  • 1 litre (4 cups) full fat milk
  • For the cake:
  • 1/2 cup unsalted Butter (soft at room temperature)
  • 3/4 cup packed crumbled mawa
  • 1-1/4 cups castor sugar
  • 3 large eggs
  • 5 to 6 cardamom pods, powdered, (about 1-1/2 tsp powdered cardamom)
  • 2 cups cake flour
  • 1 teaspoon baking powder
  • 1/4 teaspoon salt
  • 1/2 cup milk
  • 1 teaspoon vanilla extract (optional)
  • Blanched Sliced Almonds / Cashewnuts to decorate

Instructions

First make the “Mawa”. Pour the milk into a heavy bottomed saucepan, preferably a non-stick one. Bring the milk to a boil, stirring it on and off, making sure it doesn’t stick to the bottom.

Turn down the heat to medium and keep cooking the milk until reduces to about a quarter of its original volume. This should take about an hour to an hour and a half.

The important thing during this process is to watch the milk and stir it frequently to make sure it doesn’t stick to the sides or bottom of the pan and get burnt. The danger of this happening increases as the milk reduces and gets thicker.

Once the milk it has reduced to about one fourth, 1/4 quantity, lower the heat to low and let cook for a little while longer. Keep stirring regularly, until the milk solids (mawa) take on a lumpy appearance. There should be no visible liquid left in the pan, but the mawa should be moist and not stick to the sides of the pan.

Remove the pan from heat and transfer the mawa to a bowl and let it cool completely. Then cover and refrigerate it for a day or two (not more) till you’re ready to make the cake. It will harden in the fridge so let it come to room temperature before using it.You should get about 3/4 to 1 cup of mawa from 1 litre (4 cups) of full-fat milk.

Now start preparations for the cake by pre-heating your oven to moderate 350°F . Beat the butter, the crumbled mawa and the sugar in a largish bowl, using a hand held electric beater, on high speed until soft and fluffy.

Add the eggs, one at a time, and beat on medium speed till well incorporated. Add the vanilla and milk and beat till mixed well.

Sift the cake flour, baking powder, cardamom, and salt onto the batter and beat at medium speed and well blended. If you cannot find cake flour, place 2 tablespoon of cornstarch in the bottom of your 1-cup measure and then fill it with all-purpose (plain) flour to make up to 1 cup.

Grease and line only the bottom of an 8 inch (20 cm) spring form pan. Pour the batter into this and lightly smooth the top. Place the cashew nuts (or blanched almonds) on top of the batter randomly. Do not press the nuts down into the batter. A Mawa Cake always has a rustic finished look rather than a decorated look.

Bake in a preheated moderate oven for about 1 hour until the cake is a golden brown and a skewer pushed into the centre comes out clean. Do not over bake the cake or it will dry out. If the cake seems to be browning too quickly, cover it will aluminium foil hallway through the baking time.

Remove from oven and allow it to cool for 10 min in the tin. Release the cake, peel off the parchment from the base and let it cool completely.

http://www.thefoodielovers.com/2013/09/mawa-cake-and-masala-herb-cookies-daring-bakers-august13-challenge/

Masala Herb Cookies

Yield: Makes 2 1/2 dozen cookies

Ingredients

  • 1-3/4 cup all-purpose (plain) flour
  • 2 tablespoons fine white or brown rice flour (optional)
  • 1 teaspoon baking powder
  • 1/4 teaspoon baking soda
  • 1/2 teaspoon salt (or according to your taste)
  • 1/2 cup chilled butter, cut into small pieces
  • 3 green chillies, deseeded and chopped
  • 3/4 inch piece of ginger, finely grated
  • 1-1/2 teaspoon whole peppercorn, crushed coarsely
  • 1-1/2 teaspoon cumin seeds, toasted and crushed coarsely
  • 1 tablespoon granulated sugar
  • 1-1/2 tablespoons finely chopped curry leaves
  • 1 tablespoon each finely chopped fresh cilantro,mint and dill leaves
  • 3 to 4 tablespoons cold yogurt
  • A little oil to brush the tops of the biscuits/ cookies

Instructions

Put both flours, salt, baking powder and baking soda into the bowl of a food processor and add the pieces of chilled butter. Pulse until the mixture takes on the texture of breadcrumbs.

Now add the chopped green chillies, finely grated ginger, crushed peppercorn and cumin, sugar, the chopped curry leaves and coriander leaves. Pulse a couple of times to mix well.

Then add 2 tablespoons of yogurt and pulse again. Add one more tbsp of yogurt (or two, as much as needed), and pulse again until the dough just comes together and clumps together. You want a moist dough, not a wet one – somewhat like pie dough.

Do not over process or knead. The dough should be just moist enough for you to use your hands and bring everything together to shape into a ball. Flatten it into a disc and cover the dough with plastic wrap and let it rest in the refrigerator for at least hour. You can also leave it overnight (up to about 24 hours) and work on it the next day.

Pre-heat your oven to moderate 350°F and line your baking trays with parchment or grease them with oil.

Lightly dust your working surface and roll out the dough to 1/8”(3 mm) thickness, not more or your biscuits/ cookies will not be crisp. If using Sesame seeds, sprinkle it uniformly over the dough and use your rolling pin, very lightly, to press them in.Using cutters of your choice (about 2-1/4 inch in size), cut out biscuits/ cookies and place them on lightly greased baking trays. Brush a very thin coat of oil over them. This will help them brown while baking. Bake them in a preheated moderate oven for about 20 to 25 minutes or till they’re done and golden brown on the top. Remember the baking time will depend on the thickness and shape of your biscuits/ cookies. Let them cool on the trays for about 5 minutes and then cool them on racks. Once they’re completely cool, they should be a bit crunchy and not chewy.

http://www.thefoodielovers.com/2013/09/mawa-cake-and-masala-herb-cookies-daring-bakers-august13-challenge/

Note - I was traveling so posting very late. Its better late than never:)

Bon Appétit
Nina

Print
Recipe

Hokkaido Bread 1 main

I have been absconding from the blogging world for over a month now. We were busy moving and with all the packing, unpacking and setting up, things were just crazy. My little one kept removing everything I packed, making me rework multiple times. I had a tough time packing her toys…she was so mad at me. Guess it is part of the “terrible two” phase. Anyways, we are limping back to normalcy. I did start baking last week, but couldn’t post anything because of my laziness rather tiredness. It is the 24th of the month and is time for Aparna’s “We need to Bake”. This month Aparna shared yet another classic recipe – Hokkaido Milk Bread. I had never heard about this bread and was very intrigued with the method used. I must admit it was one of the best bread I’ve ever baked…super soft texture with a milky taste making it just perfect!

Hokkaido bread 2 main

Hokkaido Milk Bread also known as Asian Sweet Bread and Hong Kong Pai Bo, is known for its soft cottony/ pillowy texture.I believe it’s a very popular bread in South Asian bakeries across the world. It is The Hokkaido Mild Bread owes its texture and height to the use of an interesting ingredient called Tangzhong.The Tangzhong method involves cooking 1 part of bread flour with 5 parts of water (by weight) at 149 °F to form a roux. When the Tangzhong is added into other ingredients of a bread dough, it produces light, tender and fluffier bread.

This method of using Tangzhong is often seen in South Asian breads and was created by a Chinese woman, Yvonne Chen, who describes this method in her book which translates to “65 degrees Bread Doctor” .The Hokkaido Milk Bread is very easy to make. First you make a Tangzhong (flour-water roux, and milk in this case) and then let it cool completely. You can use it after a 2 hour rest. It also keeps for a day or so refrigerated.

Haikado Buns 1 main

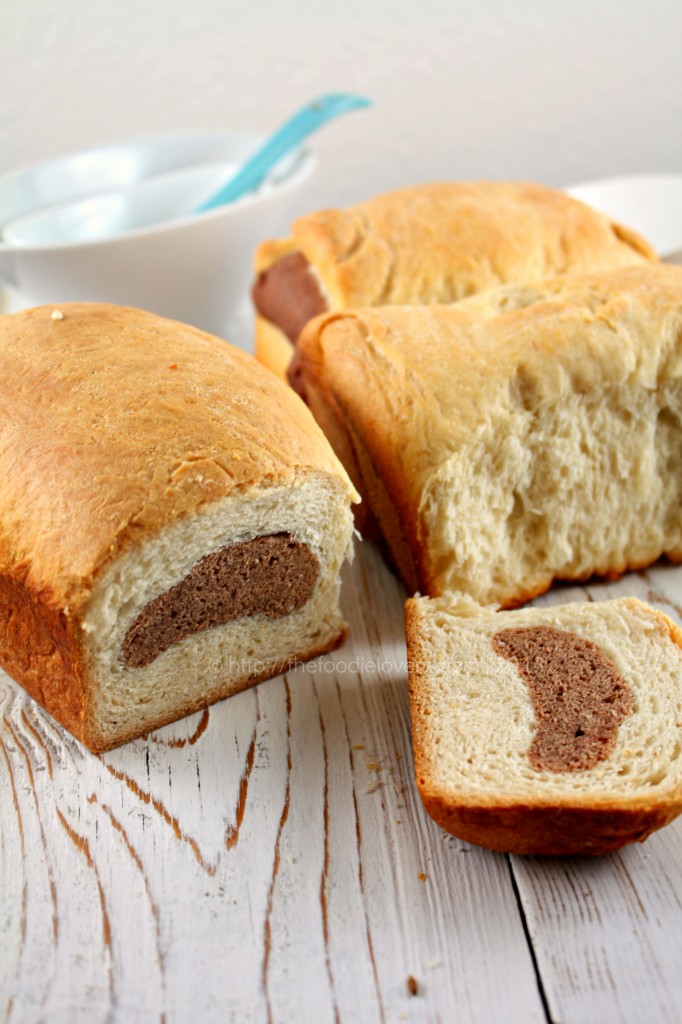
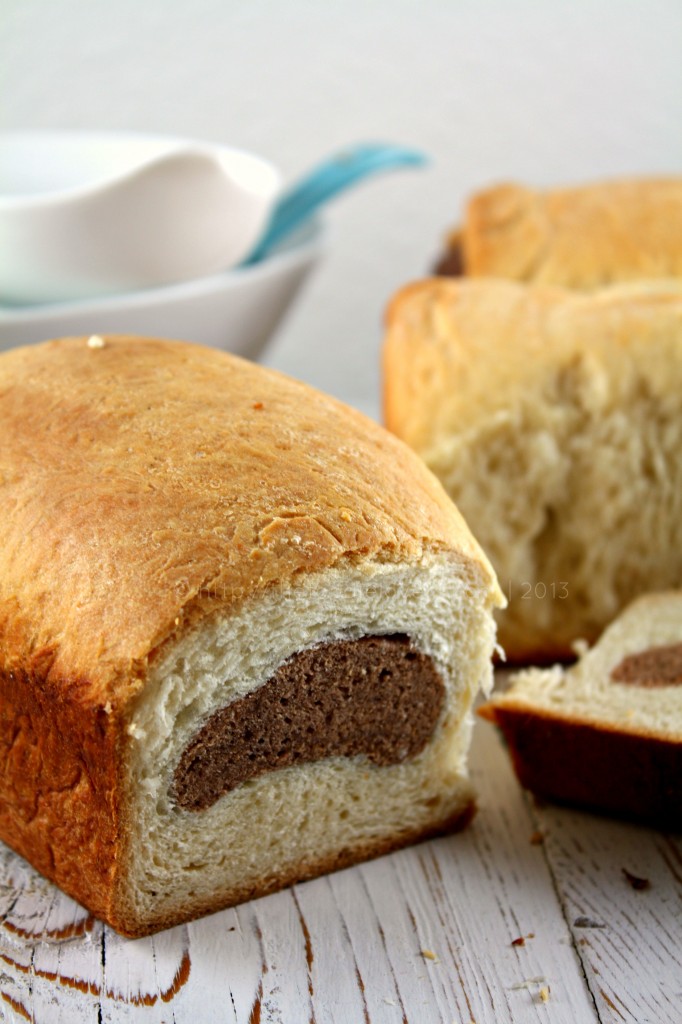
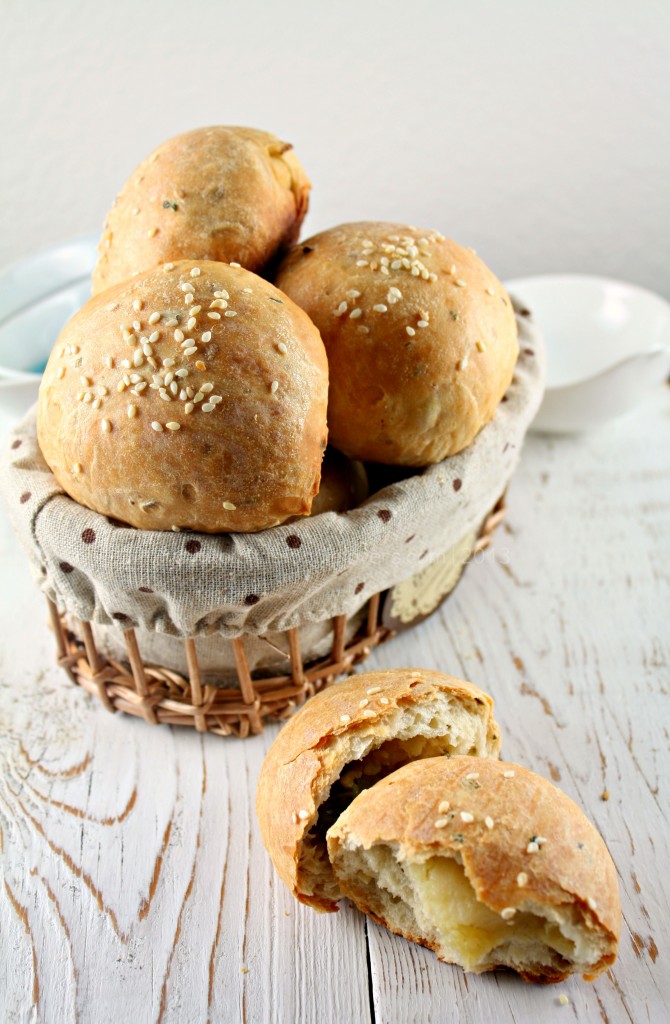
You can make both Sweet or Savoury ones with the same recipe. If you want to make a savoury version, you can cut down the sugar to 1 tbsp and add another 1/4 tsp of salt. I baked two different kinds of bread the same day. For the sweet version - a Chocolate Marble Hokkaido Bread (9×5 loaf) and for the savoury – Spiced Hokkaido Rolls with Potato filling. The original recipe was adapted from here.

CHOCOLATE MARBLE HOKKAIDO BREAD AND SPICED HOKKAIDO ROLLS WITH POTATO FILLING

Ingredients:
For The Tangzhong (Flour-Water Roux)

1/3 cup all-purpose flour
1/2 cup water
1/2 cup milk

For The Dough:

2 1/2 cups all-purpose flour
3 tablespoon sugar ( reduce for the savoury ones)
1 teaspoon salt
2 tablespoon powdered milk
2 teaspoon instant dried yeast
1/2 cup milk (and a little more if needed)
1/8 cup cream
1/3 cup tangzhong (use HALF of the tangzhong from above)
25gm unsalted butter (cut into small pieces, softened at room temperature)

Apart from the above, for the Sweet version you’ll need:
1/3 cup chocolate chips
2 tablespoon all- purpose flour
a pinch of cinnamon, powdered

Savoury version ( for the dough):
1 teaspoon cumin seeds
½ teaspoon caraway seeds
2-3 cloves of garlic, minced
2 tablespoon cilantro,chopped
2-3 green chillies, minced

Potato Filling :
2 large Potatoes,cooked, peeled and mashed
¼ cup frozen peas
2 teaspoon olive oil
¼ teaspoon cumin seeds
¼ teaspoon cayenne pepper/chili powder
Salt as per taste

Directions:The Tangzhong(Flour-Water Roux):

Whisk together lightly the flour, water and milk in a saucepan until smooth and there are no lumps. Place the saucepan on the stove, and over medium heat, let the roux cook till it starts thickening. Keep stirring/ whisking constantly so no lumps form and the roux is smooth.
If you have a thermometer, cook the roux/ tangzhong till it reaches 150F and take it off the heat. If you don’t have a thermometer, then watch the roux/ tangzhong until you start seeing “lines” forming in the roux/ tangzhong as you whisk/ stir it. Take the pan off the heat at this point.
Let the roux/ tangzhong cool completely and rest for about 2 to 3 hours at least. It will have the consistency of a soft and creamy crème patisserie. If not using immediately, transfer the roux to a bowl and cover using plastic wrap. It can be stored in the fridge for about a day. Discard the tangzhong after that.

Chocolate Marble Bread Dough:

1. In the bowl of the stand mixer, put the flour, salt, sugar, powdered milk and instant yeast and pulse a couple of times to mix. In another small bowl mix the milk, cream and Tangzhong till smooth and add to the processor bowl. Run on slow speed until the dough comes together. Now add the butter and process till you have smooth and elastic dough which is just short of sticky. Remove 1/3rd of the mixture and keep it aside.
2. The dough will start out sticky but kneading will make it smooth. If the dough feels firm and not soft to touch, add a couple of teaspoons of milk till it becomes soft and elastic. When the dough is done, you should be able to stretch the dough without it breaking right away. When it does break, the break should be form a circle.
3. Form the dough into a ball and place it in a well-oiled bowl turning it so it is well coated. Cover with a towel, and let the dough rise for about 45 minutes or till almost double in volume.
4. Now for the chocolate part of it, melt the chocolate chips and allow it to cool down. Mix it with ¼ cup milk and cinnamon powder. Pour it to the 1/3 rd mixture (which is set aside from step 1). You may need about 2 tablespoon of flour( add more if needed) to form a soft dough. Continue with step 2 and 3.
5. Place the dough on your working surface. You don’t need flour to work or shape this dough. This recipe makes enough dough to make one loaf (9” by 5” tin), 2 small loaves (6” by 4” tins) or 1 small loaf (6” by 4”) and 6 small rolls (muffin tins). Depending on what you are making, divide your dough. If you are making 1 loaf, divide your dough in 3 equal pieces. If you are making two smaller loaves, divide your dough into 6 equal pieces.
6. Roll out each portion of the dough with a rolling pin into an oval shape, about 1/8” thick. Take one end of the dough from the shorter side of the oval and fold it to the middle of the oval. Take the other end and fold so it slightly overlaps the other fold. Roll this folded dough with the rolling pin so the unfolded edges are stretched out to form a rectangle. Roll the rectangle from one short edge to the other, pinching the edges to seal well. Now repeat the above method for the chocolate dough. Place one on top of the plain one and fold the sides; try and roll it into a cylinder. (I wanted to make a Chocolate Spiral Bread, but couldn’t roll it well). Do this with each of the three larger pieces and place them, sealed edges down, in a well-oiled loaf tin. Cover with a towel and leave the dough to rise for about 45 minutes.

Savoury Rolls with Potato Filling:

Add the cumin seeds, caraway seeds, garlic and chillies at Step 1.(from above) and follow step 2 and 3.

Roll out each portion of the dough with a rolling pin into an oval shape, about 1/8” thick. Take one end of the dough from the shorter side of the oval and fold it to the middle of the oval. Take the other end and fold so it slightly overlaps the other fold. Roll this folded dough with the rolling pin so the unfolded edges are stretched out to form a rectangle. Roll the rectangle from one short edge to the other, pinching the edges to seal well. Place a small portion of the potato filling and bring the sides together and shape it into a roll. Place each roll of dough in a baking sheet and cover with a towel. Allow to rise for about 45 minutes.

Before working on the rolls make the filling. Heat oil in a pan, add cumin seeds and when it splutters add rest of the ingredients. Saute for two minutes; remove from heat and allow it to cool.

Carefully brush the tops of the rolls and the loaf with milk (or cream) and bake them at 325F for about 20 to 30 minutes till they are done (if you tap them they’ll sound hollow) and beautifully browned on top. Let them cool for about 5 minutes and then unmould and transfer to a rack till slightly warm or cool.

Serve or else store in a bread bin. This bread stays soft and delicious even the next day. We enjoyed each and every bite of the bread. From the left overs, I made an Eggless Bread Pudding which was delicious too.

Thank you Aparna for sharing a great recipe

So far in “We need to Bake”

Herbed and Cheese Pull-Apart Bread with Sundried Tomatoes
Croissant

Bon Appétit

Nina

Print
Recipe

HB 2 main

I am sure each of us has one or the other food craving? Isn’t it? There are times when I have the most irresistible urge to try out something and would probably go mad if I can’t have it! I still recall vividly during my initial stages of pregnancy when I had a sudden craving for Arby’s curly fries and I had to send my husband late in the night to get it for me! Similarly I had this sudden craving for Dipping dots Ice Cream in the middle of a night! I had them at Wisconsin Dells for some for the first time which is like 3 hours drive from the place where I live and I couldn’t possible send my husband to get it this time:). Hence I googled up and got a nearby address where these ice-creams where were sold. Along with a few friends we went in the middle of the night, only to land at a local theater’s vending machine. I couldn’t stop laughing!!! Ahh such is my craving.

HB 3 main

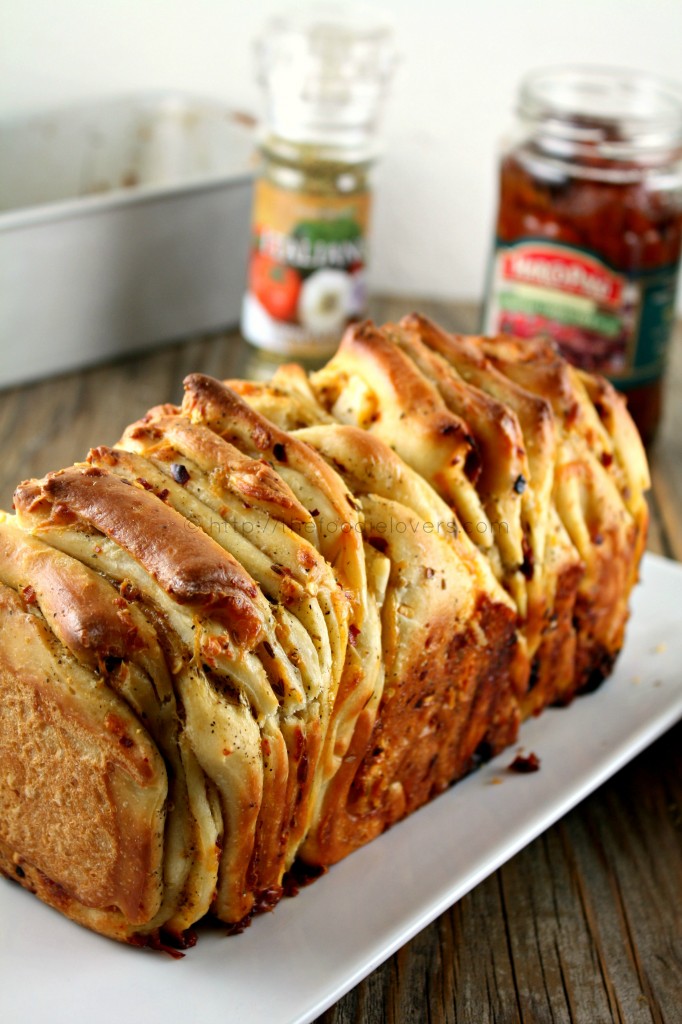
On the same note, Pull - Apart Bread has been on my mind for some time now. I was longing for some savory bread and I HAD TO - HAD TO bake something and this was the first thing that struck me. So I baked a Whole Wheat Pull-Apart Bread with some garlic butter spread. My husband said it was too garlicky and didn’t like it much( he hates garlic!!!).Though I loved it, it was a little hard. So I started browsing to find a good recipe.

HB 5 main

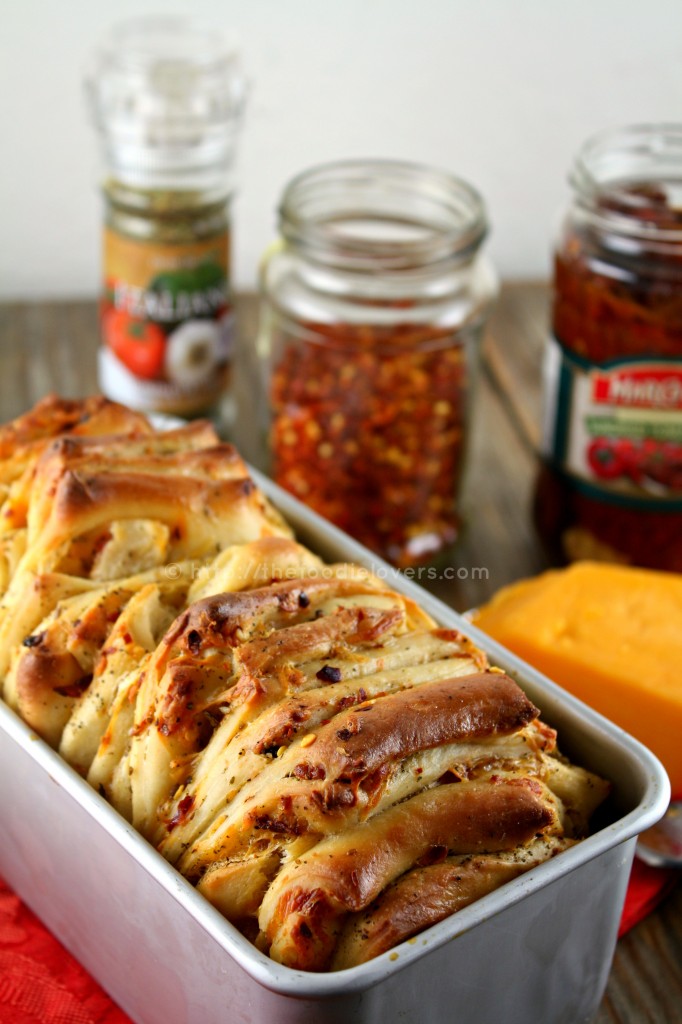
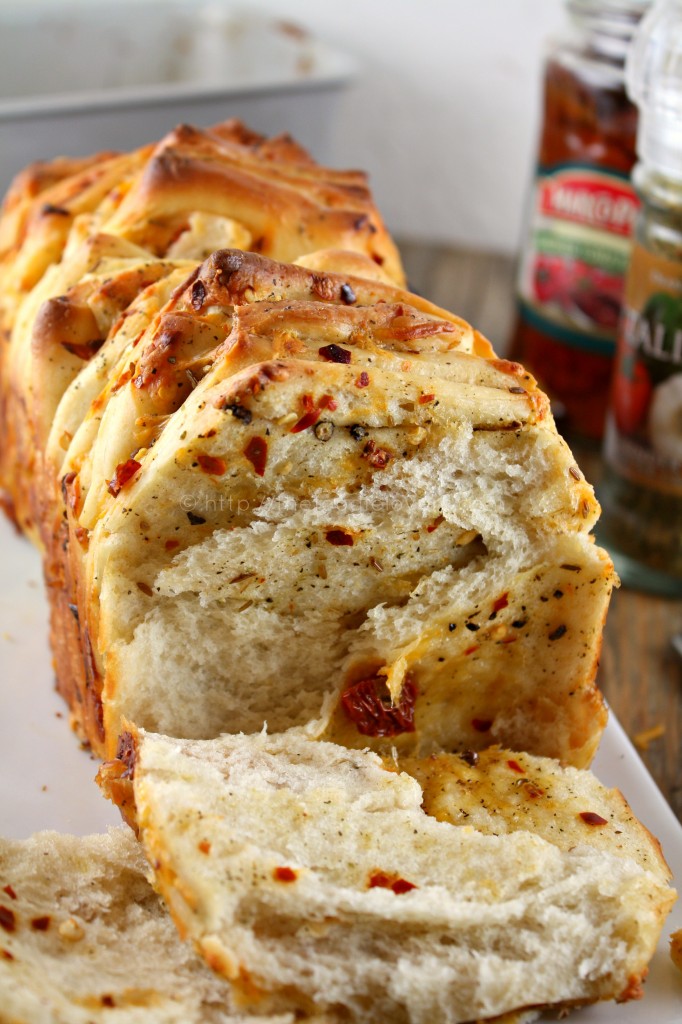
To my surprise, every other blog I stumbled upon had posted about this bread. All the blogs lead to Aparna’s “We need to Bake “ group. That’s when I hoped onto Aparna’s beautiful blog and read the details and was keen to participate. I immediately wrote to her and she was kind enough to add me and asked me to bake the bread and post it by end of this month. In addition to her recipe I added some sun dried tomatoes. So here is my bread for your eyes.

HERB AND CHEESE PULL- APART BREAD WITH SUN DRIED TOMATOES
Makes one loaf ( 9 x 4 or 5)
Ingredients:

For the Dough:
1/2 cup warm milk
1 teaspoon sugar
2 teaspon active dry yeast
2 3/4 to 3 cups all-purpose flour
1 teaspoon salt
2 tablespoon butter,room temperature
3/4 teaspoon garlic paste
3/4 cup milk (+ a couple of tablespoon to brush over the bread)

For the Filling:
1 tablespoon butter,melted
2 teaspoon dried italian herbs
1 teaspoon cumin seeds,crushed
Crushed pepper and red chilli flakes, to taste
1/2 cup grated cheddar cheese
2 tablespoon chopped sundried tomatoes

Directions:

In a small bowl, dissolve the sugar and the yeast in the 1/2 cup of warm milk. Keep aside for about 5 minutes till the yeast mixture bubbles up. In the bowl of a stand mixer( Kitchenaid) Put 2 ¾ cup of flour, salt, softened butter, and garlic paste and stir a couple of times to mix. Then add the yeast mixture and the ¾ cup of milk and knead till you have a soft, smooth and elastic/ pliable dough which is not sticky. Add a little extra flour if your dough is sticking, but only just as much as is necessary. I didn’t use up the entire milk, also didn’t have the need to add more flour.

Shape the dough into a ball and place it in a well-oiled bowl, turning the dough to coat it completely with oil. Cover and let it rise for about 1 to 1 ½ hours or until almost double in volume. Dust your work surface lightly with flour. Deflate the dough, shape it into a square and roll the dough out into a larger square that is about 12’ by 12”. Brush the surface of the square with the melted butter. Evenly sprinkle the herbs, pepper/ chili flakes and the cumin seeds and then the grated cheese. Use a rolling pin to very lightly press the topping into the dough to ensure the topping doesn’t fall off when you are stacking the strips. Using a pizza cutter, slice the dough from top to bottom into 6 long and even strips – they do not have to be perfect. Lay each strip on top of the next, with the topping facing upwards, until you have a stack of the strips
You can put the 2 strips cut from the sides in the middle of the stack so it looks neater. Using a pastry scraper or a sharp knife, cut straight down through the stack dividing it into 6 equal pieces (6 square stacks). Grease and lightly flour a 9” by 4” (or 5”) loaf tin. {I used a (7.75x 4.75)}. Butter and lightly flour the loaf pan. Layer the square slices, cut sides down into the loaf tin. Cover the loaf tin dough with a towel and allow the dough to rise for an hour. Lightly brush some milk over the top of the loaf. Bake the dough 350F for about 30 to 40 minutes until it is done and the top is golden brown.

The bread was fantastic, both in terms of look and taste. It was very flavorful. As the name suggest you have to PULL the Bread apart: you don’t need a knife. I am so glad that I joined this group, this will keep me going.

Thanks Aparna for the lovely recipe:)

Roxana of Roxana’s Home Baking asked me to send this to her “Bake your own Bread” event and I was happy to do so:). Thanks a bunch Roxana:)

Bon Apetit!

Nina

Related Posts Plugin for WordPress, Blogger...

COPYRIGHT

MyFreeCopyright.com Registered & Protected

FAVORITE POST

Povitica Bread

Povitica - An East European Bread

Photobucket
BFS-logo
Proud member of FoodBlogs
my foodgawker gallery
Manage your shopping list and search for recipes from across the web at ZipList.com

SOCIAL MEDIA

ARCHIVES

Blogroll