Category Archives: Vegetables

Print
Recipe

gOBI 1
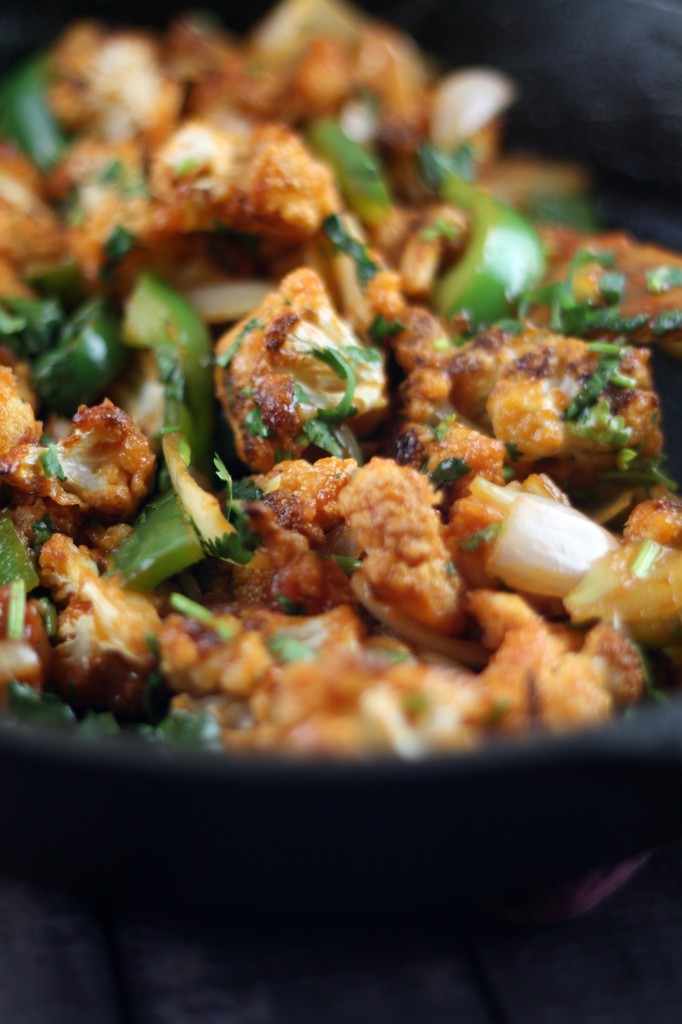
Learn how to make Gobi Manchoorian/ Gobi Manchoori

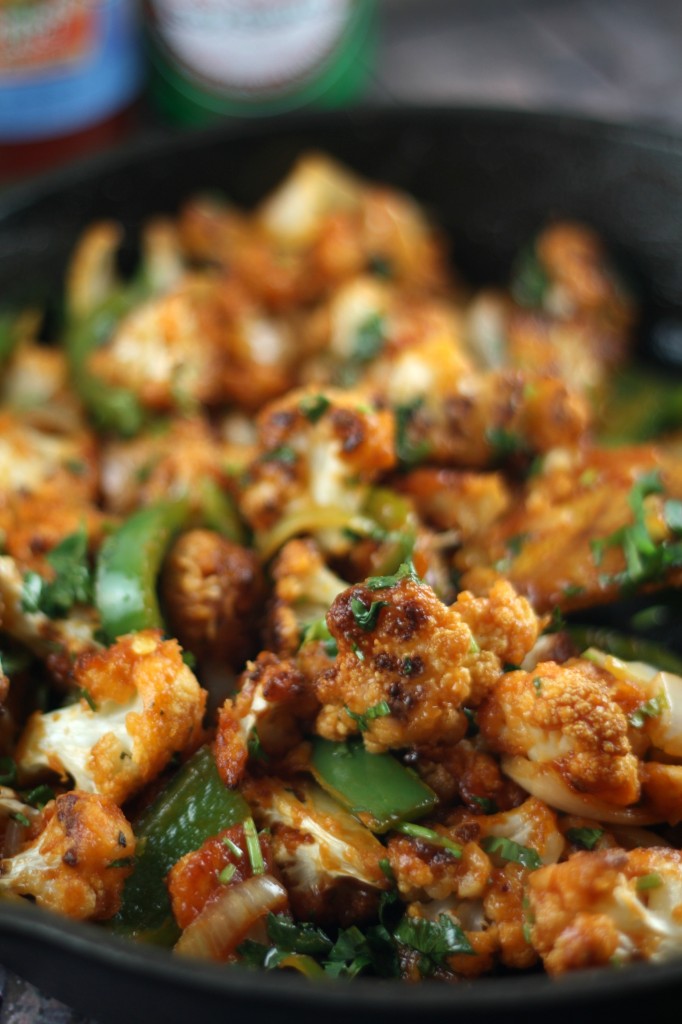
Gobi Manchoorian/ Manchoori is an Indo Chinese food which is quite popular in India. It is said to have been developed by the tiny Chinese community that lived in Kolkata for over a century. It is nothing but fried cauliflower tossed in a sweet and chili sauce. There are two different variants of it, dry and gravy. If I were frying I would use all purpose flour and cornstarch to make a thin batter; dip the florets in the batter and then deep fry. Once that is done follow the below mentioned sauce recipe. Few recipes even call for Ajinomoto (MSG) to increase the taste however I try to avoid it due to health reasons. Some add food colors to give the florets a bright red color, which is quite common in restaurants. I avoid that as well.
gOBI 2
In the past I have baked the same dish using different flours - chickpea,all purpose and even whole wheat flour. The problem was it wasn’t as crispy as I had expected it to be also there would a thin layer of batter stuck in the base of the florets. This used to put me off. That’s when dusting cornstarch came to my mind. I actually used about 3-3.5 tablespoon of cornstarch. The cauliflower florets baked beautifully, ending with a crispy texture. But the only thing was I could feel the cornstarch even after baking ( I realized I added a lot).The next time I would work with 1.5-2 tablespoons only. I know fried ones are the best but I wanted to try something that I could enjoy whole heartedly without worrying about calories. Making junk food healthy is a very smart idea:) .
Gobi 3
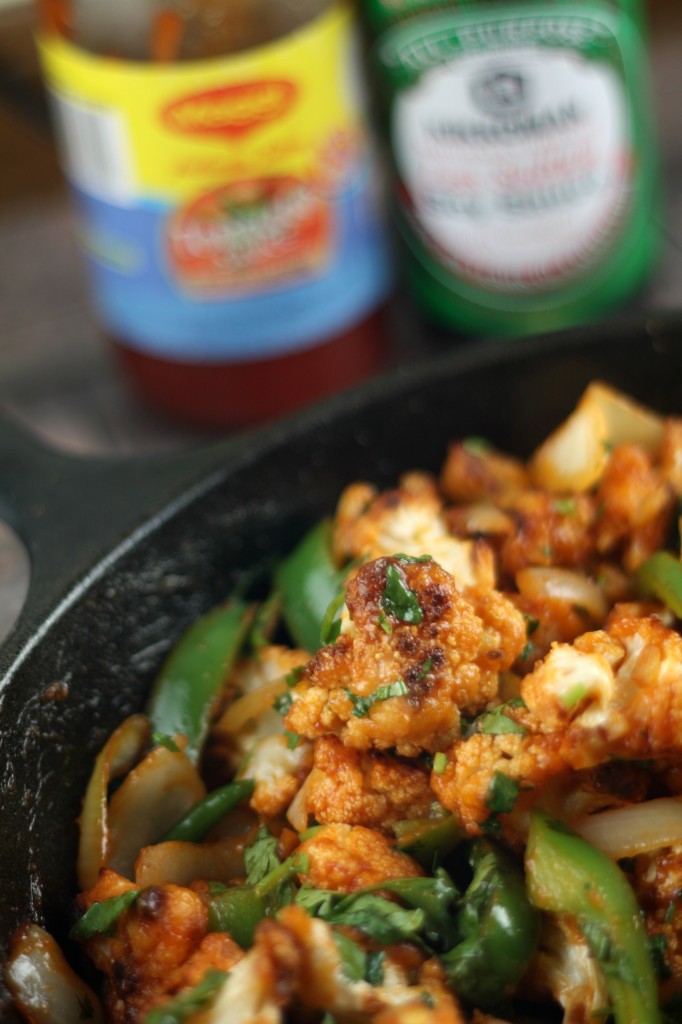
To me these tasted great, not as crispy as the fried ones but slightly close to it. Once they are coated in the sauce, I don’t see much of a difference. A good sauce is the key! If you plan to use them just as plain fritters, do season them with salt, pepper, cayenne and some turmeric (for the color) before baking. Also broil it for about 2-3 minutes towards the end to make it more crispier.

Baked Gobi Manchoori

Serving Size: 3

Baked Cauliflower with sweet and Chili sauce - healthy twist to a tasty junk food.

Ingredients

  • Baking Cauliflower
  • 1 large cauliflower, cut into florets about 5-6 cups
  • 2 tablespoon oil
  • 1-2 tablespoon cornstarch
  • For the Sauce
  • 1 teaspoon oil
  • 2-3 garlic pods, chopped
  • 1 teaspoon ginger, chopped
  • 2-3 thai green chillies, chopped
  • 1 onion, roughly chopped
  • ½ cup bell pepper, cubed
  • 2 tablespoon ketchup
  • 1 tablespoon soy sauce
  • Green chili/red chili sauce, as needed
  • 1 teaspoon lemon juice
  • 2 tablespoon cilantro , chopped
  • Salt as needed

Instructions

Preheat oven at 400F. Line a baking sheet with parchment. Cut the cauliflower into small florets. Wash and dry in a paper towel. Place all the cauliflower in a large bowl. Drizzle oil over the florets coating it well. Now add the cornstarch and toss it. Spread it evenly on the lined sheet. Bake for 20 minutes. Flip each floret. Increase temperature to 425F. Bake again for about 20 minutes. You will end with slightly crispy florets with a brownish tinge. Feel free to broil it for about 2 – 3 minutes for more crispier option, which I didn’t.

Sauce - Heat oil in a pan. Add garlic, ginger, chillies, onion and bell pepper. Saute until the onions turn pink. Do not overcook the veggies, do retain the crunchiness. Now add the ketchup and soy sauce. If you are using the chilli sauce, please add now( We don’t eat too spicy food, so I avoided the sauce). The mixture will start sizzling. Add the cauliflower,lemon juice and salt. Mix well. Garnish with cilantro.

http://www.thefoodielovers.com/2015/03/baked-gobi-manchoori/

If you are thinking of gravy please add some water mixed with very little cornstarch towards the end and then a quick boil will result in a semi gravy Manchoorian sauce. Serve as an appetizer or along with fried rice/noodles. Spring onions are a great choice too, if you have some handy do add it right at the end.

Enjoy guilt free!


Print
Recipe

kbread 1 main
Thanks to Aparna I was able to do this post. I bought my first Kugelhopf pan from Sur La Table almost four years back and have hardly put to use. So when I read about this month’s bread in “We need to Bake” group, I was super thrilled.
kbread 2 main
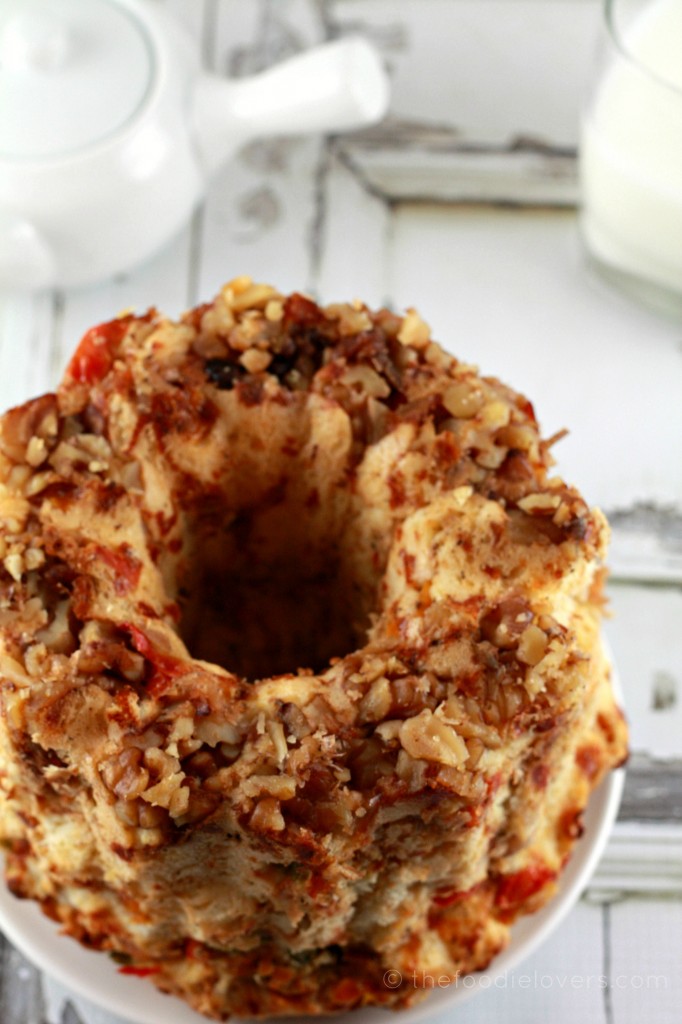
KUGELHOPF is a yeasted sweet cake which originated from Germany, Austria,Switzerland and Alsace. It is baked in a special circular pan with a central tube which is similar to a bundt pan.
kbread 3 main
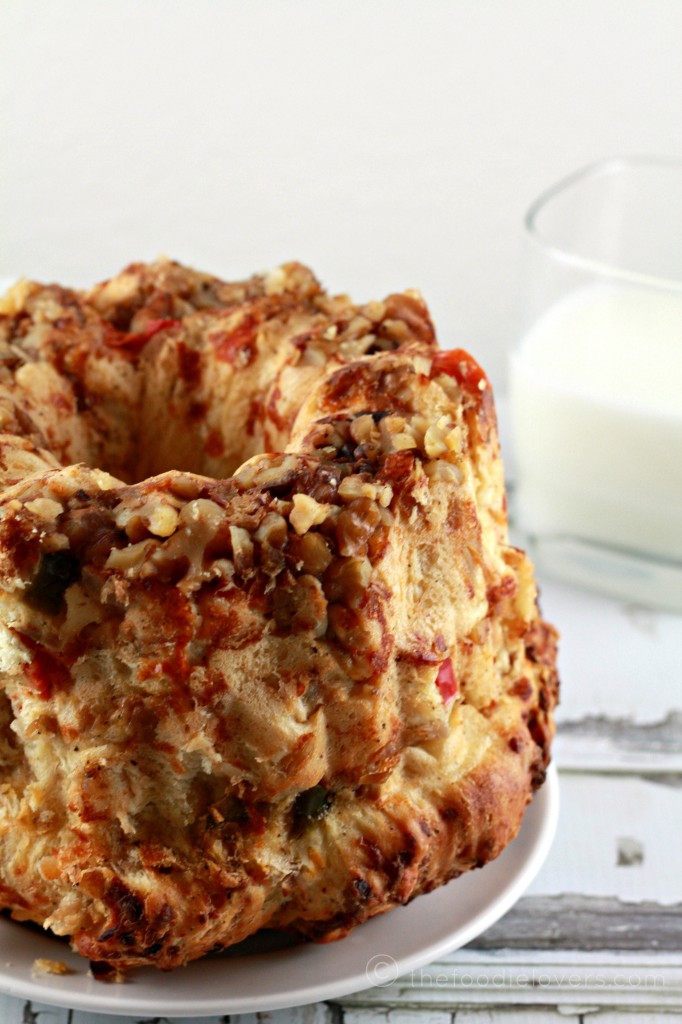
I am glad we baked a Savory one instead of the usual sweet bread. This Kugelhopf bakes in an 8” Kugelhopf pan, but you should also be able to bake it in an 8” Bundt pan, a regular loaf tin (or 2 small ones), smaller Brioche tins or even muffin tins. If you’re baking this in muffin tins you might want to use half the recipe..Since I had only a 6″ pan, I used that along with a small bread pan(7×5).After the initial rise, I divided the dough into two portions.

Savoury Kugelhopf

Ingredients

  • 3 to 3 1/2 cups all-purpose flour
  • 2 teaspoon instant yeast
  • 1 teaspoon salt (or to taste)
  • 5 1/2 tablespoon butter, at room temperature
  • 3/4 cup milk
  • 2 eggs, beaten lightly
  • 1 teaspoon oil
  • 1/3 cup chopped green bell peppers
  • 1/3 cup deseeded, pulp-free and chopped tomatoes
  • 1 cup onions, finely chopped
  • 1/2 cup diced cheddar cheese
  • 1/3 cup coarsely chopped walnuts
  • 1 1/2 teaspoon coarsely crushed black pepper
  • 1 teaspoon dried thyme

Instructions

Put 3 cups of flour, yeast, and salt in the bowl of the processor. Pulse a couple of times to mix. The add the butter, a little at a time, and process till incorporated.

Add the warm milk and process till mixed. Now add the eggs and process till mixed. You will now have a soft and sticky dough. Knead some more, adding more flour, a little at a time and just enough till the dough pulls away from the sides of the bowl. Do not be tempted to add more flour than absolutely necessary.

Your dough will be very soft, elastic and just short of sticky. Transfer the dough to an oiled bowl, cover and let it rise until double in volume. This can take from 1 1/2 hours to 2 1/2 hours!

In the meanwhile, heat 1/2 tsp oil in a pan. Add the chopped green bell pepper, the tomato and a pinch of salt and stir-fry till the raw smell disappears but the vegetables are still crisp/ crunchy. Remove and keep aside. To the same pan, add the remaining 1/2 tsp oil and sauté the onions with a pinch of salt till they turn golden brown. Remove and add to the bell peppers and keep aside.

Grease an 8” kugelhopf mould or bundt pan well especially around the centre (or whatever pan/ tin you plan to use). Place some of the chopped walnuts in the bottom of the mould. If you’re using a loaf tin or brioche moulds, then don’t do this. Instead press in the walnuts on top of the dough after the second rise, just before baking.

Once the dough has risen, deflate it. Then work the cheese, stir-fried onions, bell pepper and tomato, the remaining walnuts, black pepper and thyme into the dough. The best way to do this is to flatten the dough out and spread all this over the surface, fold the dough over and then knead it. This will ensure a more uniform incorporation of the “filling”. The dough will be a bit sticky, so use a scraper to help you with the kneading. Do not add more flour!

Roll the dough into a longish log, long enough to fit into the mould comfortably. Lift the “log” of dough and place it in the mould in a circular fashion and pinch the two ends together to close the “circle” of dough. Cover and let the dough rise for about an hour or so, until it reaches the edge/ rim of the mould.

Bake the Kugelhopf at 200C (400F) Pre-heat oven to 400 degrees for about 35 to 40 minutes until the top is golden brown and sounds hollow when it is tapped.

Unmould the Kugelhopf and let it cool on a rack. Slice and serve.

http://www.thefoodielovers.com/2013/07/savoury-kugelhopf/

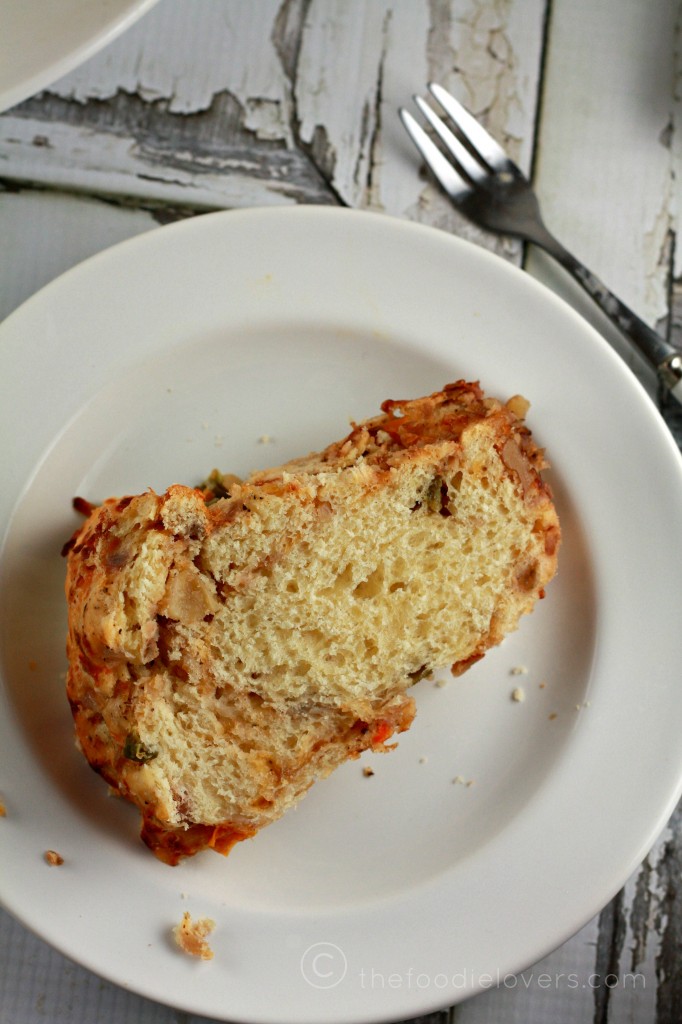
Kugelhopf is similar to a Coffee Cake; it can be eaten for breakfast or as a snack along with coffee. This bread is full of flavors. Loved the crunchiness of the walnuts and the softness of the bread. Will I bake this again….??? OFCOURSE!!

Thanks Aparna for another great recipe!

Bon Appétit

Nina

Print
Recipe

Winter here is characterized by cold and sub zero temperature. Dec,Jan and Feb are peak winter months. Surprisingly the weather hasn’t been bad as expected. It doesn’t seem like January so far. The weather is going to be great the entire week; it’s in 30F’s. Wow am I dreaming or what??:)

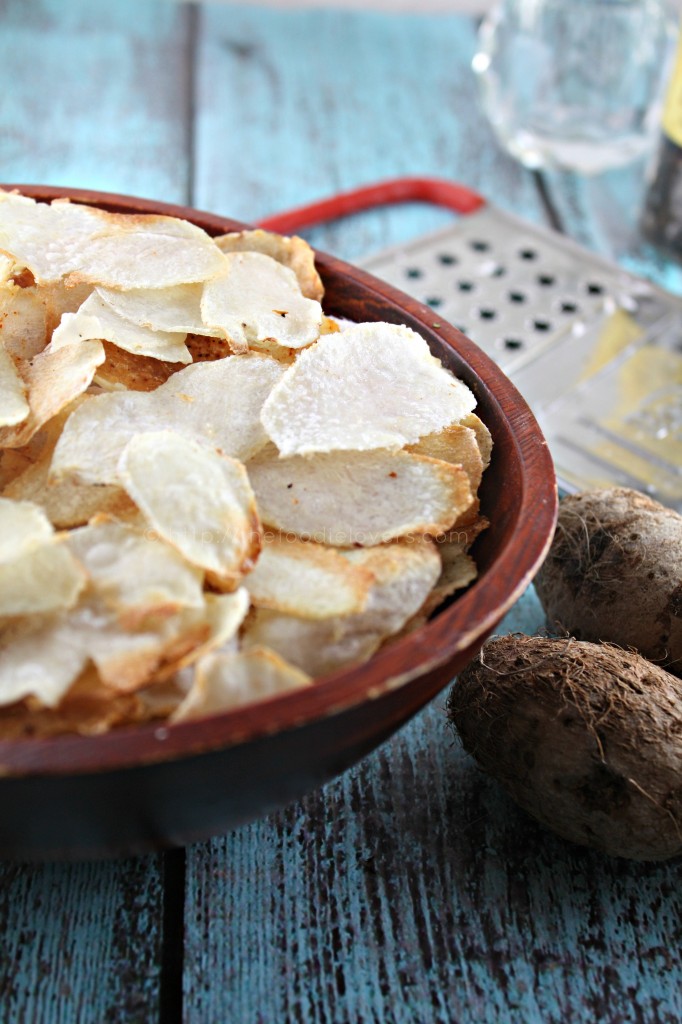
I am not a big fan of winter, it’s a little depressing. I know it’s time to enjoy winter activities, but how long? One can’t do that every day….huh! I miss stepping out and playing with my little one. Oh how much I hate winters!!! Anyways I should stop cribbing coz for now, we ain’t experiencing any snow storm or freezing temperature. I baked these Taro chips last evening and couldn’t stop munching. It was just perfect for the weather. The picky little one enjoys anything crunchy…so this is one of her fav now:)

I had some small Taro root lying at home for almost 2 weeks. The best part about them is there shelf life is much longer than most of the vegetables. Since I couldn’t slice the entire vegetable, I chopped the remaining into bite size pieces, seasoned with salt and pepper; baked them until crisp, for about 30 minutes. It tasted a lot like breakfast potatoes. They taste great as soon as they are baked;but they tend to harden in a few hours’ time. However, the Chips remain crispy for long; all you need to do is to store them in an airtight container. You may sprinkle salt, pepper, paprika, chili powder/cayenne pepper as per your liking. Instead of drizzling the entire baking sheet with oil, just brush them over. This way you will not need a lot of oil( I used about a teaspoon oil for about 6 taro’s), thus making it healthy!

BAKED TARO CHIPS
Ingredients:

Makes a big bowl of chips

Taro root
Salt
Pepper
Chili powder/cayenne pepper
Olive oil

Directions: Preheat oven at 400F. Peel the skin and slice the taro using any slicer(mandoline slicer). Place them on a parchment lined baking sheet. Bake in batches; do not over crowd the pan and also do not overlap the slices. Using a brush slightly brush them with olive oil. Sprinkle salt, pepper and chili powder. Bake for 5-6 minutes, rotating mid-way. Bake until its golden brown on the edges and crisp. They brown quickly so watch out.

They become crispier when they come to room temperature. Enjoy the crunchy-munchy healthy chips:)

Bon Apetite!

Nina

Print
Recipe

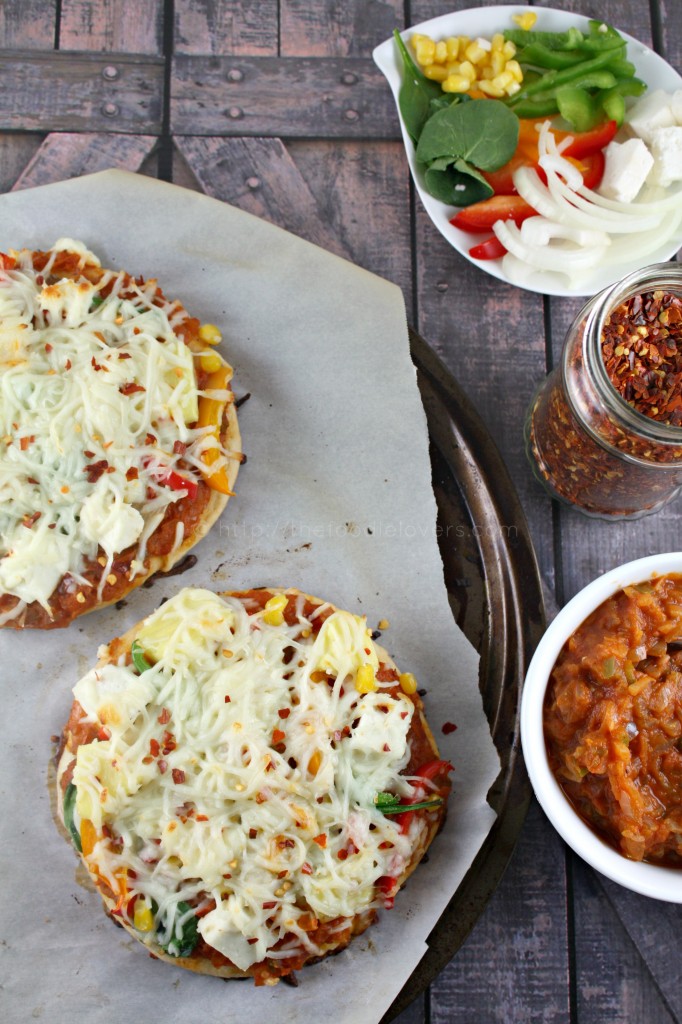
We as a family love Indian food. My sister in law had come over to visit us and I was in a cooking spree. One of the things that she wanted to have before she left was an Indianized Pizza. So I made her a “Vegetable Pizza with Indian spices”. I made the pasta sauce using onion & tomatoes. To give it a little twist I added bell peppers and carrots too. It was a nice change to the usual sauce I’ve made so far. As you would know by now that I am not a big fan of Pizzas. My husband always says that “ only things that are prepared at home are my favorites” and since I don’t like pizzas they are never made in my kitchen:). lol!. The last time I made Pizza was a very long time back, here it is -Pizza Margherita.

The sauce was a very simple one but loaded with veggies,thus making it healthy. Similarly, I replaced half of the all-purpose flour with Whole wheat pastry flour to make it slightly healthy. I had picked up a canned tomato sauce(not the usual Heinz sauce/ketchup) from Trader Joe’s that came handy; it looked more like a paste though. It gave the sauce a nice red color and tasted great too. Everyone was happy with the pizza, it had the perfect crunchy base, loaded with veggies and not to forget the main ingredient Cheese. It was super cheesy and delicious!

VEGETABLE PIZZA WITH INDIAN SPICES

PIZZA BASE
Ingredients:
1 tablespoon yeast
2/3 cup warm milk plus as required
1 cup whole wheat pastry flour
1.5 cup all-purpose flour
3 tablespoon olive oil
½ teaspoon salt
1 tablespoon sugar
Make the dough - In the bowl of a stand mixer, add 2/3 cup warm milk and yeast. Set it aside for about 10 minutes. Add all the other ingredients and mix on low speed. Gradually add more milk if required to make a soft dough. Knead for about a minute. Transfer to a greased glass bowl, cover with plastic and let It rise for about 1.5 – 2 hours, until doubled in size.

PIZZA SAUCE
Ingredients:

1.5 tablespoon olive oil
1 large onion chopped
1/3 cup bell pepper chopped
¼ cup carrot grated
½ cup tomato paste/sauce
½ teaspoon chili powder/ cayenne pepper
1 teaspoon garam masala/pav bhaji masala
Salt as per taste
Topping – Onions, bell pepper, corn, pineapple, spinach and mozzarella cheese
Blanch the tomatoes for about ten minutes. Peel the skin and mash it. Heat oil in a pan, add onions and sauté until light brown. Slowly add the paste and tomatoes. Mix in the bell pepper and carrot. Allow it to cook for a bit,until all the water evaporates. Lastly, add the salt, chili powder and garam masala. Mix and set it aside.

Base - When the dough has risen, knock it back and divide into six balls and roll out each onto a work surface. Spread the sauce over each pizza base and top with the vegetables (topping ingredients).
Preheat the oven at 400F. Bake the pizzas in the oven until the bases are crisp ; golden brown around the edges and cheese has melted.

Bon Apetite!

Nina

Related Posts Plugin for WordPress, Blogger...

COPYRIGHT

MyFreeCopyright.com Registered & Protected

FAVORITE POST

Povitica Bread

Povitica - An East European Bread

Photobucket
BFS-logo
Proud member of FoodBlogs
my foodgawker gallery
Manage your shopping list and search for recipes from across the web at ZipList.com

SOCIAL MEDIA

ARCHIVES

Blogroll