Category Archives: We need to Bake

Print
Recipe

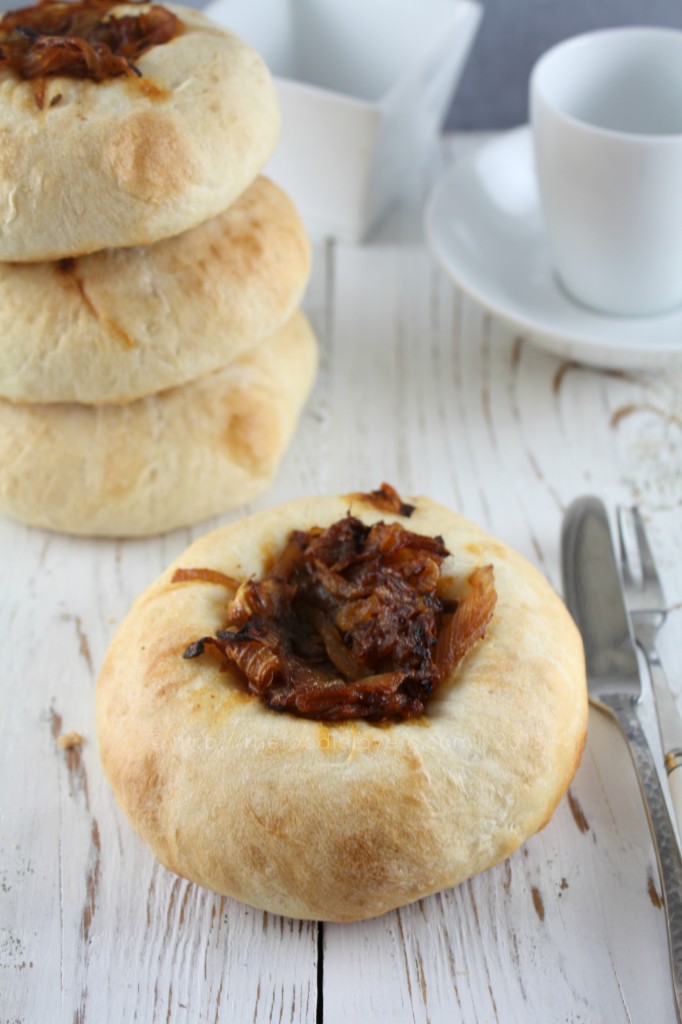
Bialys 1 main

Ever since I read about Bialys in Julia Child’s book Baking I have been wanting to make these. Thanks to Aparna who came up with Bialys for the “We need to Bake” event. I baked these as soon as she announced it( which was last Summer ). But these pictures ended up being in my draft for this long.

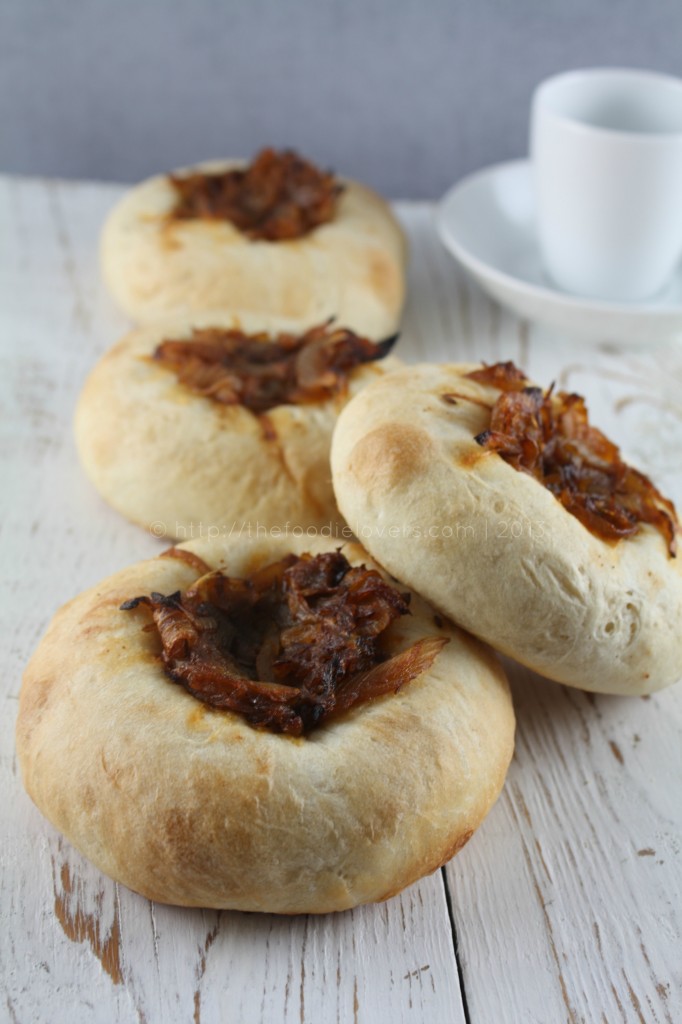
Bialys 2 main

The recipe was adapted from King Arthur Flour. I am really not happy with the pictures and wanted to re-do, but just haven’t had the time for it. These Bialys are best eaten when warm. Also, if you want to make it slightly chewier, refrigerate the dough overnight after the first rise. The next day, take the dough out and keep it at room temperature for about half an hour. Then shape the rolls and proceed with the recipe. These Bialys are on the softer side so do not over bake them or they will dry out and become tough. Anyways here it is warm chewy rolls with Caramelized Onions.

Bialys – Chewy Rolls with Carmelised Onion Topping

Yield: 8 Large Bialys

Ingredients

  • For the dough:
  • 1 teaspoon instant yeast
  • 1 tbsp sugar
  • 1 1/4 cup water
  • 3 cups all-purpose flour (use bread flour if you can find it or all-purpose flour + 1 tbsp vital wheat gluten)
  • 1 tsp salt
  • Milk for brushing the dough
  • For the Onion Filling:
  • 1 tbsp oil
  • 3 medium onions, finely chopped
  • 1 1/2 tsp cumin seeds
  • 3/4 tsp garam masala
  • Salt to taste

Instructions

Make the dough first. If you are using bread flour or vital wheat gluten, then your dough will be tougher to knead so if you have a machine you can use, I would say go ahead and use it. Me, I always take the easier way out provided I get good results. If you’re doing this by hand, just adapt the instructions to that.

Put the yeast, sugar, salt and flour in the food processor bowl. Pulse a couple of times to mix and then add the warm water in a steady stream. Knead until the dough comes together as a mass and then let the dough rest for 10 minutes. This will help the dough absorb water. Knead again, adding a little more water or flour (not too much) if you need it, until your dough is smooth and elastic but not sticky.

Shape it into a ball and put it in a well-oiled bowl, turning the dough till it is well coated. Cover and let it rise till about double. This should take about 2 hours. If you’re not making the Bialys right away, you can refrigerate the dough overnight at this point. When ready to make them, keep the dough at room temperature for about half an hour and then proceed with the rest of the recipe.

In the meanwhile, make the filling. Heat the oil in a pan, and add the cumin seeds. When the crackle, add the onions, and sauté over low to medium heat. Sprinkle a little salt and continue sautéing until they become soft and turn golden brown in colour. Add the garam masala and stir well. Keep the caramelised onions aside to cool.

Sprinkle your work surface lightly with flour and place the dough on it. Divide it into 8 equal pieces and shape each one into a roll by flattening it and then pinching the ends together to form a smooth ball. Place the rolls on a lightly greased baking sheet and cover them with a towel. Let them rise for about one hour (about 1 1/2 to 2 hours for refrigerated dough) till pressing with a finger on the top leaves a dent.

Work on one piece at a time, while you keep the others covered so they don’t dry out. When the rolls are ready, pick them up one at a time and using your fingers, form the depression in the middle. Hold the roll like a steering wheel with your thumbs in the middle and your fingers around the edges. Pinch the dough between your thumb and fingers, rotating as you go and gradually making the depression wider without actually poking a hole through.

Remember not to press on the edges, or they will flatten out. Once shaped, you should have a depression about 3” in diameter with 1” of puffy dough around the edge, so your Bialy should be about 4” in diameter. Prick the centre of the Bialy with a fork so the centre doesn’t rise when baking.

Place the shaped dough on a parchment lined (or greased) baking tray leaving about 2 inches space between them. Place the caramelized onion filling in the depressions of each Bialy. Brush the outer dough circle with milk.

Bake the Bialys at 450F for about 15 minutes till they’re golden brown in colour. Cool them on a rack. Serve slightly warm or at room temperature. Bialys keep well in an airtight container for a day or two and just need to be warmed up slightly before serving.

http://www.thefoodielovers.com/2014/03/bialys-chewy-rolls-with-carmelised-onion-topping/

Thanks for the recipe Aparna.

Enjoy!

Nina

Print
Recipe

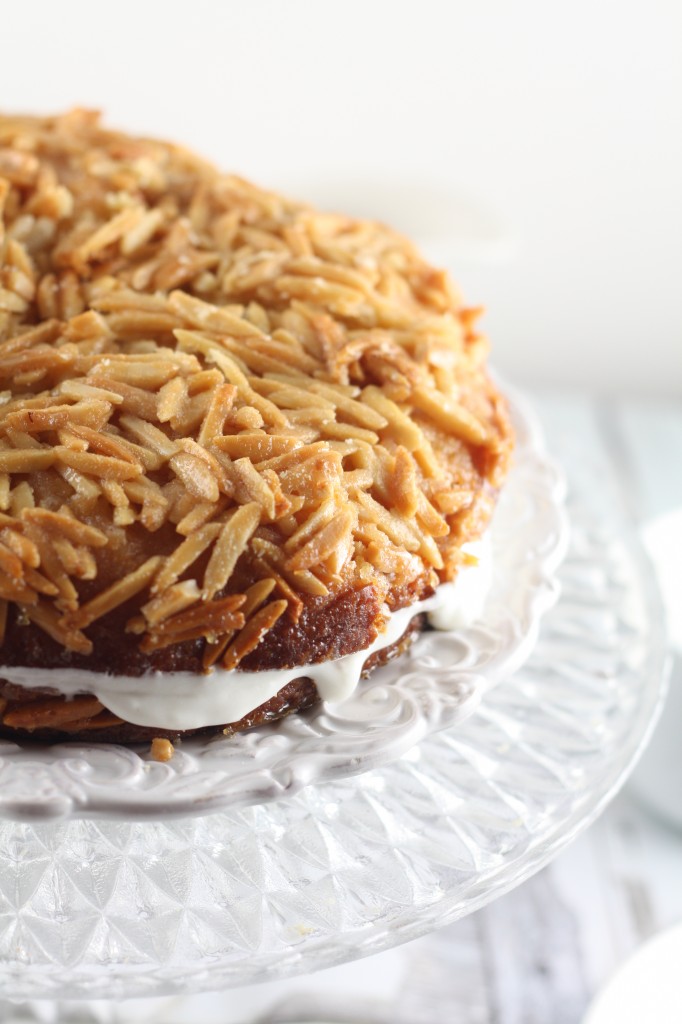
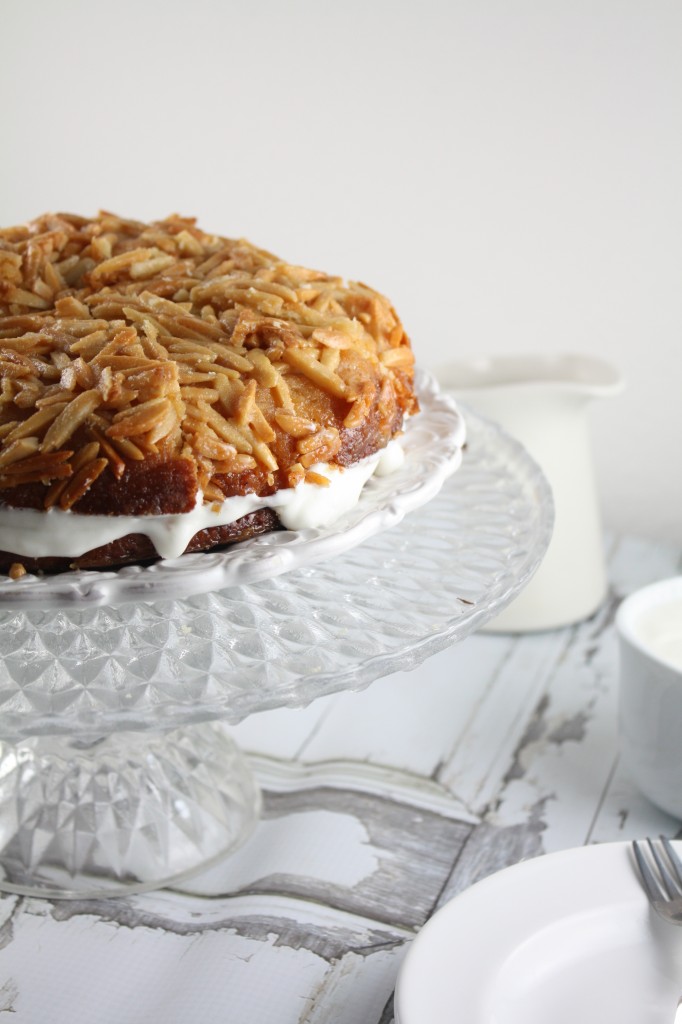
Cake 1

I absolutely love surprises. Most of the presents that I receive have been been pre bday/anniversary presents. My husband tries hard to keep them up, but ends up giving in hours and sometimes days before the actual “moment”. I somehow believe the surprise element adds a whole new dimension and makes gifting experience even more memorable. How I wish I could change this characteristic of his! This Valentines day for me was no different. He got some stuff for me and supposedly hid it on the trunk. On our way to the dinner, he blurts out what he has got for me and also ended up saying that it was right inside the trunk! Huh! Such are his skills.

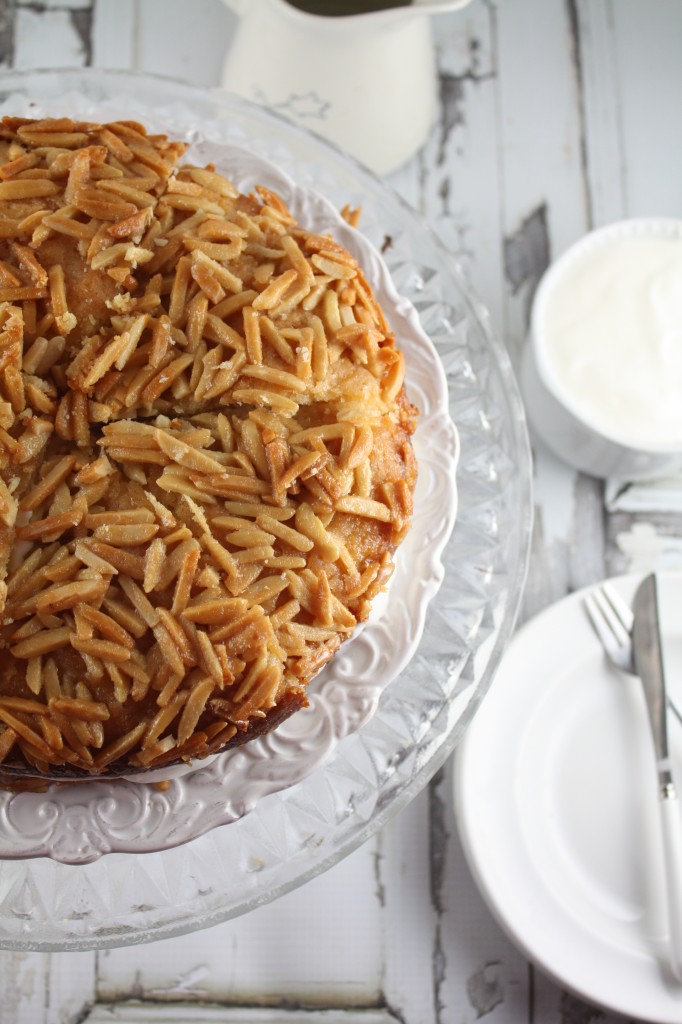
cake 3

Anyways coming to the recipe : Aparna chose a Beinenstich Cake for “We need to Bake” for the month of Dec’13. For this month she asked us to bake anything of our choice or work on any missed post. So I decided to go for this German delicacy. Bienenstich means “bee sting” in German and probably got its name from the honey flavored topping that it typical of this yeasted cake. It is made with an enriched Brioche like dough. This yeasted cake is filled with pastry cream mixed with whipped cream. Instead of the custard powder as mentioned in the recipe I used white chocolate pie and pudding mix along with whipped cream. The filling was not stable and strong enough to handle the weight of the top layer, it oozed out a bit. So using custard powder is the best choice. Of course the other options are to use Buttercream or Bavarian cream.

Cake 2

Also once done it gets difficult to cut the cake because of the top layer, so it’s better to pre-cut the almond toffee layer into slices; Place the base on a serving platter, make a collar around it with a double parchment paper (which should be taller than the height of the cake) and then spread the filling on the lower layer; finally place the pre-cut layer on the top and refrigerate for at least couple of hours before serving.

Bienenstich Kuchen (German Bee Sting Cake)

Yield: One 8" cake

Serving Size: serves 8 - 10

Ingredients

  • For the Pastry Cream Filling:
  • 250ml milk (I used 2%)
  • 3 tbsp sugar
  • 3 tbsp vanilla flavored custard powder or any other as per choice
  • 200ml cream
  • 1 tbsp corn-starch
  • For the Dough:
  • 1/4 cup milk (I used 2%)
  • 6 tablespoons +2 teaspoons butter, at room temperature
  • 2 cups all-purpose flour
  • 2 tbsp sugar
  • 1 egg
  • 3/4 tsp salt
  • 1 1/4 tsp instant yeast
  • For the Honey-Almond Topping:
  • 3 tablespoon + 1 teaspoon butter butter
  • 1/3 cup sugar
  • 2 tbsp honey
  • 1 tsp vanilla extract
  • 2/3 cup almonds, sliced

Instructions

Make the custard for the filling first. This can be made the previous day and refrigerated till required. Keep aside 1/4 cup of milk, and put the remaining milk and the sugar in pan. Over medium heat, bring this to a boil while stirring frequently to dissolve the sugar. In the meanwhile, dissolve the custard powder in the 1/4 cup of milk. Add this in a stream, to the boiling milk and keep whisking so that no lumps are formed.Keep whisking until the custard becomes very thick. Take the pan off the heat and let the custard cool to room temperature. Whisk it on and off so it stays smooth. If it does become lumpy after cooling, use a hand blender to make it smooth. Transfer to a bowl, cover and refrigerate.

Once you are ready to fill the Bienenstich, whip 200ml of cream till soft peaks form. Then add the corn-starch and whip till it forms stiff peaks. Whisk the custard to make sure it is smooth. Gently fold the cream into the custard. If you feel it is too soft, refrigerate for a couple of hours and then use.

To make the dough, heat the milk until it is quite hot but not boiling. Cut the butter into pieces and add to the milk, stirring it until the better melts completely. Let it cool a little.

In the meanwhile, put the flour, sugar, salt and the yeast in the bowl of your processor. Run a couple of times to mix well and then add the egg (leave the egg out if you don’t use it). Run again till the egg has also mixed well. Now add the butter-milk mixture (it should be warm, not hot) and the then knead till it forms a smooth and soft (loose) brioche-like dough that’s just short of sticky. It should come way from the sides of the bowl and be easy to handle.

Shape the dough into a ball and place it in a bowl. Cover loosely and let it rise for about 1 1/2 to 2 hours. This dough will rise quite well but not to double or as much as your regular bread dough.

Deflate the dough, and shape again to a smooth ball. Place it in a 8” spring form cake tin lined with parchment. It is important to do this otherwise the topping will make the bread/ cake sticky and difficult to unmould. Flatten the dough a little, pressing down lightly so that the dough fits the cake tin. It doesn’t matter if its not touching the sides like batter does. Let it rise for about 30 to 45 minutes. It will not rise very much and look a little puffy.

Prepare the topping while the dough rises. Melt the butter, sugar, honey and vanilla in a small pan, over medium heat. Keep stirring frequently and it will start bubbling up. Let it cook for about 3 minutes or so until it turns to a light beige colour. Add the sliced almonds, and stir well till the almonds are well coated. Take the pan off the heat and let it cool a bit. The mixture will become quite thick.

Now get ready to bake the bread/ cake. Once the dough has risen, use a spoon take bits if the topping (it will be quite thick, like a sticky fudge) and distribute it uniformly over the surface. If there are small gaps they will get covered once the bread/ cake is baking.

Bake at 350F for about 25 to 35 minutes until the top is golden brown and bubbling. A cake tester through the centre should come out clean. Let the cake cool in the pan for abpout 15 minutes. Then gently loosen the sides with a spatula and unmould. Let it cool completely on a rack.

When it has cooled completely, slice the cake into two equal layers carefully, using a very sharp knife. Spread the pastry cream on the lower layer and top with the upper layer and refrigerate till ready to serve.

http://www.thefoodielovers.com/2014/02/bienenstich-kuchen-german-bee-sting-cake/

Thanks Aparna for the recipe:)

Enjoy!

Nina

Print
Recipe

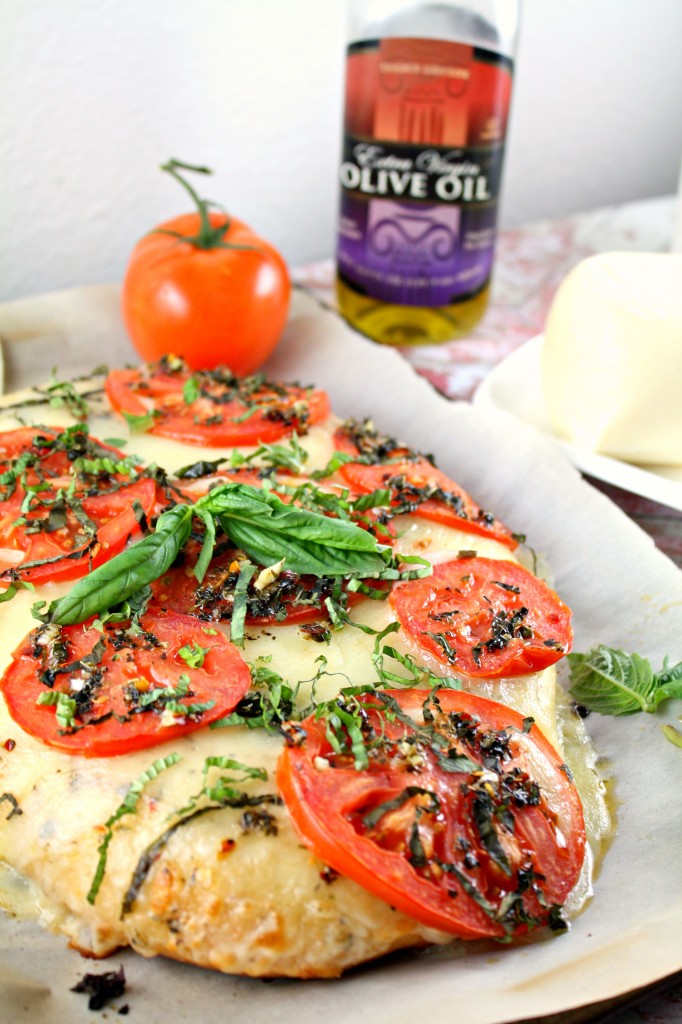
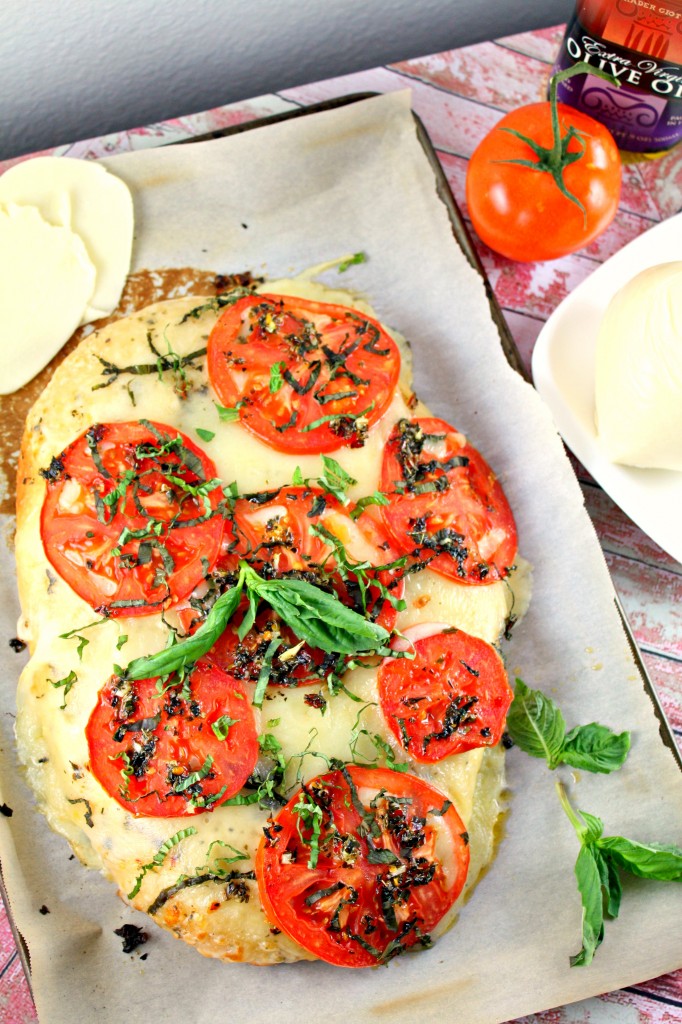
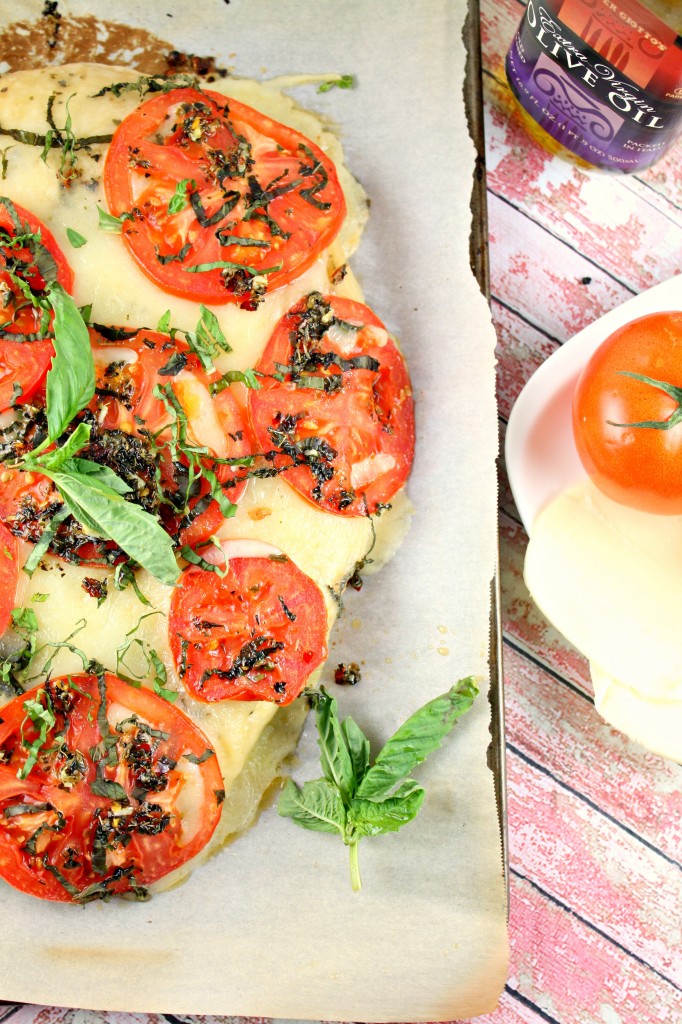
Foccacia 3

Just when I thought we are nearing Spring we got hit with another snow storm. It snowed like crazy yesterday. My husband’s car got stuck in the drive way this morning. We called up for help and the snow plow services came to our rescue. My daughter had to miss her school today. Huh..how much winter affects daily life. Let me not crib again!!

Foccacia 2

As mentioned in my previous post I am busy catching up on events and challenges that I have missed in the past. For the month of January, Aparna made us bake Focaccia Caprese. Focaccia is said to be a true stroke of an Italian genius. It’s incredibly simple to make with just few ingredients. I have baked this bread a few times with different toppings. Do check out my Spice Focaccia with onion and Pepper topping. I used cheese for the first time and was pleasantly surprised with the results. Since I had baked this bread a little longer, the cheese had melted completely.

Foccacia 1

Also, I feel that the secret to a great Focaccia is the Olive oil, it has to be a really good one! With all the garlic, herbs, olive oil and cheese…this one is fully loaded with flavors and this recipe is a definitely a keeper. The original recipe was adapted from The Kitchen Whisperer.

Focaccia Caprese

Yield: 2 Medium size Bread

Ingredients

  • For the Dough:
  • 2 tsp instant yeast
  • 1 1/2 tbsp sugar
  • 3 1/2 cups bread flour*
  • 1 tsp salt
  • 1/4 cup oil (preferably olive oil)
  • 1 to 1 1/2 cups warm water
  • A little more olive oil for brushing dough
  • For the Topping:
  • 4-5 larg-ish tomatoes, sliced thin
  • 1 6-7” round piece of fresh buffalo mozzarella, cut into1/4” slices**
  • 1/2 cup fresh basil leaves, cut into thin strips
  • For the Herbed Oil:
  • 1/4 cup olive oil
  • 1 tsp dried oregano
  • 1 tsp dried basil
  • 1/4 to 1/2 tsp red chili flakes
  • 1/2 tsp finely minced garlic/ paste
  • Salt to taste
  • Fresh basil leaves for garnishing

Instructions

First make the herbed oil. Put all the ingredients in a bowl and whisk them together. Keep aside till required.

The dough can be mixed and kneaded by hand or machine. Put the yeast, sugar flour, salt and oil in the bowl of the processor and pulse a couple of times to mix well. Then add 1 cup of warm water (and as much more as you need) and knead until you have a soft elastic dough that is just short of sticky.

Remove the dough from the processor bowl, shape into a round and place in a well oiled bowl turning the dough around so it is coated. Cover and let it rise till almost double in volume. This should take about an hour.

You can make this as 2 medium sized Focaccia or 4 smaller ones like I did. For the rectangular Focaccia, take two rectangular pans/ jelly or Swiss roll pans (I used an 11" by 7" tins) and oil them well. Then divide the dough into two equal portions and lightly roll them (or press out) out into approximately 11” by 7”. If making 4 Focaccia, then divide the dough into 4 equal portions. Roll each portion out (or press out) evenly into approximately 5” by 7”. It alright if it’s an odd shape because Focaccia is really a “rustic” bread.

Transfer the dough to the baking tins. The dough will shrink a little. Use your fingers and push it out a bit making sure it’s evenly thick throughout. Let it rise for 20 minutes. Lightly oil your finger tips and press into the dough creating evenly spaced “dimples” in it. Generously brush the surface with oil.

Bake at 410 F for about 18 to 20 minutes till it is almost done and is beginning to turn golden brown. Take the Focaccia out and turn up the heat of your oven to 450F.

Lightly drizzle some of the Herbed Oil over the Focaccia and then evenly arrange some slices of mozzarella over the bread, leaving very little space between them. Arrange the tomato slices over this and a little sprinkle the chopped basil over this. The topping should cover most of the surface of the bread.

Drizzle some more Herbed Oil over the topping and return the bread to the oven. Bake the Focaccia for 5 to 8 minutes or until the cheese has just melted. Remove from the oven and garnish with fresh basil leaves. Cut the Focaccia into slices and serve while it is still hot. This recipe should serve 4 if served alone or 6 if served with a side.

http://www.thefoodielovers.com/2014/02/focaccia-caprese/

Note - * If you cannot find bread flour, you can add 1 tbsp of Vital Wheat Gluten to 3 1/2 cups of all-purpose flour and mix together well. Otherwise just use 3 1/2 cups all-purpose flour.

**If you don’t get fresh buffalo mozzarella use regular mozzarella instead, the kind we use on pizzas. Otherwise, use any “melty/ stringy” kind of cheese you can find.

Thanks Aparna for the recipe:)

Enjoy!

Nina

Print
Recipe

Honeycomb 4 main
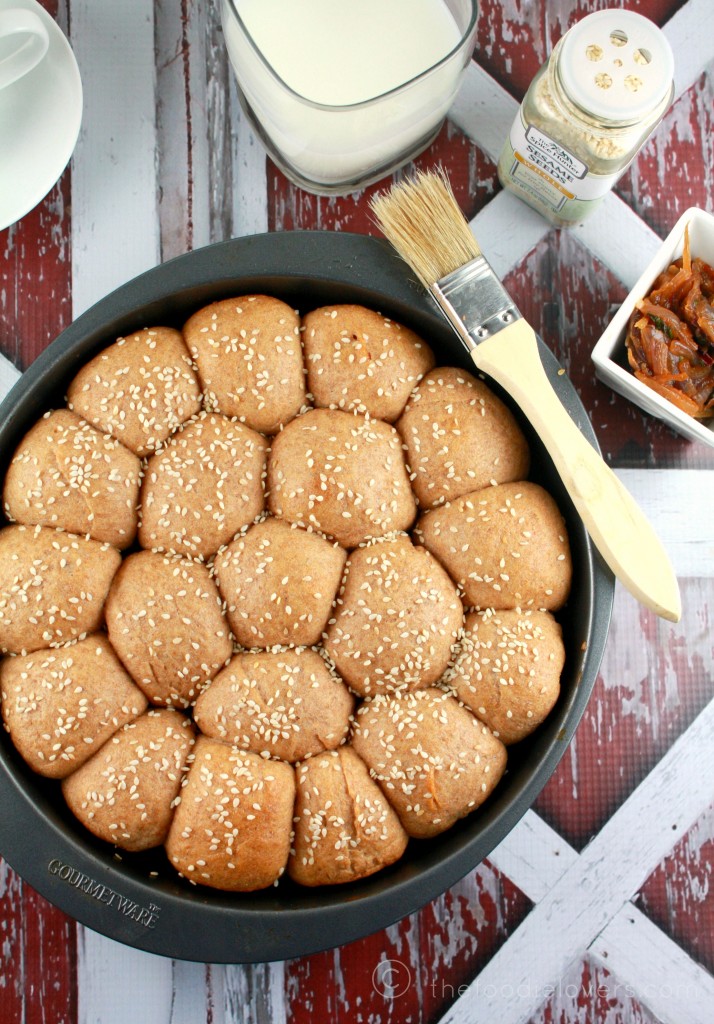
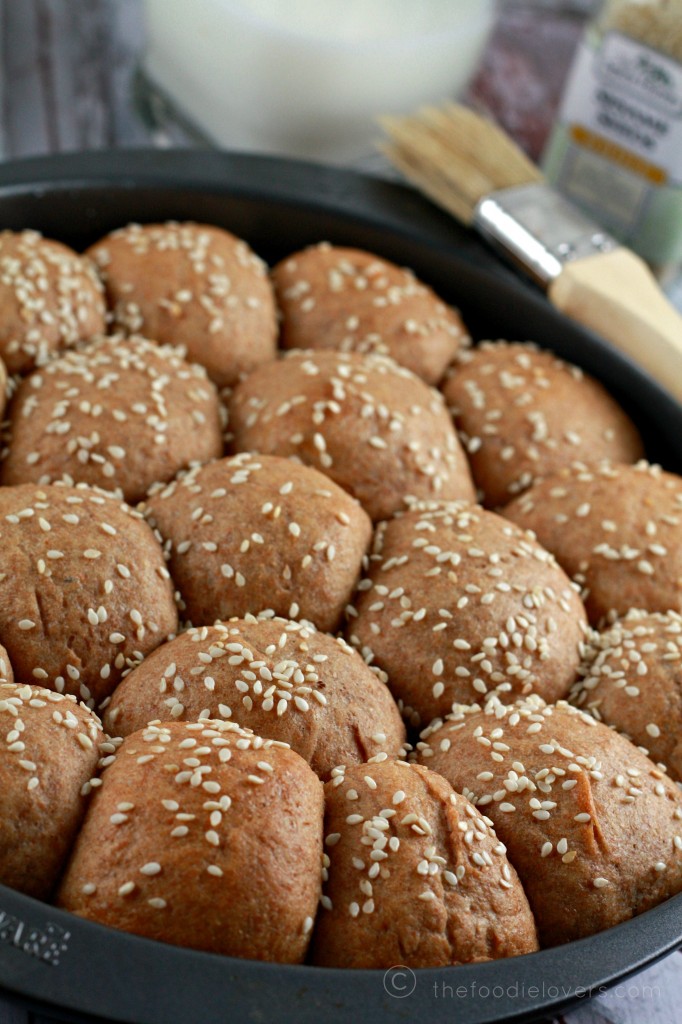
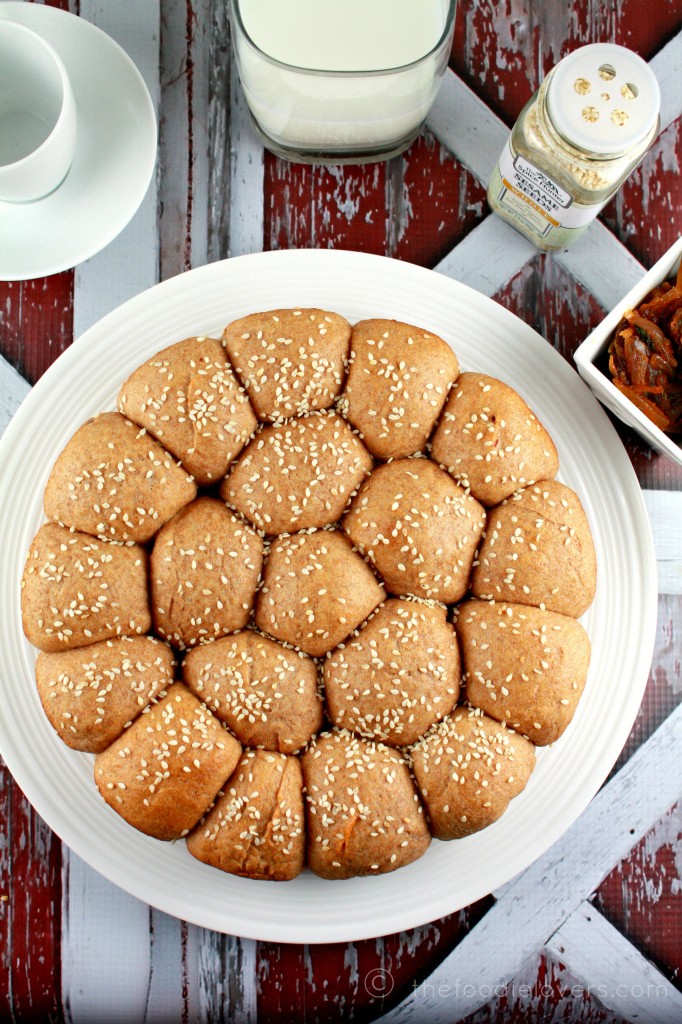
Aparna always comes up with interesting breads for the “We need to Bake”. This time it was KHALIAT NAHAL ( HONEYCOMB BUNS OR BEE’S HIVE BUNS ).These are cute little buns structured in the form of a Bee Hive. The whole grain health bug has caught me too. I have started making an attempt to use whole grain though I haven’t been able to completely make the switch.

Honeycomb 3 main
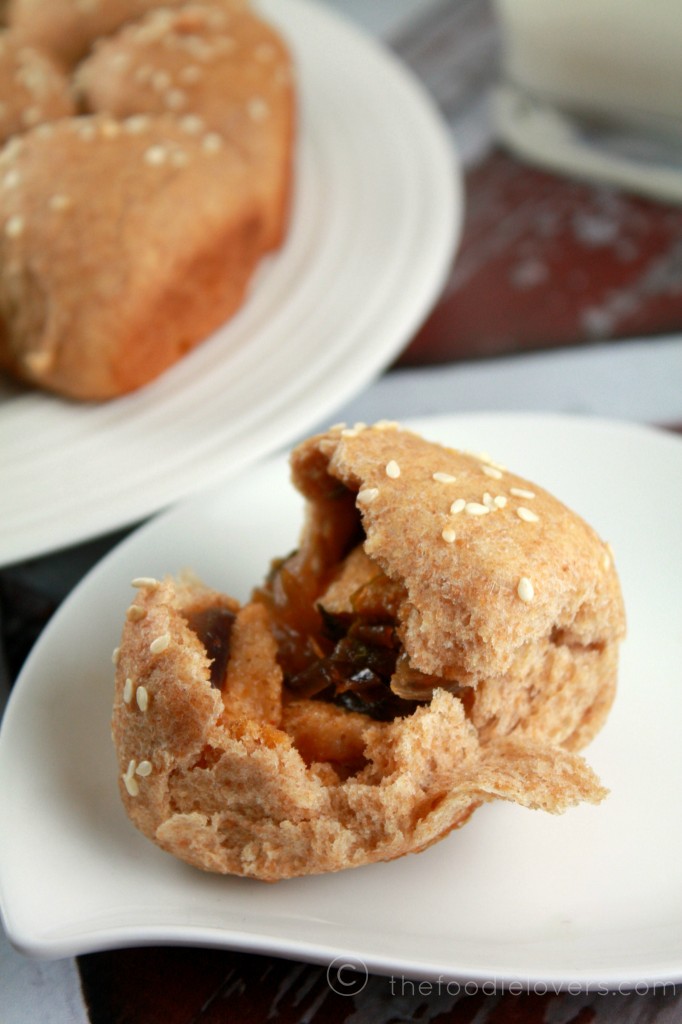
The original recipe called for 2½ cups all-purpose flour. I have substituted it with 2 cups of whole wheat flour and reduced the milk to ¾ cup instead of 1. While baking with low protein flours like Whole Wheat, adding Vital Wheat Gluten really helps. Since its purely gluten it goes a long way to improve the elasticity of the dough and rising. The wheat buns were a little dense which was expected,thanks to the flour!!.But if you are used to eating wheat breads you wouldn’t be disappointed with this one. I believe they are traditionally made sweet and glazed with honey flavored syrup. I am more of a savory person so ended up baking the Savory buns. While thinking about filling, Caramelized Onions were the first to cross my mind. They are my favorite!!! I love this bun, the filling in every bite balances the flavor and the taste of the buns.

Honeycomb buns main
The below mentioned recipe makes 18 small buns which is good to go with a 9” round pan. Usually cream cheese is used as a filling; but there are plenty of other choices like feta cheese/paneer(cottage cheese)/cheese. And for the Sweet ones: Chocolate,dried fruit like dates, raisins, chopped nuts, chopped fruit , sweetened coconut are great options.

Honeybuns 2 main Incase you plan to make the sweet one, here is the recipe.Sugar Syrup/ Glaze : 3/4 cup sugar;1/2 cup water;A pinch of saffron; 1 tablespoon honey; 1 teaspoon lime/ lemon juice. Make the sugar syrup/ glaze during the first rise of the dough. For this put the sugar, water and saffron in a small pan and bring to a boil. Turn down the heat and let it simmer for a few minutes until it starts thickening a bit. Take it off the heat and add the honey and the lime/ lemon juice. Mix well and let it cool. Keep aside till needed. When the sweet buns come out of the oven, pour the syrup all over the top of the “Honeycomb”. The bread should be hot and the syrup/ glaze should be cool. If you want your Honeycomb Buns to be less sweet, just brush the syrup/ glaze over the top. Let it sit for a while for the syrup/ glaze to set a bit. I plan to try the sweet one next time.

Whole Wheat Honeycomb Buns with Carmelized Onion Filling

Ingredients

  • ¾ cup lukewarm milk
  • 1 1/2 teaspoon instant yeast
  • 1 teaspoon sugar
  • 2 cups whole wheat flour
  • 3 teaspoon vital wheat gluten
  • 3/4 to 1 teaspoon salt
  • 3 tablespoon butter, melted
  • 2 tablespoon milk for brushing the dough
  • 2 tablespoon white sesame seeds for sprinkling on top
  • For the filling:
  • 1 red onion sliced
  • 1 tablespoon olive oil
  • ½ teaspoon cayenne pepper
  • ½ teaspoon salt
  • Mint leaves, a few
  • OR
  • 1 cup of filling (approximately) of your choice

Instructions

Make sure your melted butter has cooled down a bit before using it. Put 2 cups of the flour, salt, sugar (if making the sweet bread only) and melted butter in the bowl of your processor. Run a couple of times to mix well.

Combine the milk, sugar and yeast in a small bowl and keep for 5 minutes. Add this to the processor bowl and knead until you have a smooth and elastic dough which is not sticky. Add as much of the remaining 1/2 cup of flour as you need to get this consistency of bread dough. I used all of 2 1/2 cups of flour for mine.

Shape the dough into a ball and place it in a well-oiled bowl, turning it to coat completely with the oil. Cover and let it rise till double in volume, for about an hour.

Turn the dough out onto your work surface. You won’t really need to flour it as the dough is quite manageable as it is. Cut it into 2 halves. With your palms, roll out each half a “rope” about 9” long. Cut each rope into 1” pieces so you have a total of 18 pieces. Take each piece and flatten it out a little and place half a teaspoon of filling in the centre. Pull up the sides and wrap the dough around the filling, pinching it closed at the top. Smoothen it into a round ball. Place this in a well-greased round 9” cake tin. Repeat with the remaining 17 pieces and the filling. Arrange the filled balls of dough in concentric circles, filling the base of the cake tin. Cover with a kitchen towel and let it rise for about 30 to 40 minutes. Brush the tops with milk and sprinkle the sesame seeds over this. Don’t use the sesame seeds for sweet bread, only for the savoury one. Bake the buns at 350F for about 25 minutes, until they’re done and a nice golden brown on top. Let them cool in the tin for about 5 minutes and then on a wire rack. Serve them warm with tea/ coffee.

For the Filling – Heat oil in a pan and sauté the onions until pink. Add the sugar which will help to caramelize them. When they are almost done, add the salt; pepper and mint leaves. Mix well.

http://www.thefoodielovers.com/2013/09/whole-wheat-honeycomb-buns-with-carmelized-onion-filling/

Thanks Aparna for the recipe.

Enjoy!!

Nina

Related Posts Plugin for WordPress, Blogger...
« Previous Entries Next Entries »

COPYRIGHT

MyFreeCopyright.com Registered & Protected

FAVORITE POST

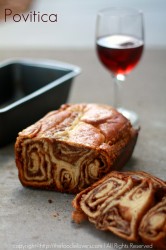
Povitica Bread

Povitica - An East European Bread

Photobucket
BFS-logo
Proud member of FoodBlogs
my foodgawker gallery
Manage your shopping list and search for recipes from across the web at ZipList.com

SOCIAL MEDIA

ARCHIVES

Blogroll