| I think this one is one of the very few DBC’s which has taken me very less time to make. I made both the challenges today and everyone loved it. The February 2011 Daring Bakers’ challenge was hosted by Mallory from A Sofa in the Kitchen. She chose to challenge everyone to make Panna Cotta from a Giada De Laurentiis recipe and Nestle Florentine Cookies. 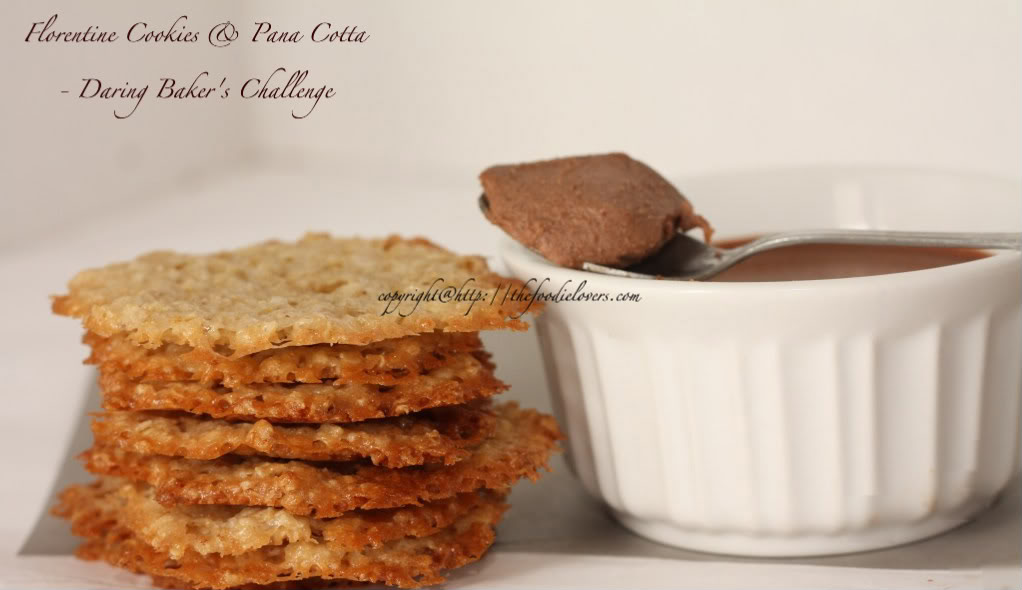
First batch of cookies -I wanted to reduce the sweetness so reduced sugar and corn syrup. Since the mixture was too dry,I added little more milk which inturn made the oats soften resulting in a thick/fat cookies without no crunchiness:(.Boo hoo! So I baked fresh ones today,following the exact recipe given by Mallory. And here it is:) NESTLE FLORENTINE COOKIES Ingredients:
2/3 cup unsalted butter
2 cups quick oats
1 cup granulated sugar
2/3 cup plain (all purpose) flour
1/4 cup dark corn syrup ( I used light syrup)
1/4 cup whole milk
1 tsp vanilla extract
pinch of salt
1½ cups dark or milk chocolate (for decoration) Directions: Preheat oven to moderately hot 375°F. Prepare your baking sheet with silpat or parchment paper. Melt butter in a medium saucepan,then remove from the heat. To the melted butter add oats,sugar,flour,corn syrup,milk,vanilla,and salt. Mix well. Drop a teaspoon full,three inches (75 mm) apart,onto your prepared baking sheet. Flatten slightly with the back of your teaspoon,or use a spatula. Bake in preheated oven for 6-8 minutes( mine actually took only 4 minutes),until cookies are golden brown. Cool completely on the baking sheets. While the cookies are cooling melt your chocolate until smooth either in the microwave (1 1/2 minutes). Peel the cookies from the silpat or parchment and place face down on a wire rack set over a sheet of wax/parchment paper. 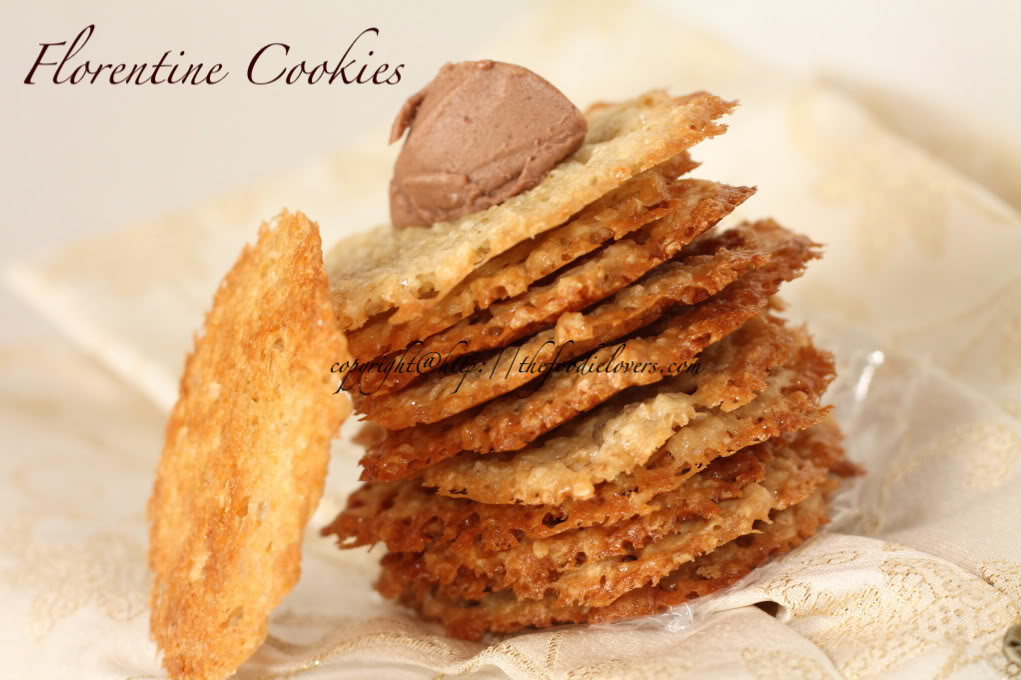
Spread a tablespoon of chocolate on the bottom/flat side of your cookie,sandwiching another (flat end) cookie atop the chocolate. (I drizzled the chocolate only in the first batch of cookies). CHOCOLATE PANA COTTA Recipe adapted fro Bon Appetit Ingredients:
1 cup (240 ml) whole milk
1 tablespoon (15 ml) (7 gm) (¼ oz) unflavored powdered gelatin
2 cups (480 ml) whipping cream (30+% butterfat)
½ cup (115 gm) (4 oz) sugar
¾ cup (145 gm)(5 oz) bittersweet or semisweet chocolate
½ teaspoon (2½ ml) vanilla extract 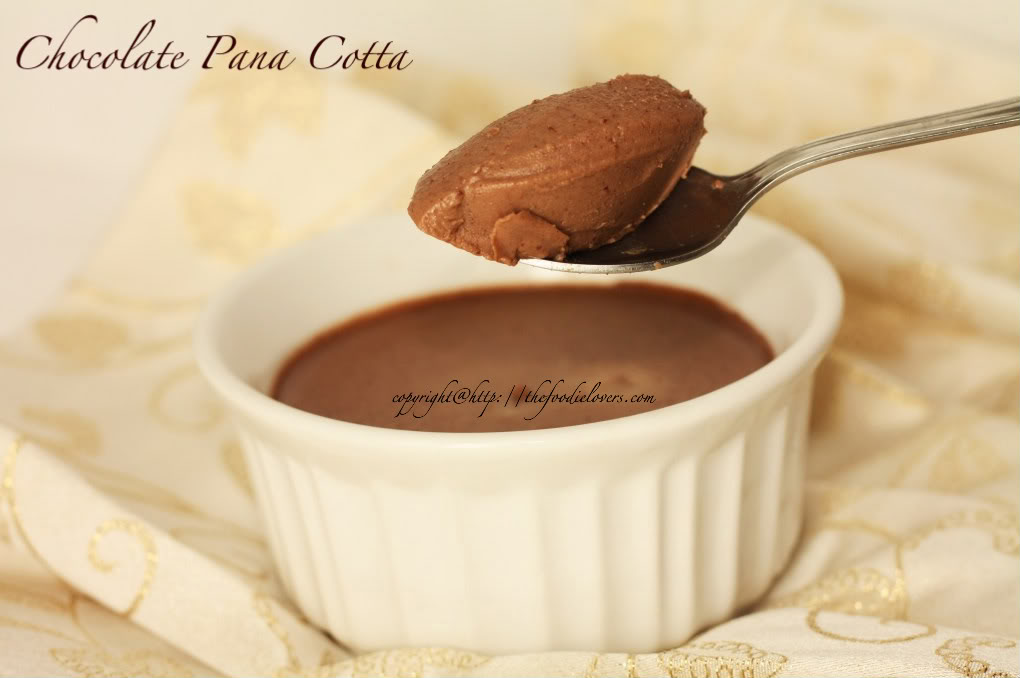
Directions: Pour milk into a small bowl,sprinkle gelatin over the top,set aside for 2-5 minutes . Place a medium saucepan over medium heat,stir in cream,sugar and vanilla. Bring to a low boil. Add chocolate and whisk until melted( this took a very long time for me). Whisk the milk/gelatin mixture into chocolate cream mixture. Whisk until gelatin has dissolved.Transfer to ramekins,or nice glasses for serving. Cover and chill at least 8 hours,or overnight. 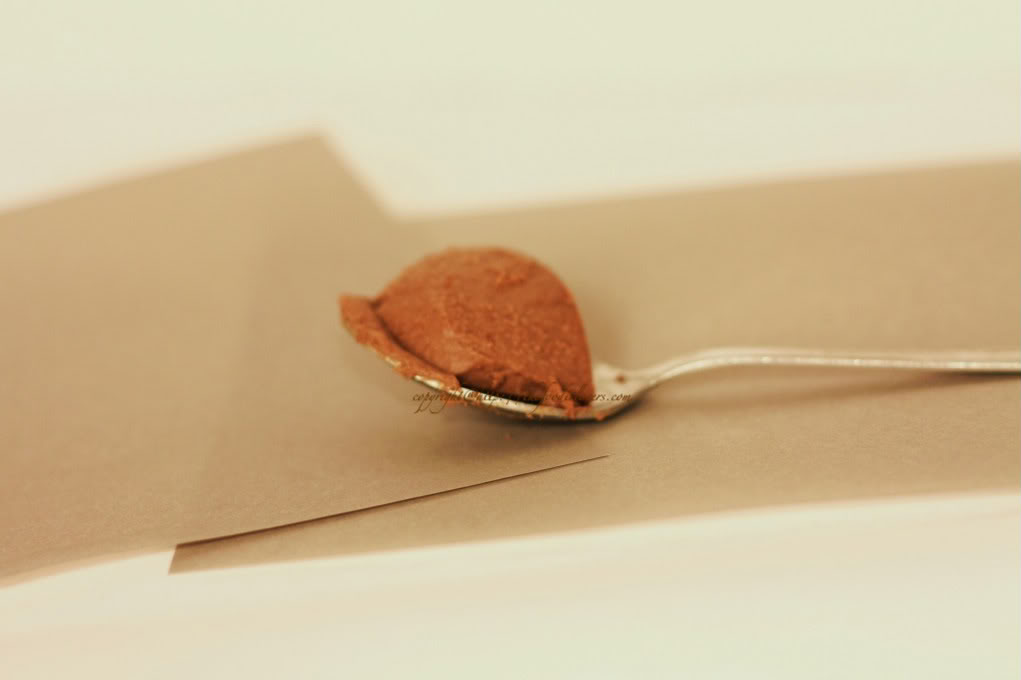
Verdict :Easy Breezy Challenge. The cookies were crunchy munchy and very easy to bake. On the other hand the Pana Cotta was soft,creamy and chocolaty:). Not to forget both tasted very great:). 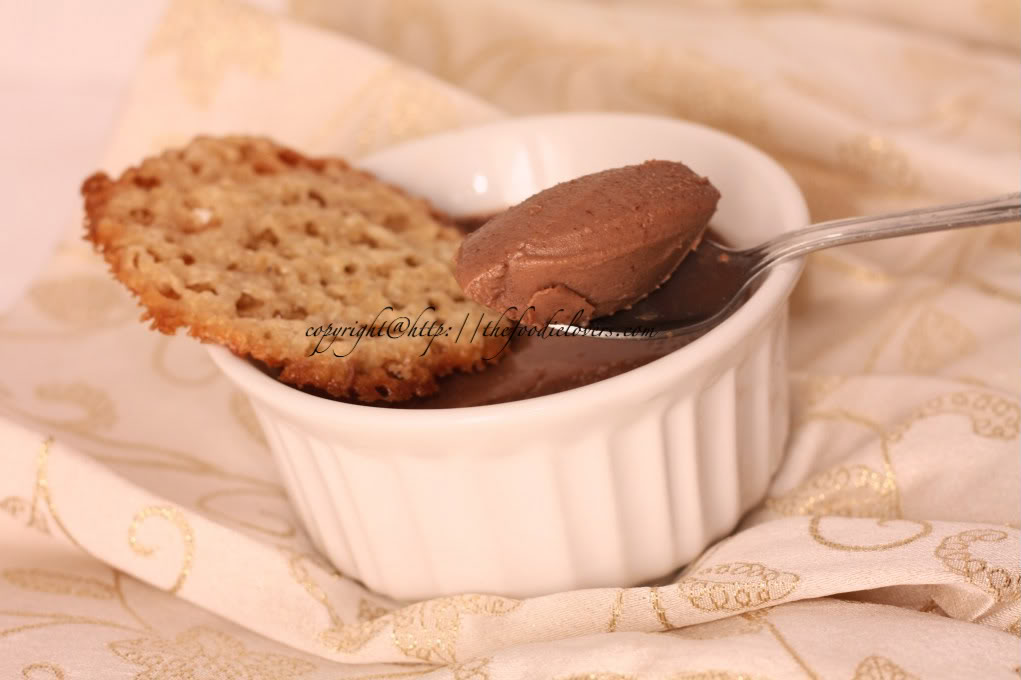
Loved it!. Now I plan to try and make some Vanilla Pana Cotta. Yay,For once I made this challenge well ahead of time!!! 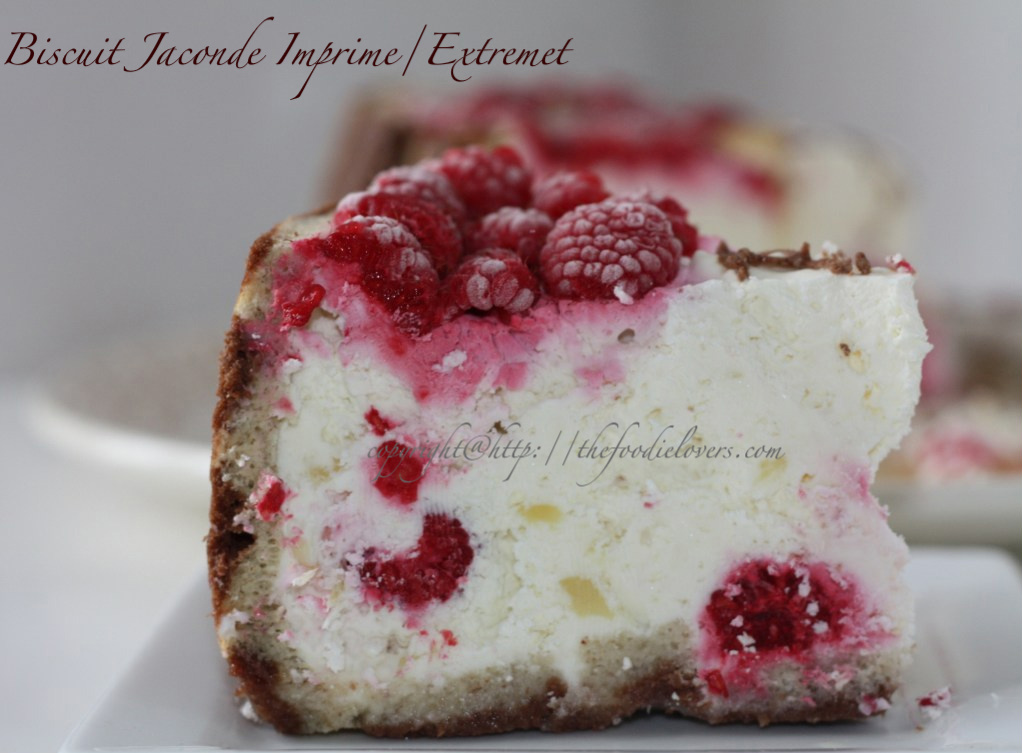
Brillat Savarin said - “The discovery of a new dish does more for human happiness than the discovery of new star”. I was glad to participate in DBC this time,as I discovered the two new words “Extremet” and “Jaconde”. I like to explore new stuffs and enjoy baking at home. But to be honest,if it was not for DBC,I wouldn’t have dreamt of making such beautiful desserts all from scratch. Coming to this months post -“The January 2011 Daring Bakers’ challenge was hosted by Astheroshe of the blog accro. She chose to challenge everyone to make a Biscuit Joconde Imprime to wrap around an Entremets dessert.” Joconde imprime /entremets - A Joconde imprime (French Baking term) is a decorative design baked into a light sponge cake providing an elegant finish to desserts/torts/entremets/ formed in ring molds. A Joconde batter is used because it bakes into a moist,flexible cake. The cake batter may be tinted or marbleized for a further decorative effect. This Joconde/spongecake requires attentive baking so that it remains flexible to easily conform to the molds. If under baked it will stick to the baking mat. It over baked it will dry out and crack. Once cooled,the sponge may be cut into strips to line any shape ring mold. Entremets (French baking term)- an ornate dessert with many different layers of cake and pastry creams in a mold,usually served cold. Think Trifle in a mold vs. a glass bowl.A joconde imprime is the outside cake wrapper of the Entremets dessert. From the moment,I saw the challenge updated in the site,my hands were itchy and I knew that I had to get started with it. For the filling,I was contemplating between a chocolate mousse and a cheesecake. Mousse is something I make quite often so tried out something simple to please the man in the house:) - “No Bake -Raspberry Pineapple Cheesecake”. Joconde SpongeYIELD:Two ½ size sheet pans or a 13” x 18” (33 x 46 cm) jelly roll pan Ingredients: ¾ cup almond flour/meal ( *You can also use hazelnut flour,just omit the butter )
½ cup plus 2 tablespoons confectioners’ (icing) sugar
¼ cup cake flour
3 large eggs
3 large egg whites
2½ teaspoons white granulated sugar or superfine (caster) sugar
2 tablespoons unsalted butter,melted ( I did not use this) Directions: - In a clean mixing bowl whip the egg whites and white granulated sugar to firm,glossy peeks. Reserve in a separate clean bowl to use later.
- Sift almond flour,confectioner’s sugar,cake flour. (This is something that takes a lot of time)
- On medium speed,add the eggs a little at a time. Mix well after each addition. Mix until smooth and light. (If using a stand mixer use blade attachment. If hand held a whisk attachment is fine,or by hand. )
- Fold in one third reserved whipped egg whites to almond mixture to lighten the batter. Fold in remaining whipped egg whites. Do not over mix.
- Fold in melted butter if using.
- Reserve batter to be used later.
Patterned Joconde-Décor PasteYIELD:Two ½ size sheet pans or a 13” x 18” (33 x 46 cm) jelly roll pan
Ingredients
14 tablespoons unsalted butter,softened
1½ cups plus1½ tablespoons Confectioners’ (icing) sugar
7 large egg whites
1¾ cup cake flour
Food coloring gel,paste or liquid COCOA Décor Paste Variation: Reduce cake flour to 6 oz. Add 2 oz cocoa powder. Sift the flour and cocoa powder together before adding to creamed mixture. This is what I used.
Directions: - Cream butter and sugar until light and fluffy ( I used a stand mixer with blade)
- Gradually add egg whites. Beat continuously.
- Fold in sifted flour.
- Tint batter with coloring to desired color,if you are not making the cocoa variation.
Preparing the Joconde- How to make the pattern: - Spread a thin even layer of décor paste approximately 1/4 inch (5 millimeter) thick onto silicone baking mat with a spatula,or flat knife.( I used parchment paper). Place it on an upside down baking sheet. The upside down sheet makes spreading easier with no lip from the pan.
- Pattern the décor paste –I used an angled spatula and ran it all over the thin layer forming zig zag pattern.
- Slide the baking sheet with paste into the freezer. Freeze hard. Approx 15 minutes.
- Remove from freezer. Quickly pour the Joconde batter over the design. Spread evenly to completely cover the pattern of the Décor paste.
Baking - - Bake at 475ºF /250ºC until the joconde bounces back when slightly pressed,approx. 15 minutes.( mine actually took just 8 mins). You can bake it as is on the upside down pan. Yes,it is a very quick bake,so watch carefully.
- Cool. Do not leave too long,or you will have difficulty removing it from mat.
- Flip cooled cake on to a powdered sugared parchment paper. Remove silpat. Cake should be right side up,and pattern showing! (The powdered sugar helps the cake from sticking when cutting.)
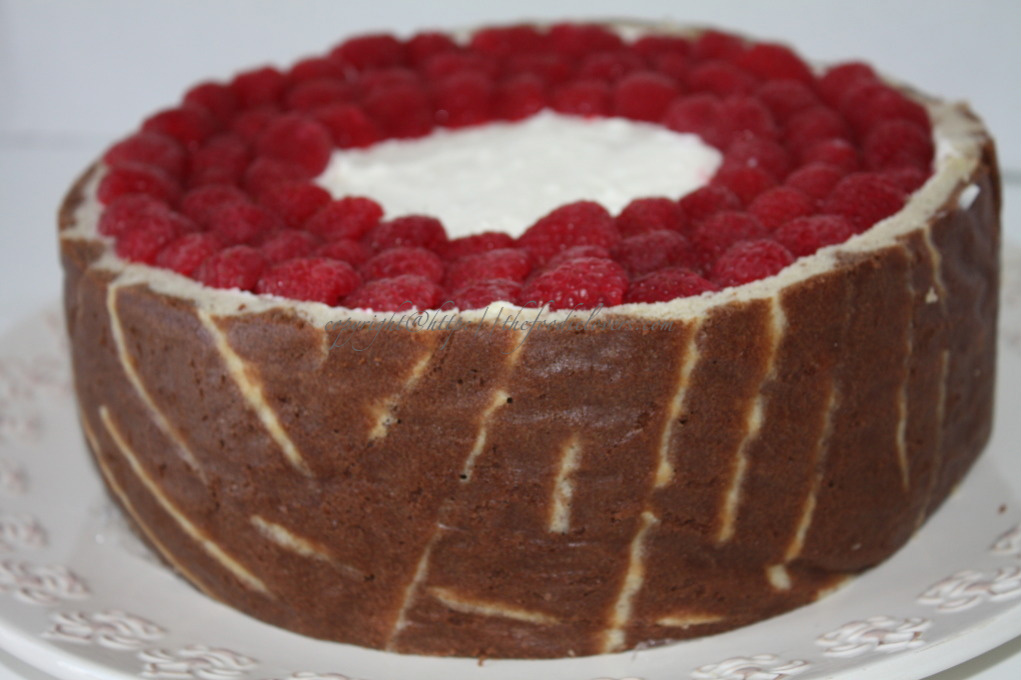
Preparing the mold for Entremets: I used a 9 “spring-form pan.Start with a large piece of parchment paper laid on a very flat baking sheet. Then a large piece of cling wrap over the parchment paper. Place a spring form pan ring,with the base removed,over the cling wrap and pull the cling wrap tightly up on the outside of the mold. Line the inside of the ring with a curled piece of parchment paper overlapping top edge by ½ inch. CUT the parchment paper to the TOP OF THE MOLD. It will be easier to smooth the top of the cake. Preparing the Jaconde for molding: - Trim the cake of any dark crispy edges. You should have a nice rectangle shape.
- Decide how thick you want your “Joconde wrapper”. Traditionally,it is ½ the height of your mold. This is done so more layers of the plated dessert can be shown. However,you can make it the full height.
- Once your height is measured,then you can cut the cake into equal strips,of height and length. (Use a very sharp paring knife and ruler.)
- Make sure your strips are cut cleanly and ends are cut perfectly straight. Press the cake strips inside of the mold,decorative side facing out. Once wrapped inside the mold,overlap your ends slightly. You want your Joconde to fit very tightly pressed up to the sides of the mold. Then gently push and press the ends to meet together to make a seamless cake. The cake is very flexible so you can push it into place. You can use more than one piece to “wrap “your mold,if one cut piece is not long enough. I used the leftover pieces of the jaconde for my base.
- The mold is done,and ready to fill.
Entremet- Filling Options: The variation allowed in the entire challenge was the filling. I made a “ No Bake -Raspberry Cheesecake” with the addition of l’il Pineapple,which was adapted from here. I did tweak the recipe a li’l to suit our tastebuds:) 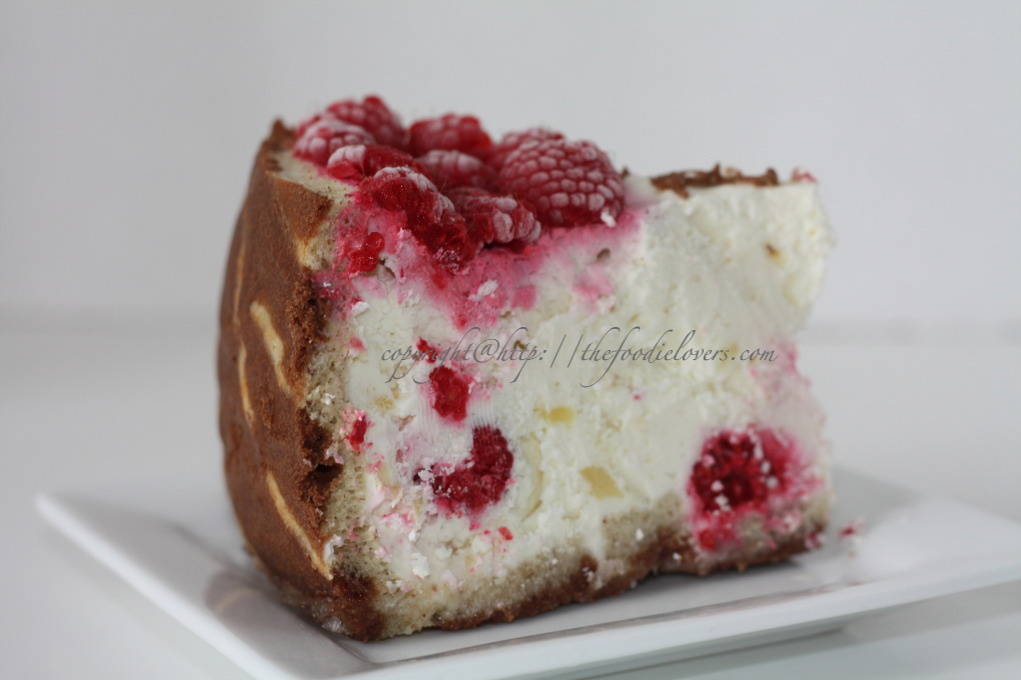
No Bake – Raspberry Pineapple Cheesecake Ingredients: 24 oz Cream Cheese ( 3 packs) at room temperature 12 oz Whipped Cream 6tbsp Granulated Sugar 16 oz Raspberries ( Reserve 8 oz separately for decoration) 4 oz Crushed Pineapple( drained) a tsp of Vanilla Extract Using a stand mixer,whip the cream along with the sugar until thick. Add the cream cheese and stir for another 2 mins. Add the Raspberries,Pineapple and vanilla extract. ( I know adding Pineapple is something weird but I love anything with Pineapple,it definitely tasted good).Mix well. Take the prepared mold,press the leftover pieces of the Jaconde to the bottom and form a thin layer. Fill in the Cheesecake mixture. Slit the raspberries vertically into two and arrange it on top of the cake. Refrigerate until set.( it took abt 4hrs for me). 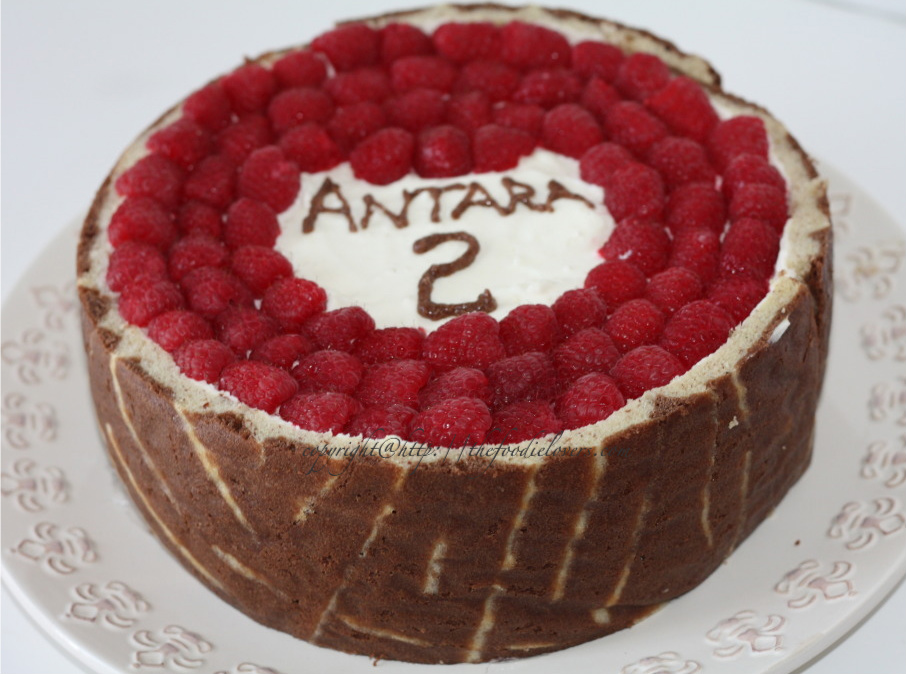
Verdict: This is one of the best DBC that I have ever participated. It was wonderful to bake something totally unheard of. The outer Layer ie.,the Jaconde remained soft and moist even after a week.The Raspberry Cheesecake was just perfect. Overall it has been a fantastic challenge and a great experience….i loved it!!!
The 2010 December Daring Bakers’ challenge was hosted by Penny of Sweet Sadie’s Baking. She chose to challenge Daring Bakers’ to make Stollen. She adapted a friend’s family recipe and combined it with information from friends,techniques from Peter Reinhart’s book………and Martha Stewart’s demonstration. 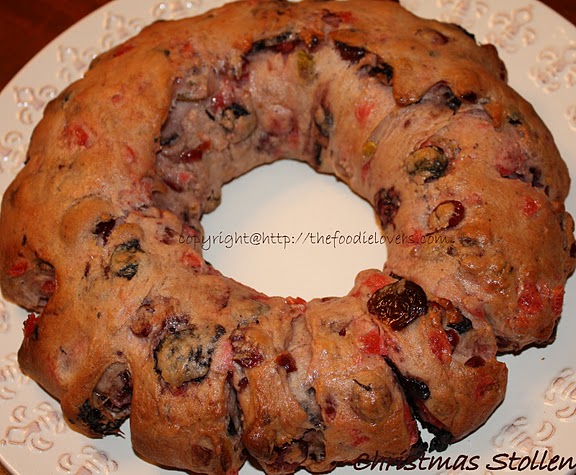
Stollen WreathMakes one large wreath or two traditional shaped Stollen loaves. Serves 10-12 people Ingredients¼ cup (60ml) lukewarm water (110º F / 43º C)
2 packages (4 1/2 teaspoons) (22 ml) (14 grams) (1/2 oz) active dry yeast
1 cup (240 ml) milk
10 tablespoons (150 ml) (140 grams) unsalted butter (can use salted butter)
5½ cups (1320 ml) (27 ozs) (770 grams) all-purpose (plain) flour (Measure flour first -then sift- plus extra for dusting)
½ cup (120 ml) (115 gms) sugar
¾ teaspoon (3 ¾ ml) (4 ½ grams) salt (if using salted butter there is no need to alter this salt measurement)
1 teaspoon (5 ml) (6 grams) cinnamon
3 large eggs,lightly beaten
Grated zest of 1 lemon and 1 orange
2 teaspoons (10 ml) (very good) vanilla extract
1 teaspoon (5 ml) lemon extract or orange extract
¾ cup (180 ml) (4 ¾ ozs) (135 grams) mixed peel (link below to make your own)
1 cup (240 ml) (6 ozs) (170 gms) firmly packed raisins
3 tablespoons (45ml) rum
12 red glacé cherries (roughly chopped) for the color and the taste. (optional)
1 cup (240 ml) (3 ½ ozs) (100 grams) flaked almonds
Melted unsalted butter for coating the wreath
Confectioners’ (icing) (powdered) sugar for dusting wreath Note:If you don’t want to use alcohol,double the lemon or orange extract or you could use the juice from the zested orange. Directions:Soak the raisins
In a small bowl,soak the raisins in the rum (or in the orange juice from the zested orange) and set aside. See Note under raisins. To make the dough
Pour ¼ cup (60 ml) warm water into a small bowl,sprinkle with yeast and let stand 5 minutes. Stir to dissolve yeast completely. In a small saucepan,combine 1 cup (240 ml) milk and 10 tablespoons (150 ml) butter over medium -low heat until butter is melted. Let stand until lukewarm,about 5 minutes. Lightly beat eggs in a small bowl and add lemon and vanilla extracts. In a large mixing bowl (4 qt) (4 liters) (or in the bowl of an electric mixer with paddle attachment),stir together the flour,sugar,salt,cinnamon,orange and lemon zests. Then stir in (or mix on low speed with the paddle attachment) the yeast/water mixture,eggs and the lukewarm milk/butter mixture. This should take about 2 minutes. It should be a soft,but not sticky ball. When the dough comes together,cover the bowl with either plastic or a tea cloth and let rest for 10 minutes. Add in the mixed peel,soaked fruit and almonds and mix with your hands or on low speed to incorporate. Here is where you can add the cherries if you would like. Be delicate with the cherries or all your dough will turn red! Sprinkle flour on the counter,transfer the dough to the counter,and begin kneading (or mixing with the dough hook) to distribute the fruit evenly,adding additional flour if needed. The dough should be soft and satiny,tacky but not sticky. Knead for approximately 8 minutes (6 minutes by machine). The full six minutes of kneading is needed to distribute the dried fruit and other ingredients and to make the dough have a reasonable bread-dough consistency. You can tell when the dough is kneaded enough – a few raisins will start to fall off the dough onto the counter because at the beginning of the kneading process the dough is very sticky and the raisins will be held into the dough but when the dough is done it is tacky which isn’t enough to bind the outside raisins onto the dough ball. Lightly oil a large bowl and transfer the dough to the bowl,rolling around to coat it with the oil. Cover the bowl with plastic wrap.
Put it in the fridge overnight. The dough becomes very firm in the fridge (since the butter goes firm) but it does rise slowly… the raw dough can be kept in the refrigerator up to a week and then baked on the day you want. Shaping the Dough and Baking the Wreath
1.Let the dough rest for 2 hours after taking out of the fridge in order to warm slightly.
2.Line a sheet pan with parchment paper.
3.Preheat oven to moderate 350°F/180°C/gas mark 4 with the oven rack on the middle shelf.
4.Punch dough down,roll into a rectangle about 16 x 24 inches (40 x 61 cms) and ¼ inch (6 mm) thick. Starting with a long side,roll up tightly,forming a long,thin cylinder.Transfer the cylinder into a sheet pan.Join the ends together,trying to overlap the layers to make the seam stronger and pinch with your fingers to make it stick,forming a large circle.You can form it around the bowl to keep the shape.Using kitchen scissors,make cuts along outside of circle,in 2-inch (5 cm) intervals,cutting 2/3 of the way through the dough.Twist each segment outward,forming a wreath shape. Mist the dough with spray oil and cover loosely with plastic wrap. Proof for approximately 2 hours at room temperature,or until about 1½ times its original size.
Bake the stollen for 20 minutes,then rotate the pan 180 degrees for even baking and continue to bake for 20 to 30 minutes. The bread will bake to a dark mahogany color,should register 190°F/88°C in the center of the loaf,and should sound hollow when thumped on the bottom. 
Transfer to a cooling rack and brush the top with melted butter while still hot.
Immediately tap a layer of powdered sugar over the top through a sieve or sifter.
Wait for 1 minute,then tap another layer over the first.
The bread should be coated generously with the powdered sugar.
Let cool at least an hour before serving. Coat the stollen in butter and icing sugar three times,since this many coatings helps keeps the stollen fresh -especially if you intend on sending it in the mail as Christmas presents! When completely cool,store in a plastic bag. Or leave it out uncovered overnight to dry out slightly,German style. 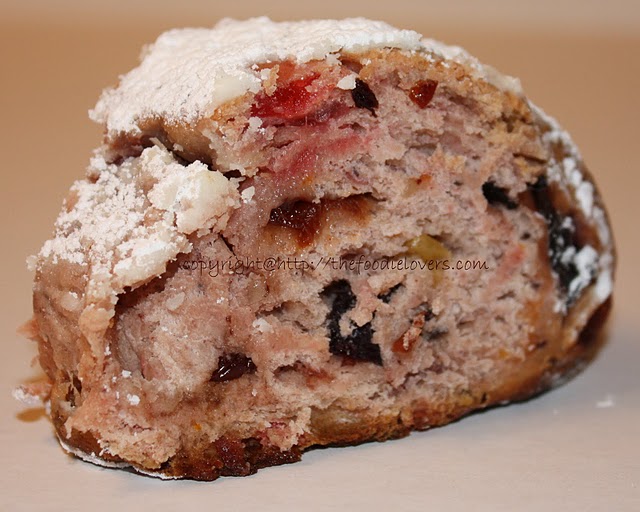
Storage
The more rum and the more coatings of butter and sugar you use the longer it will store.
The following is for the recipe as written and uses the 45 mls of rum and two coatings of butter and icing sugar
1.Stollen freezes beautifully about 4 months
2.The baked stollen stores well for 2 weeks covered in foil and plastic wrap on the counter at room temperature and
3.One month in the refrigerator well covered with foil and plastic wrap. Verdict - I was told that Stollen’s tastes better when stored for long (similar to Fruit Cakes) which I am yet to try. For now,I had them freshly baked from the oven and it was pretty good. Though I am not a great fan of Stollen’s,it was a good try to bake them from scratch at home. Thanks Penny for this recipe:) Have you heard this ???? - “Between the optimist and the pessimist,the difference is droll. The optimist sees the doughnut;the pessimist the hole!” -Oscar Wilde Its the 27th again and I am all set for this month’s Daring Baker’s Challenge. This time there was no baking,it was a wonderful Doughnut Challenge. I love simple doughnuts with powdered sugar sprinkled on the top. And I must say they taste best when hot. Thanks to my Mom who helped me make this! Doughnut is a sweet deep fried snack which is very popular across most countries. Some have them as an evening snack and some take it for breakfast. The most popular ones are the ring shaped ones and other one being the flat ones with some creamy filling. Also Doughnuts are made in various sizes and shapes. I ended up with the regular ones which are so simple and easy to make. The October 2010 Daring Bakers challenge was hosted by Lori of Butter Me Up. Lori chose to challenge DBers to make doughnuts. She used several sources for her recipes including Alton Brown,Nancy Silverton,Kate Neumann and Epicurious. I reduced the recipe into half as I didn’t want to make too many of them.This is how I made them: 
Yeast Doughnuts: Preparation time:
Hands on prep time -25 minutes
Rising time -1.5 hours total
Cooking time -12 minutes Yield:12 to 15 doughnuts &12 to 15 doughnut holes,depending on size Ingredients
Milk -180 ml
Vegetable Shortening 1/6 cup
Active Dry Yeast - 2.5 teaspoon (1pkg)
Warm Water - 40 ml (95°F to 105°F / 35°C to 41°C)
Eggs,Large,beaten 1
White Granulated Sugar 30 ml
Table Salt - 1/2teaspoon
Nutmeg,grated 1/2 tsp
All Purpose Flour 2 1/4 cup
Canola Oil DEPENDS on size of vessel you are frying in – you want THREE (3) inches of oil (can substitute any flavorless oil used for frying) 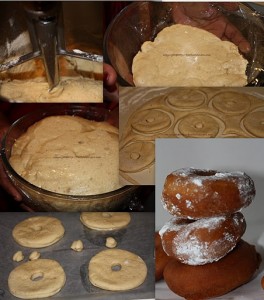
Directions: - Place the milk in a medium saucepan and heat over medium heat just until warm enough to melt the shortening. (Make sure the shortening is melted so that it incorporates well into the batter.)
- Place the shortening in a bowl and pour warmed milk over. Set aside.
- In a small bowl,sprinkle the yeast over the warm water and let dissolve for 5 minutes. It should get foamy. After 5 minutes,pour the yeast mixture into the large bowl of a stand mixer and add the milk and shortening mixture,first making sure the milk and shortening mixture has cooled to lukewarm.
- Add the eggs,sugar,salt,nutmeg,and half of the flour. Using the paddle attachment of your mixer (if you have one),combine the ingredients on low speed until flour is incorporated and then turn the speed up to medium and beat until well combined.
- Add the remaining flour,combining on low speed at first,and then increase the speed to medium and beat well.
- Change to the dough hook attachment of the mixer and beat on medium speed until the dough pulls away from the bowl and becomes smooth,approximately 3 to 4 minutes (for me this only took about two minutes). If you do not have a dough hook/stand mixer – knead until the dough is smooth and not sticky.
- Transfer to a well-oiled bowl,cover,and let rise for 1 hour or until doubled in size. Mine took almost 2.5hrs to rise. I kept it in the refrigerator and continued with the rest of the steps the next day.
- On a well-floured surface,roll out dough to 3/8-inch (9 mm)thick. (Make sure the surface really is well-floured otherwise your doughnuts will stick to the counter).
- Cut out dough using a 2 1/2-inch (65 mm) doughnut cutter or pastry ring or drinking glass and using a 7/8-inch (22 mm) ring for the center whole. Set on floured baking sheet,cover lightly with a tea towel,and let rise for 30 minutes.
- Preheat the oil in a deep fryer or Dutch oven to 365 °F/185°C.

11.Gently place the doughnuts into the oil,3 to 4 at a time. Cook for 1 minute per side or until golden brown (my doughnuts only took about 30 seconds on each side at this temperature). 12.Transfer to a cooling rack placed in baking pan. Allow to cool for 15 to 20 minutes prior to glazing,if desired. 
I didn’t allow it to cool for long as I was too tempted to have them immediately. Sprinkle some Powdered Sugar and enjoy!!! Verdict :These were just perfect like the store bought ones.Simple yet so tasty!!! I went nuts over Doughnuts….did you??? I must say that this was one of the easiest DBC. As always I ended up participating at the last minute. The Sugar Cookies were very very easy to make. While doing my Wilton Course,I came across Royal Icing and completely hated it. It isn’t the kind of icing that I would like on my cake/cookies. Its also a little messy to handle. I didn’t want to go through the pain of making it all over again so stuck to the store bought ones which ain’t that expensive too. My mom helped me make this. Here is how we made it: The September 2010 Daring Bakers’ challenge was hosted by Mandy of “What the Fruitcake?!” Mandy challenged everyone to make Decorated Sugar Cookies based on recipes from Peggy Porschen and The Joy of Baking. 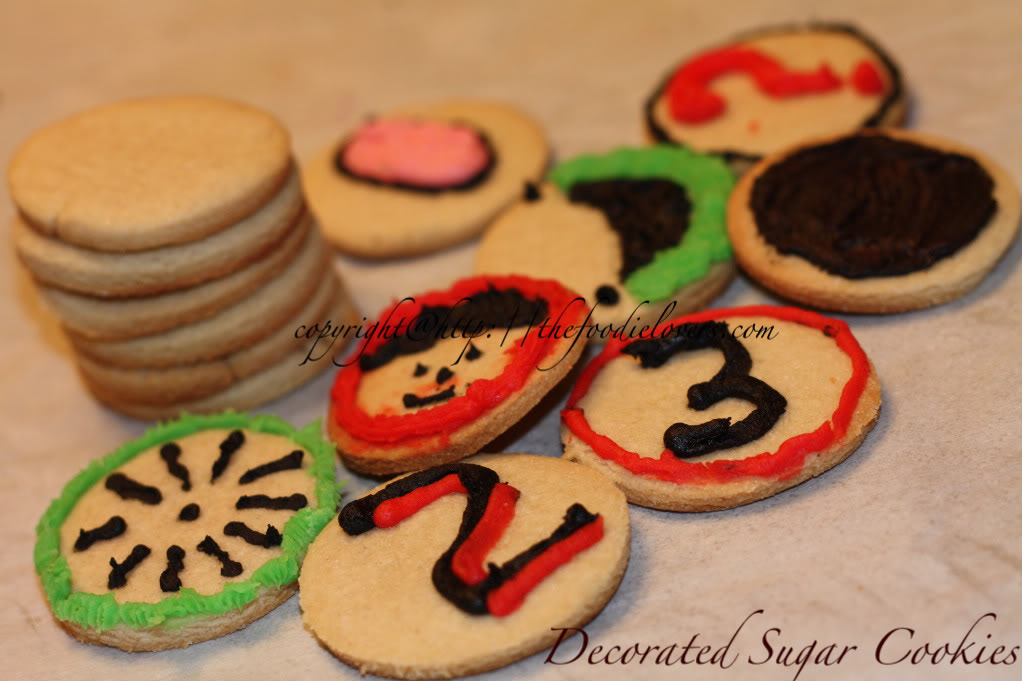
Mandatory • Make the Basic Sugar Cookie recipe provided (unless specific diet restrictions apply)
• Must decorate the cookies with the theme of September,whatever that means. Variations Allowed
• While you must use Peggy Porschen’s sugar cookies recipe,you are allowed to add your own flavourings to the dough,so if you’d like to add a pinch of cinnamon &nutmeg,substitute some of the flour for cocoa,or maybe add orange zest,go for it!
• You don’t have to make your own royal icing from scratch,you may use a store bought mix(which is what I did)
• You may make any shape cookie you like so long as it has the theme of September,this means you could do round or square cookies and pipe pictures/words on them or use specifically shaped cookie cutters (butterflies,flowers,hearts etc)
• You may also use coloured sugars,luster dust,edible glitter or flakes,dragees and coloured sprinkles to decorate your cookies. Preparation Time
30 minutes:Making dough &rolling
1 hour min:Refrigeration
8-15 minutes:Baking per tray depending on size of cookies Basic Sugar Cookies:
Makes Approximately 36x 10cm / 4″Cookies 200g / 7oz / ½ cup + 6 Tbsp Unsalted Butter,at room temperature
400g / 14oz / 3 cups + 3 Tbsp All Purpose / Plain Flour
200g / 7oz / 1 cup Caster Sugar / Superfine Sugar
1 Large Egg,lightly beaten
5ml / 1 tsp Vanilla Extract / Or seeds from 1 vanilla bean Directions
• Cream together the butter,sugar and any flavourings you’re using. Beat until just becoming
creamy in texture.
• Tip:Don’t over mix otherwise you’ll incorporate too much air and the cookies will spread during
baking,losing their shape.
• Beat in the egg until well combined,make sure to scrape down the sides of the bowl.
Add the sifted flour and mix on low until a non sticky dough forms.
• Tip:I don’t have a stand mixer so I find it easier to switch to dough hooks at this stage to avoid
flour flying everywhere.
• Knead into a ball and divide into 2 or 3 pieces.
• Roll out each portion between parchment paper to a thickness of about 5mm/1/5 inch (0.2 inch)
• Refrigerate for a minimum of 30mins.
• Tip:Recipes commonly just wrap the whole ball of dough in clingwrap and then refrigerate it for an
hour or overnight,but by rolling the dough between parchment,this shortens the chilling time and
then it’s also been rolled out while still soft making it easier and quicker.
• Once chilled,peel off parchment and place dough on a lightly floured surface.
• Cut out shapes with cookie cutters or a sharp knife. 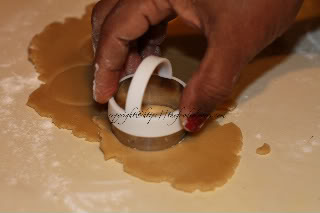
• Arrange shapes on parchment lined baking sheets and refrigerate for another 30mins to an hour.
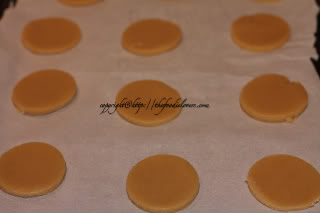
• Tip:It’s very important you chill them again otherwise they’ll spread while baking.
• Re-roll scraps and follow the above process until all scraps are used up.
• Preheat oven to 180°C (160°C Fan Assisted) / 350°F / Gas Mark 4.
• Bake until golden around the edges,about 8-15mins depending on the size of the cookies.
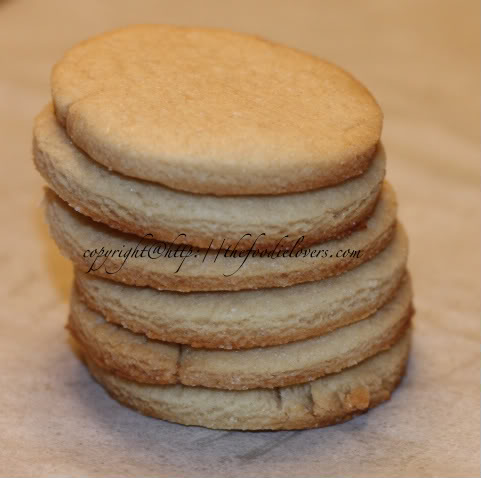
• Tip:Bake same sized cookies together otherwise mixing smaller with larger cookies could result in
some cookies being baked before others are done.
• Tip:Rotate baking sheets half way through baking if your oven bakes unevenly.
• Leave to cool on cooling racks.
• Once completely cooled,decorate as desired.
• Tip:If wrapped in tinfoil/cling wrap or kept in airtight containers in a cool place,un-decorated
cookies can last up to a month.
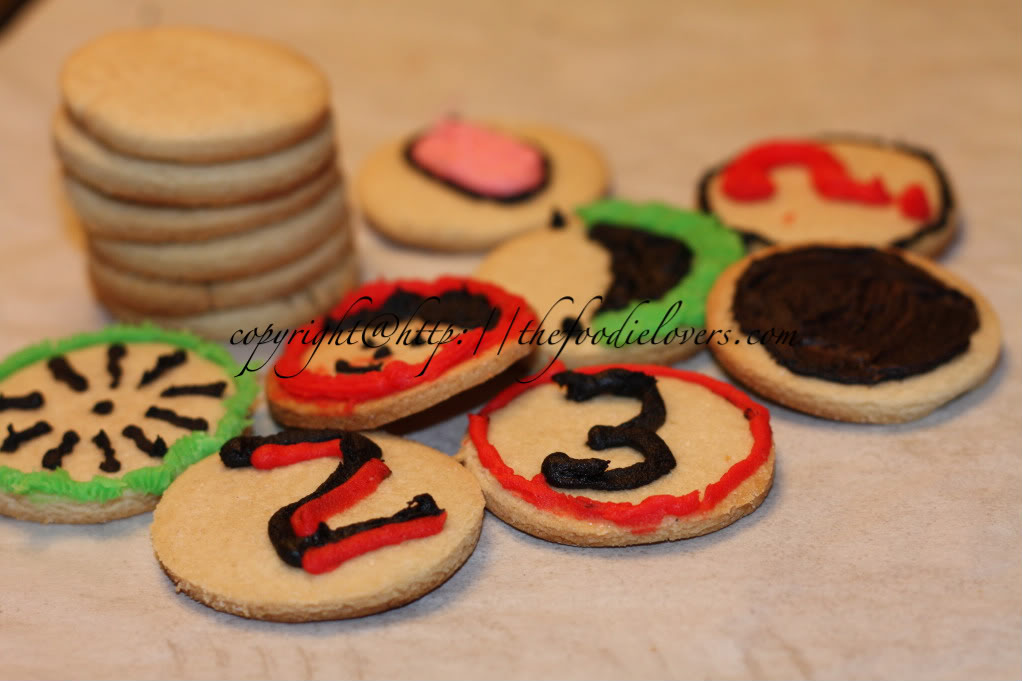
Verdict:It tasted just like the usual Sugar cookies. As I mentioned,I am not a big fan of the icing so I prefer having them without it. Overall,it wasn’t time consuming or difficult….a complete easy one!!!
Cake + Ice Cream,can it go wrong???? Ummmph…. did I forget to mention “CHOCOLATE”???? DB is the only reason I even blog these days.I really need to get back to my old self and start baking and blogging in full swing.Icecream cakes from Coldstone have always been my fav ones. Making anything like that from scratch is something that I wouldn’t have even dreamt about. I was over excited when I read the months challenge in the DBC forum. Here is how I made it:) The July 2010 Daring Baker’s challenge was hosted by Sunita of Sunita’s world – life and food. Sunita challenged everyone to make an ice-cream filled Swiss roll that’s then used to make a bombe with hot fudge. Her recipe is based on an ice cream cake recipe from Taste of Home. There were some mandatory rules,such as -We had to make the Swiss Roll,a filling,fudge sauce and two kinds of Icecream all made from scratch.And set the dessert in a bowl/pan etc in the order given in the recipe-Swiss roll,first ice-cream,the fudge topping and,finally,the second ice cream. 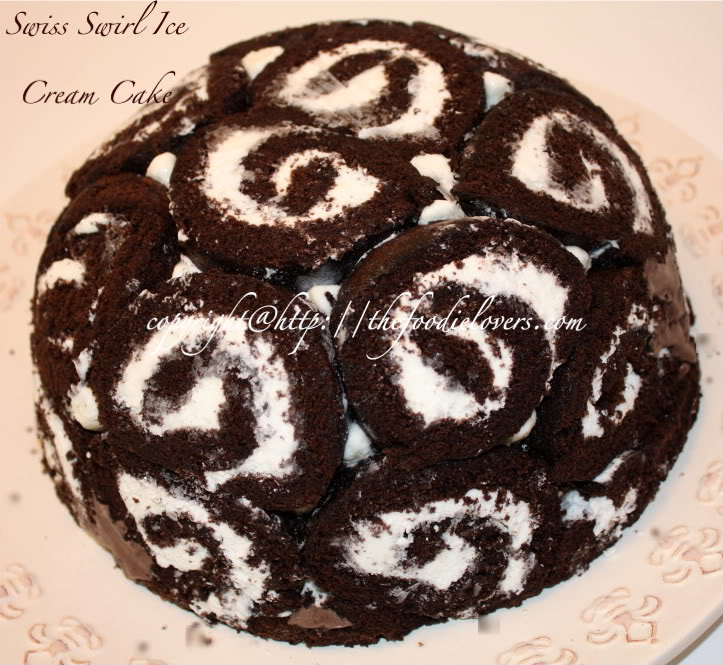
Preparation time- For the 2 Swiss rolls- 30 mins each + cooling time (at least 30 minutes) before filling and rolling. The filling can be made while the cakes cool. -For the ice creams- 5+10 minutes + freezing time For the fudge topping- 5 minutes + cooling time Assembly- At least an hour of freezing time between each layer Swiss roll ice cream cake (inspired by the recipe of the same name from the Taste of Home website) The Swiss rolls: Preparation time- 10 minutes Baking time- 10-12 minutes Rolling and cooling time- at least 30 minutes Filling-5-8 minutes Filling and rolling- 5-10 minutes Ingredients- 6 medium sized eggs 1 C / 225 gms caster sugar /8 oz+ extra for rolling 6 tblsp / 45gms/ a pinch over 1.5 oz of all purpose (plain) flour + 5 tblsp/40gm /a pinch under 1.5 oz of natural unsweetened cocoa powder,sifted together 2 tblsp /30ml / 1 fl oz of boiling water a little oil for brushing the pans For the filling: 2C / 500 mls/ 16 fl oz of whipping cream 1 vanilla pod,cut into small pieces of about ½ cm (or 1 tsp vanilla extract) 5 tblsp / 70gms/2.5oz of caster sugar Method- - Pre heat the oven at 200 deg C /400 deg F approximately. Brush the baking pans ( 11 inches by 9 inches ) with a little oil and line with greaseproof baking paper. If you have just one pan,bake one cake and then let the pan cool completely before using it for the next cake.
- In a large mixing bowl,add the eggs and sugar and beat till very thick;when the beaters are lifted,it should leave a trail on the surface for at least 10 seconds.
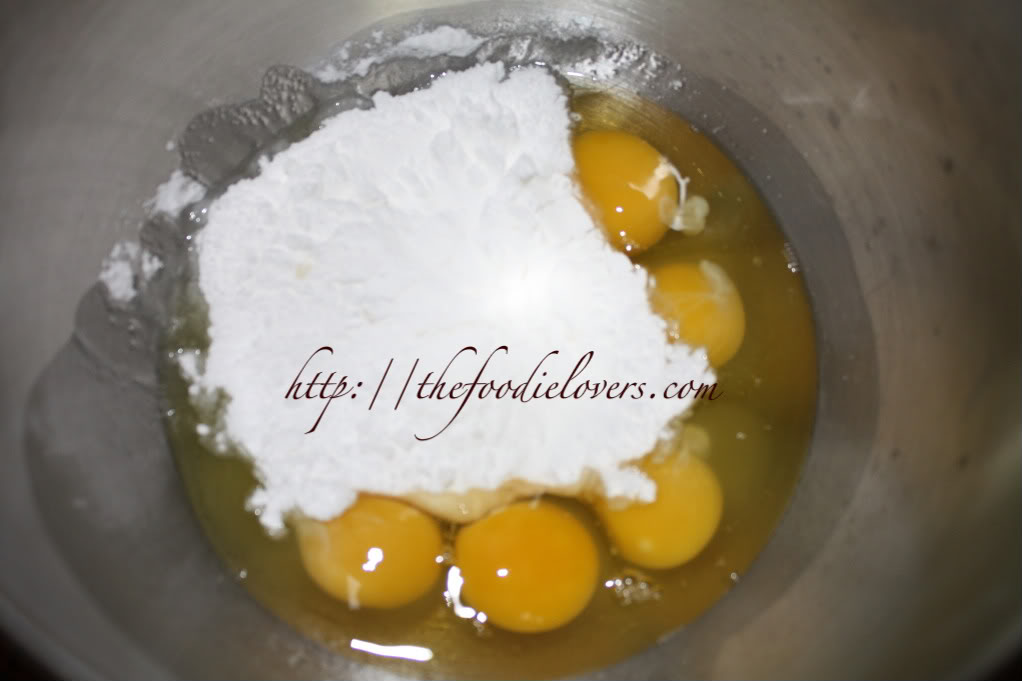 - Add the flour mixture,in three batches and fold in gently with a spatula. Fold in the water.
- Divide the mixture among the two baking pans and spread it out evenly,into the corners of the pans.
- Place a pan in the centre of the pre heated oven and bake for about 10-12 minutes or till the centre is springy to the touch.
- Spread a kitchen towel on the counter and sprinkle a little caster sugar over it.
- Turn the cake on to the towel and peel away the baking paper. Trim any crisp edges.
 - Starting from one of the shorter sides,start to make a roll with the towel going inside. Cool the wrapped roll on a rack,seam side down.
- Repeat the same for the next cake as well.
- Grind together the vanilla pieces and sugar in a food processor till nicely mixed together. If you are using vanilla extract,just grind the sugar on its own and then add the sugar and extract to the cream.
Filling - - In a large bowl,add the cream and vanilla-sugar mixture and beat till very thick.
 - Divide the cream mixture between the completely cooled cakes.
- Open the rolls and spread the cream mixture,making sure it does not go right to the edges (a border of ½ an inch should be fine).
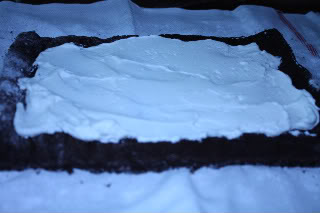 - Roll the cakes up again,this time without the towel. Wrap in plastic wrap and chill in the fridge till needed,seam side down.
Vanilla Ice Cream: Preparation time-5 minutes+freezing I have made the ice cream without an ice cream maker. Ingredients- 2 and ½ C / 625 ml / 20 fl oz of whipping cream 1 vanilla bean,minced or 1 tsp/ 5 ml/ .15 fl oz vanilla extract ½ C / 115gms/ 4 oz of granulated sugar Method- Grind together the sugar and vanilla in a food processor. In a mixing bowl,add the cream and vanilla –sugar mixture and whisk lightly till everything is mixed together. If you are using the vanilla extract,grind the sugar on its own and then and the sugar along with the vanilla extract to the cream. 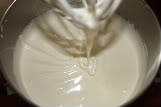
Pour into a freezer friendly container and freeze till firm around the edges. Remove from the freezer,beat till smooth and return to the freezer. Do this 3-4 times and then set completely. Hot Fudge sauce: Preparation time-2 minutes Cooking time-2 minutes Ingredients- 1 C / 230gms/ 8 oz of caster sugar 3 tblsp / 24gms/1.5 oz of natural unsweetened cocoa powder 2 tblsp /15gms/ 1 oz of cornflour/cornstarch 1 and ½ C /355ml /12 fl oz of water 1 tblsp /14gms/ 1 oz butter 1 tsp/5 ml / .15 fl oz vanilla extract Method- - In a small saucepan,whisk together the sugar,cocoa powder,cornflour and water.
- Place the pan over heat,and stir constantly,till it begins to thicken and is smooth (for about 2 minutes).
- Remove from heat and mix in the butter and vanilla. Keep aside to cool .
Chocolate Ice Cream- Preparation time- 5 minutes + freezing Ingredients- 2C/ 500 ml whipping cream 1 C/230gms/8 oz caster sugar 3 tblsp/ 24 gms/1.5 oz of natural unsweetened cocoa powder Method- - Grind together the sugar and the cocoa powder in a food processor .
- In a saucepan,add all the ingredients and whisk lightly.
- Place the pan over heat and keep stirring till it begins to bubble around the edges.
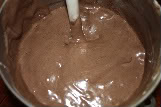 - Remove from heat and cool completely before transferring to a freezer friendly container till firm around the edges. If you are using an ice cream maker,churn the ice cream according to the manufacturer’s instruction,after the mixture has cooled completely.
- Remove from the freezer,beat till smooth and return to the freezer. Do this 3-4 times and then set completely.
Assembly: - Cut the Swiss rolls into 20 equal slices ( approximately 2 cms each ).
- Cover the bottom and sides of the bowl in which you are going to set the dessert with cling film/plastic wrap.
- Arrange two slices at the bottom of the pan,with their seam sides facing each other. Arrange the Swiss roll slices up the bowl,with the seam sides facing away from the bottom,to cover the sides of the bowl. Cover the bowl with plastic wrap and freeze till the slices are firm (at least 30 minutes).
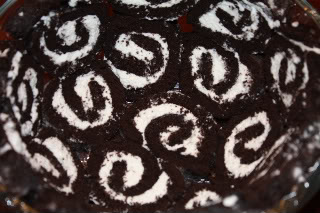 - Soften the vanilla ice cream. Take the bowl out of the freezer,remove the cling film cover and add the ice cream on top of the cake slices. Spread it out to cover the bottom and sides of the bowl. Cover the bowl with plastic wrap and freeze till firm ( at least 1 hour).I added some sliced strawberries(4 nos) and some toasted walnuts(3tbsp).
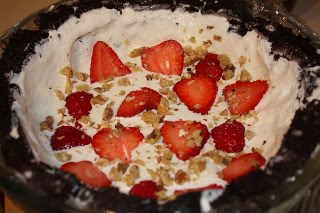 - Add the fudge sauce over the vanilla ice cream,cover and freeze till firm . ( at least an hour)
- Soften the chocolate ice cream and spread it over the fudge sauce. Cover with plastic wrap and freeze for at least 4-5 hours till completely set .
- Remove the plastic cover,and place the serving plate on top of the bowl. Turn it upside down and remove the bowl and the plastic lining. If the bowl does not come away easily,wipe the outsides of the bowl with a kitchen towel dampened with hot water. The bowl will come away easily.
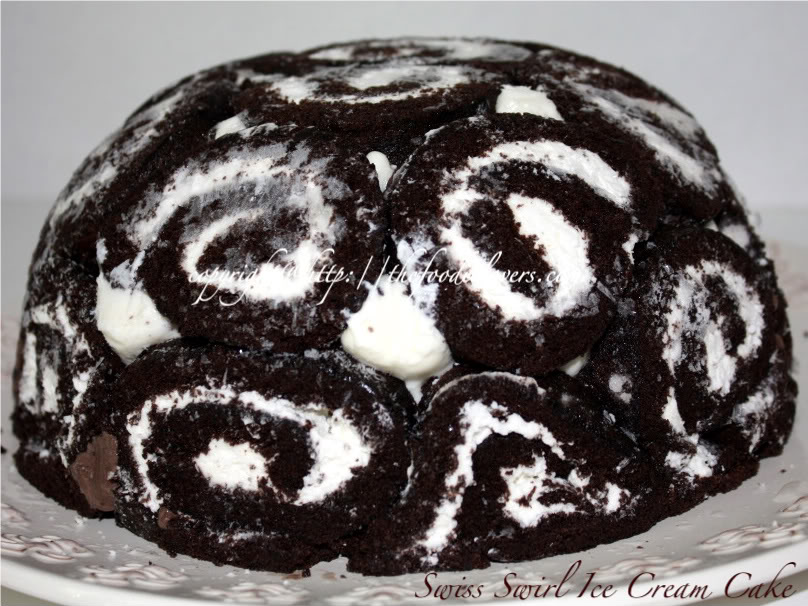 - Keep the cake out of the freezer for at least 10 minutes before slicing,depending on how hot your region is. Slice with a sharp knife,dipped in hot water.
A closer look at the cake ….. 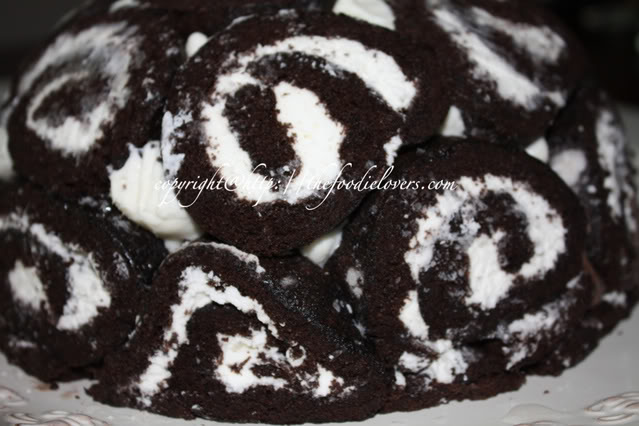
Had to take a picture before they melted:) 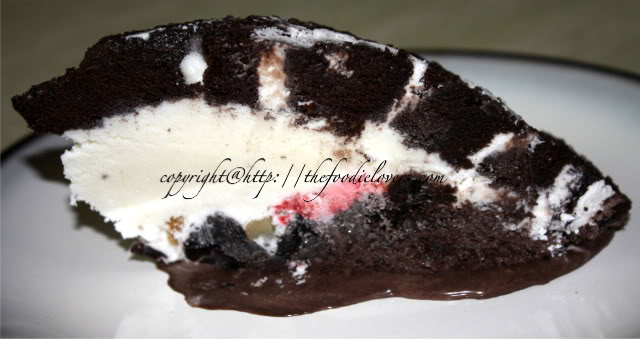
Verdict:Anything “chocolaty”and am in for it:).This cake is all about flavors ….there is a strong amount of Vanilla in most layers,the chocolaty taste is something that can make anyone drool.I cudnt stop licking the fudge sauce it was sooo good:). The cakes were pretty moist the first day and were not so very perfect later.The ice-creams were very good though I felt that they were too sweet(I shud probably reduce the quantity of sugar the next time I make this.) Also the Vanilla ice cream turned a li’l hard after few days.However,I loved this challenge and would surely make this again. DH loved it and was proud of me:). This time for a change we had friends home only for desserts.D and A liked it alot,infact D updated the pic in FB and I gained some publicity coz of it:-P. Check out the rest of the Daring Baker’s post here. “A stitch In Time Saves Nine”- is the proverb that comes to my mind as I work on the Daring Baker’s Challenge for the month of June’10. Even though I’ve been busy for the past few weeks,I had made up my mind to diligently participate in my fav forum. Pavlovas is something that I’ve been meaning to bake for a long time now.Thanks for the challenge,it gave me an opportunity to accomplish this. Pavlova is a meringue based dessert,where in the meringue is with a crispy crust and soft,light inner. The June 2010 Daring Bakers’ challenge was hosted by Dawn of Doable and Delicious. Dawn challenged the Daring Bakers’ to make Chocolate Pavlovas and Chocolate Mascarpone Mousse. The challenge recipe is based on a recipe from the book Chocolate Epiphany by Francois Payard. 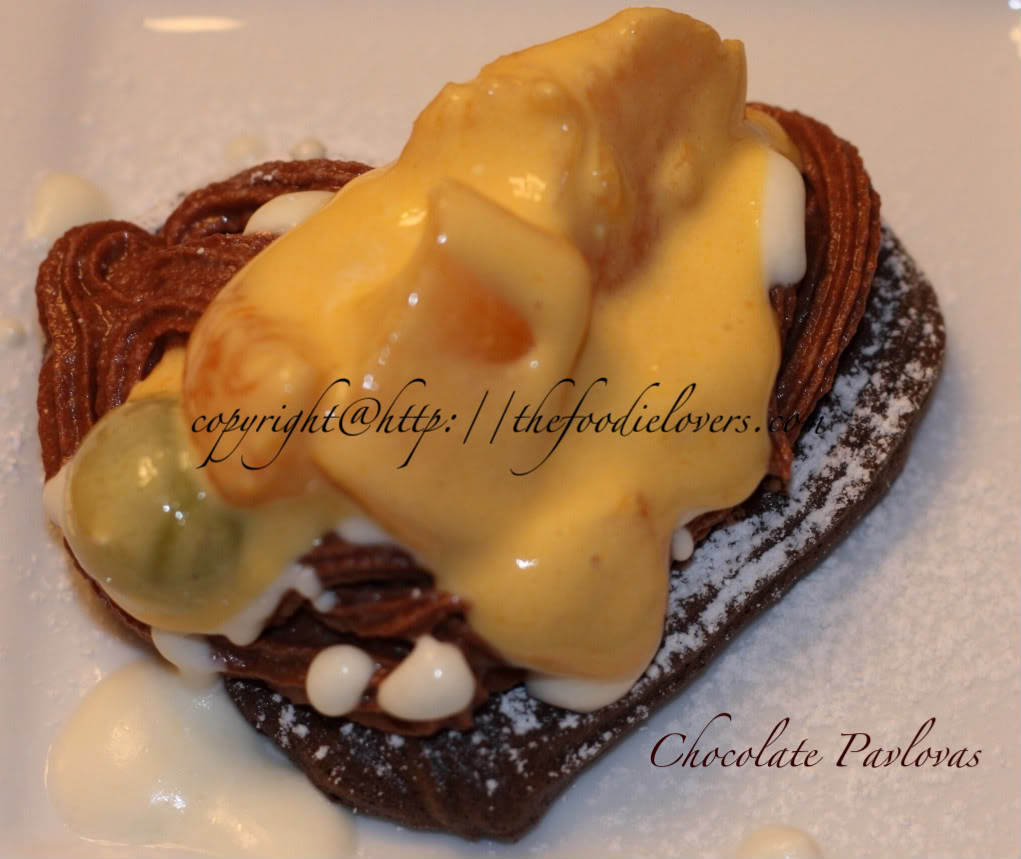
Note:The recipe consists of four parts.The quantity of ingredients was a lot for all recipes except Chocolate Meringue.Using the provided recipe,I ended up with more than 2 cups of Mascarpone cream(used for drizzling) and I am sure thats too much.One wouldn’t need more than few spoons for drizzling.Similarly,the Mascarpone mousse was a lot too.I suggest to reduce all the ingredients to 1/4th.This is what ideally I should have done. Also,the Meringue was very sweet and chocolaty,reducing the quantity of sugar and cocoa powder would do good. Recipe 1:Chocolate Meringue (for the chocolate Pavlova): 3 large egg whites
½ cup plus 1 tbsp (110 grams) white granulated sugar
¼ cup (30 grams) confectioner’s (icing) sugar
1/3 cup (30 grams) cocoa powder Directions: - Place a rack in the center of the oven and preheat to 200º F (95º C) degrees. Line two baking sheets with silpat or parchment and set aside.
- Put the egg whites in a bowl and whip until soft peaks form. Increase speed to high and gradually add granulated sugar about 1 tbsp at a time until stiff peaks form. (The whites should be firm but moist.)
- Sift the confectioner’s sugar and cocoa powder over the egg whites and fold the dry ingredients into the white. (This looks like it will not happen. Fold gently and it will eventually come together.)
- Fill a pastry bag with the meringue. Pipe the meringue into whatever shapes you desire. Alternatively,you could just free form your shapes and level them a bit with the back of a spoon.
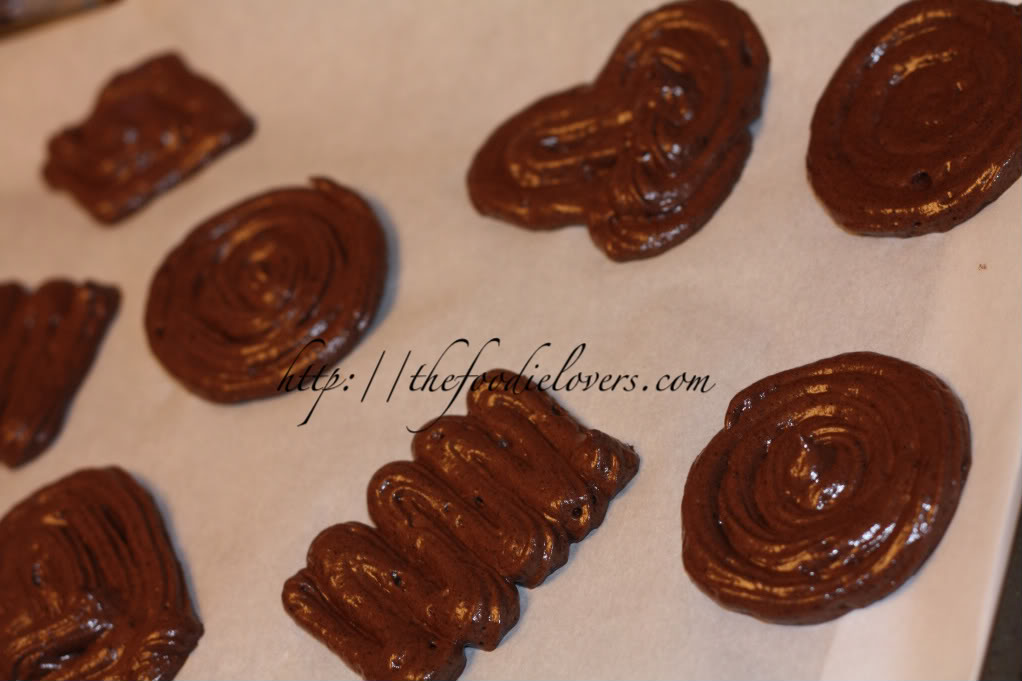
- Bake for 2 hours until the meringues become dry and crisp. Cool and store in an airtight container for up to 3 days.
Recipe 2:Chocolate Mascarpone Mousse (for the top of the Pavlova base): 1 ½ cups (355 mls) heavy cream (cream with a milk fat content of between 36 and 40 percent)
grated zest of 1 average sized lemon
9 ounces (255 grams) 72% chocolate,chopped
1 2/3 cups (390 mls) mascarpone
pinch of nutmeg
2 tbsp (30 mls) Grand Marnier (or orange juice) Directions: - Put ½ cup (120 mls) of the heavy cream and the lemon zest in a saucepan over medium high heat. Once warm,add the chocolate and whisk until melted and smooth. Transfer the mixture to a bowl and let sit at room temperature until cool.

2. Place the mascarpone,the remaining cup of cream and nutmeg in a bowl. Whip on low for a minute until the mascarpone is loose. Add the Grand Marnier and whip on medium speed until it holds soft peaks. (DO NOT OVERBEAT AS THE MASCARPONE WILL BREAK.) 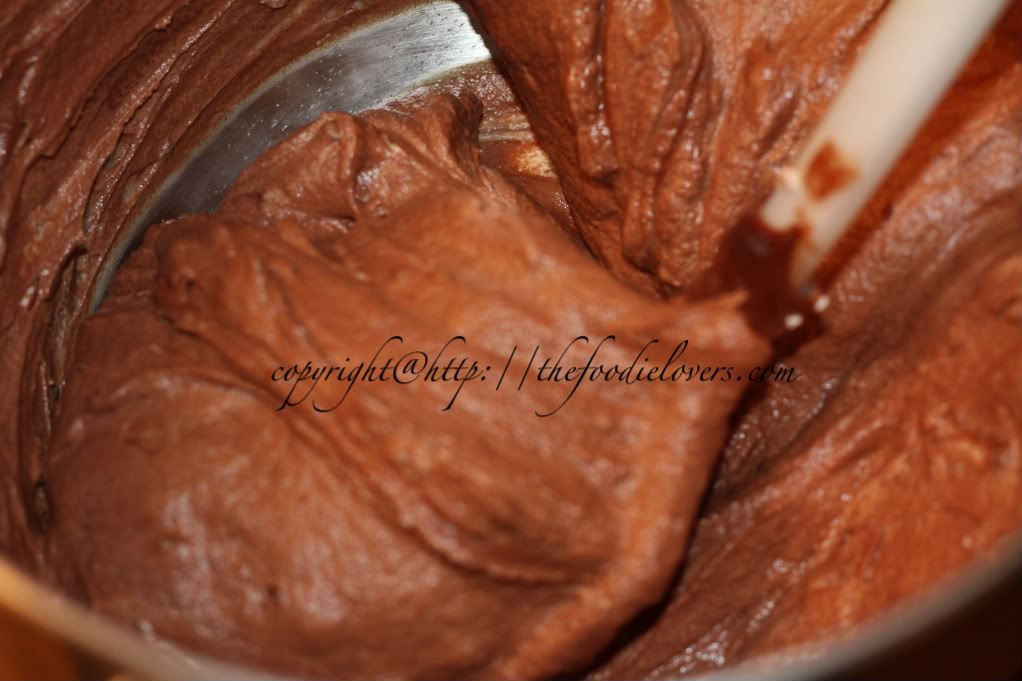
3. Mix about ¼ of the mascarpone mixture into the chocolate to lighten. Fold in the remaining mascarpone until well incorporated. Fill a pastry bag with the mousse. Again,you could just free form mousse on top of the pavlova. Recipe 3:Mascarpone Cream (for drizzling): 1 recipe crème anglaise
½ cup (120 mls) mascarpone
2 tbsp (30 mls) Sambucca (optional)
½ cup (120 mls) heavy cream Directions: 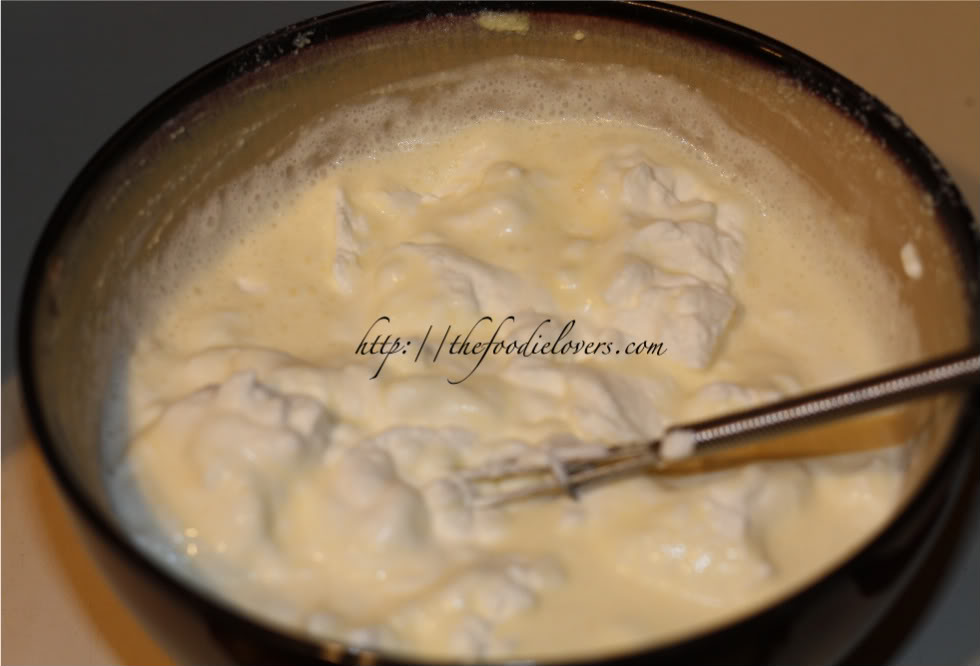
- Prepare the crème anglaise. Slowly whisk in the mascarpone and the Sambucca and let the mixture cool. Put the cream in a bowl and beat with electric mixer until very soft peaks are formed. Fold the cream into the mascarpone mixture.
Recipe 4:Crème Anglaise (a component of the Mascarpone Cream above): I made the creme anglaise a day in advance. 1 cup (235 mls) whole milk
1 cup (235 mls) heavy cream
1 vanilla bean,split or 1 tsp pure vanilla extract
6 large egg yolks
6 tbsp (75 grams) sugar Directions: - In a bowl,whisk together the egg yolks and sugar until the mixture turns pale yellow.
- Combine the milk,cream and vanilla in a saucepan over medium high heat,bringing the mixture to a boil. Take off the heat.
- Pour about ½ cup of the hot liquid into the yolk mixture,whisking constantly to keep from making scrambled eggs. Pour the yolk mixture into the pan with the remaining cream mixture and put the heat back on medium. Stir constantly with a wooden spoon until the mixture thickens enough to lightly coat the back of a wooden spoon. DO NOT OVERCOOK.
- Remove the mixture from the heat and strain it through a fine mesh sieve into a bowl. Cover and refrigerate until the mixture is thoroughly chilled,about 2 hours or overnight.
Assembly:
Pipe the mousse onto the pavlovas and drizzle with the mascarpone cream over the top. Dust with confectioner’s sugar and fresh fruit if desired. 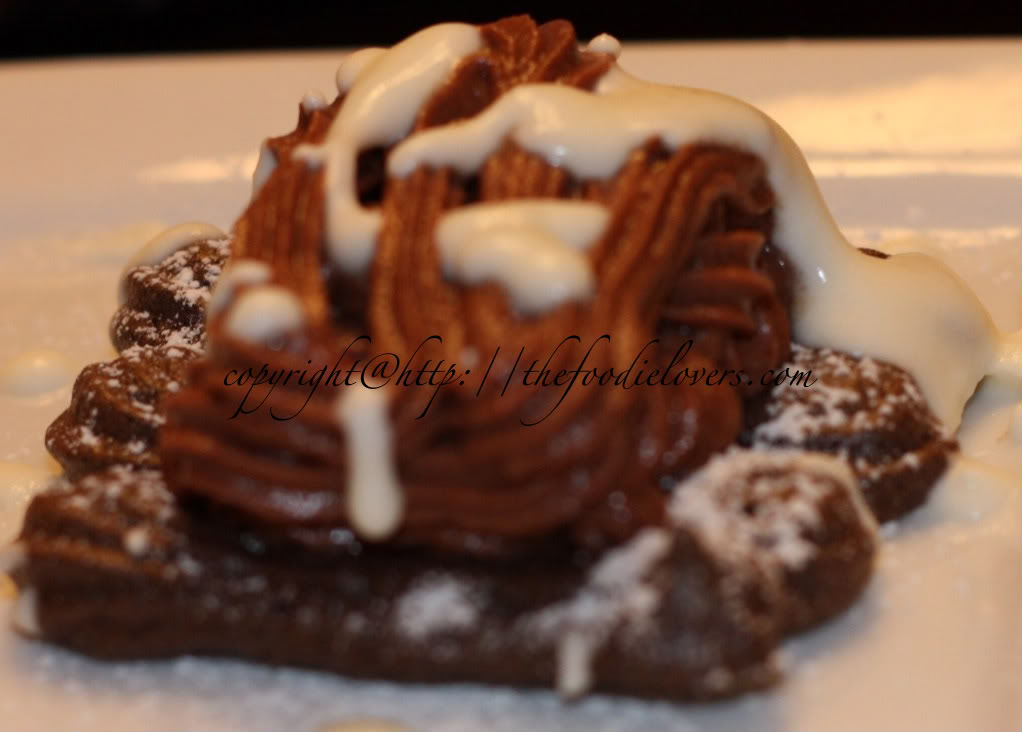
Verdict: DH and me felt that it was toooooo very chocolaty. The crispiness of the meringue was wonderful,the mousse was just perfect.I didn’t have any fruits left at home,so used a li’l bit of home made Mango Pudding which went very well with the Pavlova. Overall,a great dessert.I relished it!!!!
This month’s Daring Baker’s was an easy one. I didn’t want to miss out again,somehow managed to make it for this month’s challenge at the last minute. This month’s challenge recipe was “Piece Montée”,which means literally “mounted piece.” The other name for this dessert is Croquembouche (“crunch in the mouth”).The original piece montée is a cone like structure made of profiteroles (cream-filled puff pastries) sometimes dipped in chocolate,bound with caramel,and usually decorated with threads of caramel,sugared almonds,chocolate,flowers,or ribbons. The May 2010 Daring Bakers’ challenge was hosted by Cat of Little Miss Cupcake. Cat challenged everyone to make a Piece montée,or Croquembouche,based on recipes from Peter Kump’s Baking School in Manhattan and Nick Malgieri. 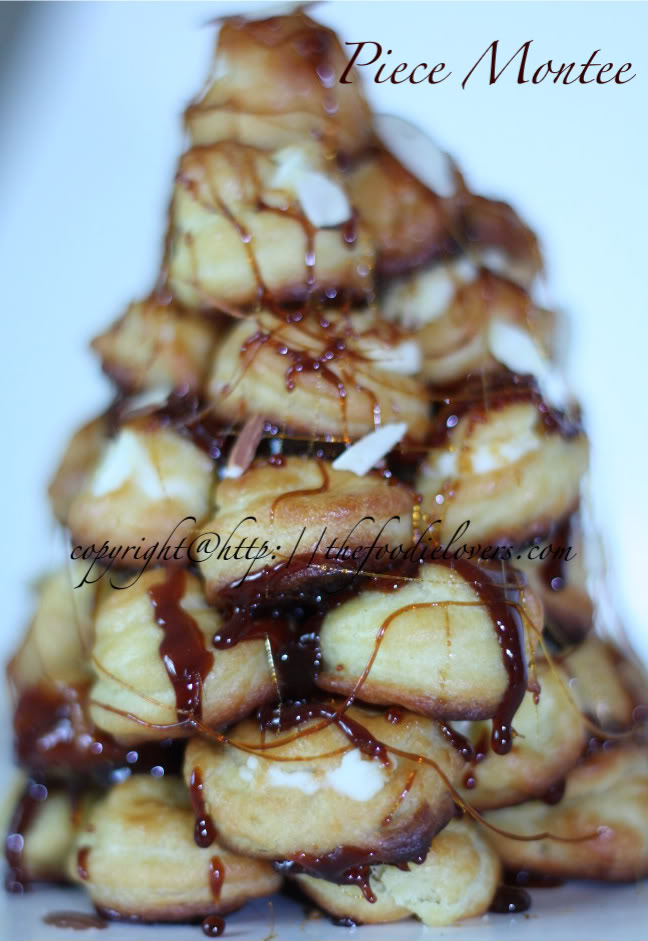
This recipe has 3 main components:the pate a choux,the crème patissiere,and the glaze used to mount/decorate it. Ingredients: For the Vanilla Crème Patissiere (Half Batch) 1 cup (225 ml.) whole milk
2 Tbsp. cornstarch
6 Tbsp. (100 g.) sugar
1 large egg
2 large egg yolks
2 Tbsp. (30 g.) unsalted butter
1 Tsp. Vanilla Dissolve cornstarch in ¼ cup of milk. Combine the remaining milk with the sugar in a saucepan;bring to boil;remove from heat.Beat the whole egg,then the yolks into the cornstarch mixture. Pour 1/3 of boiling milk into the egg mixture,whisking constantly so that the eggs do not begin to cook.Return the remaining milk to boil. Pour in the hot egg mixture in a stream,continuing whisking.Continue whisking (this is important – you do not want the eggs to solidify/cook) until the cream thickens and comes to a boil. Remove from heat and beat in the butter and vanilla.Pour cream into a stainless steel/ceramic bowl. Press plastic wrap firmly against the surface. Chill immediately and until ready to use. Pate a Choux (Yield:About 28) ¾ cup (175 ml.) water
6 Tbsp. (85 g.) unsalted butter
¼ Tsp. salt
1 Tbsp. sugar
1 cup (125 g.) all-purpose flour
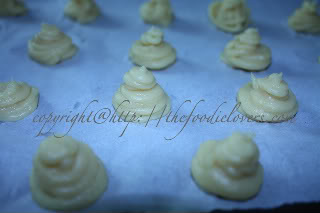
4 large eggs For Egg Wash:1 egg and pinch of salt Pre-heat oven to 425◦F/220◦C degrees. Line two baking sheets with parchment paper. Preparing batter:Combine water,butter,salt and sugar in a saucepan over medium heat. Bring to a boil and stir occasionally. At boil,remove from heat and sift in the flour,stirring to combine completely.Return to heat and cook,stirring constantly until the batter dries slightly and begins to pull away from the sides of the pan.Transfer to a bowl and stir with a wooden spoon 1 minute to cool slightly.Add 1 egg. The batter will appear loose and shiny.As you stir,the batter will become dry-looking like lightly buttered mashed potatoes.It is at this point that you will add in the next egg. Repeat until you have incorporated all the eggs. Piping:Transfer batter to a pastry bag fitted with a large open tip (I piped directly from the bag opening without a tip). Pipe choux about 1 inch-part in the baking sheets. Choux should be about 1 inch high about 1 inch wide. Using a clean finger dipped in hot water,gently press down on any tips that have formed on the top of choux when piping. You want them to retain their ball shape,but be smoothly curved on top.Brush tops with egg wash (1 egg lightly beaten with pinch of salt). Baking:Bake the choux at 425◦F/220◦C degrees until well-puffed and turning lightly golden in color,about 10 minutes.Lower the temperature to 350◦F/180◦C degrees and continue baking until well-colored and dry,about 20 minutes more. Remove to a rack and cool. 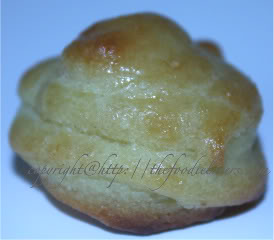 Can be stored in a airtight box overnight. Can be stored in a airtight box overnight.
Filling:When you are ready to assemble your piece montée,using a plain pastry tip,pierce the bottom of each choux. Fill the choux with pastry cream using either the same tip or a star tip,and place on a paper-lined sheet. Choux can be refrigerated briefly at this point while you make your glaze. Use one of these to top your choux and assemble your piece montée. Hard Caramel Glaze:
1 cup (225 g.) sugar
½ teaspoon lemon juice Combine sugar and lemon juice in a saucepan with a metal kitchen spoon stirring until the sugar resembles wet sand. Place on medium heat;heat without stirring until sugar starts to melt around the sides of the pan and the center begins to smoke. Begin to stir sugar. Continue heating,stirring occasionally until the sugar is a clear,amber color. Remove from heat immediately;place bottom of pan in ice water to stop the cooking. Use immediately. 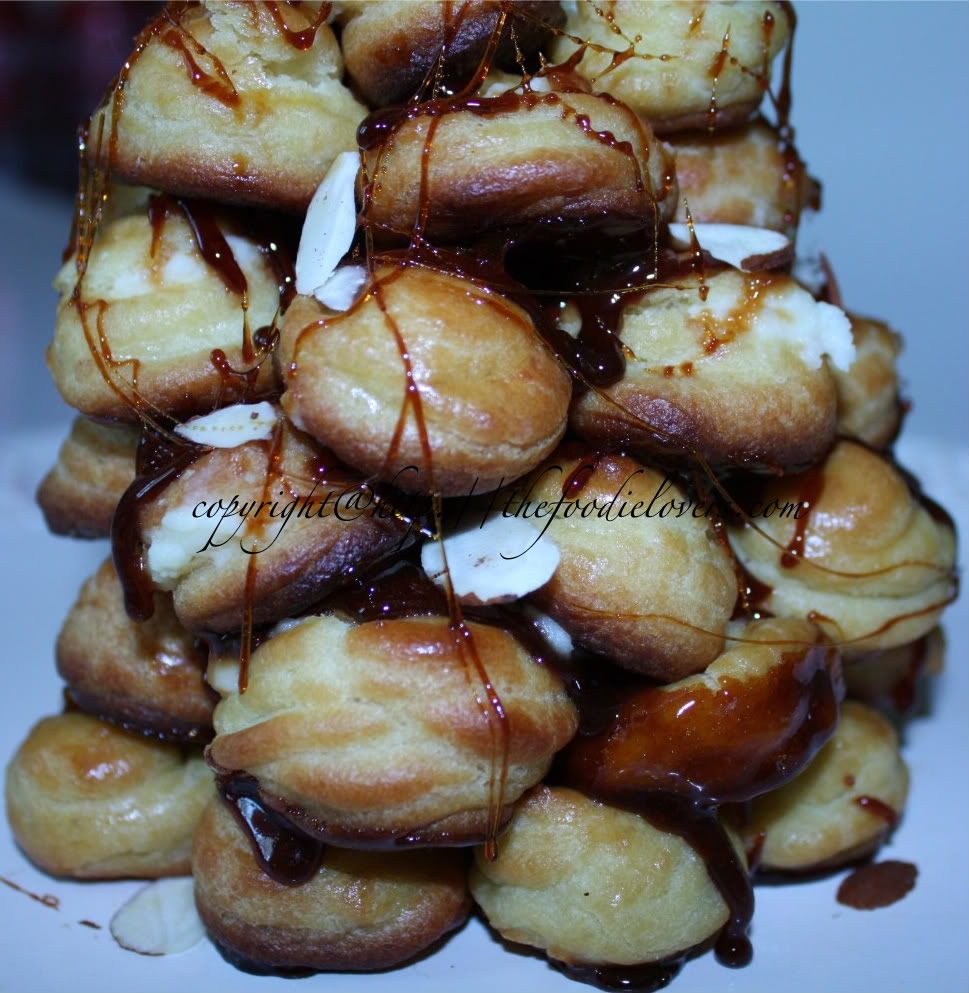
Assembly of your Piece Montée: Lay out the unfilled,unglazed choux in a practice design to get a feel for how to assemble the final dessert. For example,if making a conical shape,trace a circle (no bigger than 8 inches) on a piece of parchment to use as a pattern. Then take some of the larger choux and assemble them in the circle for the bottom layer. Practice seeing which pieces fit together best. 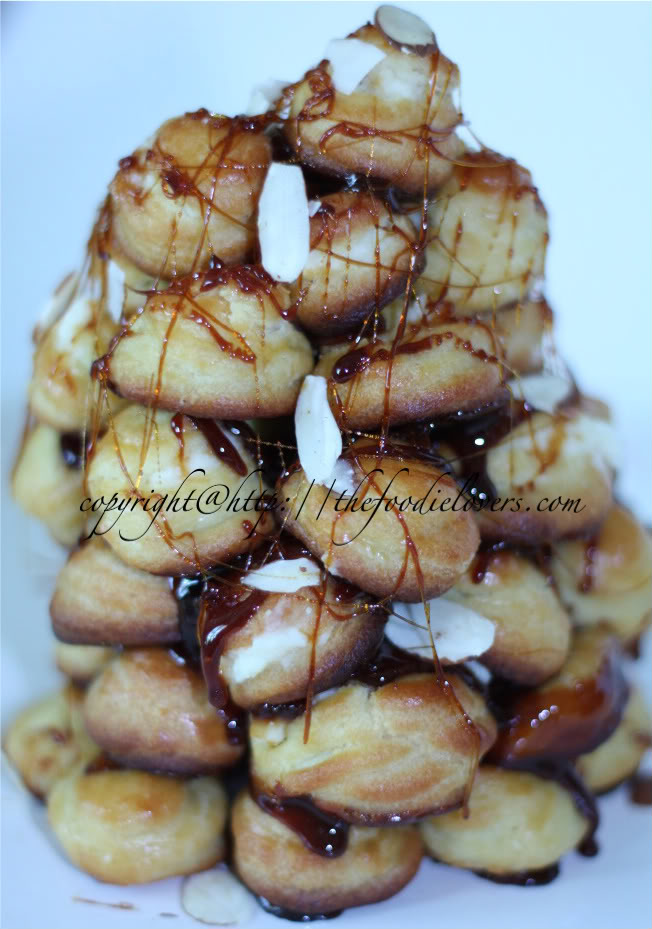 Once you are ready to assemble your piece montée,dip the top of each choux in your glaze (careful it may be still hot!),and start assembling on your cake board/plate/sheet. Continue dipping and adding choux in levels using the glaze to hold them together as you build up. Once you are ready to assemble your piece montée,dip the top of each choux in your glaze (careful it may be still hot!),and start assembling on your cake board/plate/sheet. Continue dipping and adding choux in levels using the glaze to hold them together as you build up.
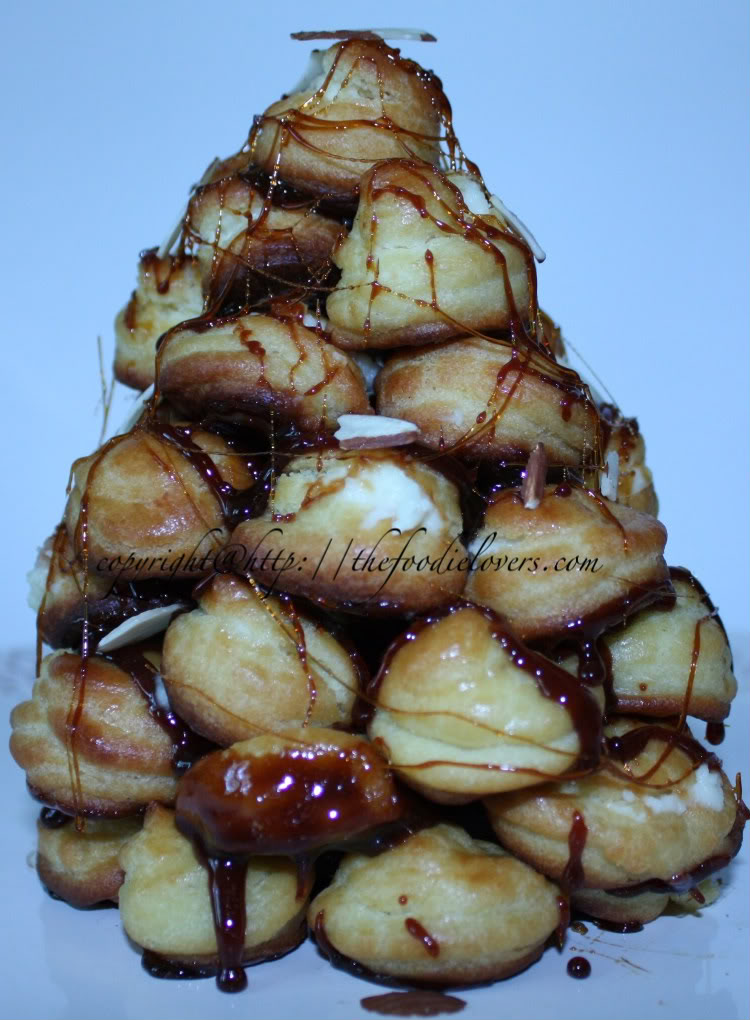
Once done,drizzle with remaining glaze.I used slivered almonds to decorate it. | About meStraight from a foodie lover’s heart thats what this site is all about. It’s just not about the taste,appearance or the presentation neither it is about satisfying ones hunger or revitalizing the organs. There is much more to it. I have been passionate about baking and this blog gave me an opportunity to express myself and hone my latent culinary skills.And last not but the least learn,the art of baking and cooking from many many talented people,age and location not withstanding.I welcome you to my world of foodie lovers!. Hope you enjoy reading it as much as I enjoy writing it - Nina:)  |


