Tomato and Onion Cottage Bread

When it comes to topics that interest me like Baking and Painting,I have a strong sense of perseverance.I began my journey with an unpredictable oven that my Mom had. Those days my experience was limited to few cookies/biscuits.Reading helped me a lot, I learnt different techniques and methods.Baking Breads is something I enjoy the most because I feel they are more challenging when compared to baking cakes/cookies/flans/tarts.Making the right dough,Fermenting and Proofing…..ahh there is so much to it.In general, if Breads turn to have a course texture it means the dough was too soft ,wasn’t kneaded well or it may have been over proofed.In the same way,if you had cracked crust that’s because of the dough being too stiff or underproofed.The more I bake the more I know, how satisfying it is.These days I have been working a lot with whole grain baking too and am thoroughly impressed as to how healthy baking can get.

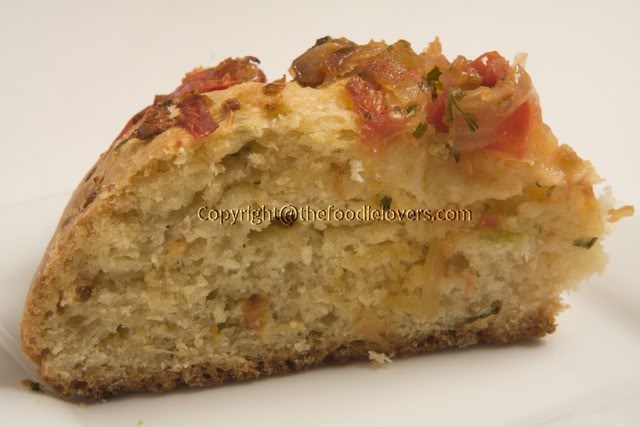
For now its “Tomato and Onion Cottage Bread” which I had made few days back.When I baked this for the first time I felt the top was a li’l soggy compared to the one I made the second time as it was underbaked.So by trial and error I work things out. If I am not sure of any recipe,I work with small portions first to ensure I don’t waste much.

Photobucket

Photo Courtesy - Friend R,who is an amazing Photographer,you may check his site here
.
Recipe Source - The complete book of Home Baking by Heilie Pienaar, gifted to me by my cousin H.

Preparation Time 1 hr(including one hour of baking)

Makes one large round Bread

Filling:

1 tbsp Olive oil

1 Medium onion,finely chopped

1 clove garlic,crushed

3 medium tomatoes,skinned and chopped

1 tbsp chopped fresh oregano or a tsp ground black peper to taste

A tsp salt

Bread:

4 C bread flour

1 tsp salt

A tbsp caster sugar

2 tsp easy blend yeast

A tbsp olive oil

200 ml warm milk

Method: For Filling - Heat oil in a heavy sauce pan and Saute onion and garlic until soft.Add tomatoes and seasoning.Simmer for ten minutes or until tomatoes have softened and most of the liquid has evaporated.Leave it cool slightly.

For Bread: Sift flour and salt into a bowl.Add sugar,yeast and one third of the tomato filling.Mix,Add oil and enuf milk and mix it to a soft dough.Knead the dough on a lightly floured surface until smooth and elastic.Place dough in a oiled bowl,cover and leave it to rise in a warm place until double in size.Turn dough into a lighly floured surface and knead until smooth.Shape into a round and place on a greased baking tray.Cut a large cross in top of the round and fill with remaining tomato filling.Leave to prove in a warm place to double in size.Bake in preheated oven at 350F for 40-45 mins, or until loaf sounds hollow when tapped on base.And here it is:)

Photobucket

And a small piece…

Photobucket

Verdict: This one is a perfect for an evening snack or morning breakfasts.Usually breads are too plain,the Onions and tomatoes in this recipe surely adds a zing to the taste.These breads taste bests when eaten the same day its baked.

Gingerbread House - Daring Baker's December Challenge

It’s the holiday season everywhere.I so very wanted to have a Christmas Tree at home,somehow it just didn’t happen.I was happy to at least make the Gingerbread House and enjoy the festive mood.I wasn’t too confident when I read the Daring Baker’s Challenge for this month,wasn’t sure if wud be able to go with it.Finally made up my mind and decided to make it well in advance and there I go ..hell,the roof broke into two. I was thoroughly disappointed. Later,used royal icing to stick them togetherand hurray it worked. Luckily the shapes where not as bad as I had anticipated, after baking they had increased a lil in size but I cud easily trim them down.I wanted to make a very small house so used up a lil bit of batter to make cookies.Though the house looks good I had to hide a lot of cracks and cuts,to cover these up I brushed them with melted white chocolate.I cant think of anything other than chocolates for decoration so used a lot of chocolate morsels,sprinkles and M&M’s.Here I present my Gingerbread House.

Photobucket

The December 2009 Daring Bakers? challenge was brought to you by Anna of Very Small Anna and Y of Lemonpi. They chose to challenge Daring Bakers, everywhere to bake and assemble a gingerbread house from scratch. They chose recipes from Good Housekeeping and from The Great Scandinavian Baking Book as the challenge recipes.

I used Y’s Recipe ?
Scandinavian Gingerbread (Pepparkakstuga)
from The Great Scandinavian Baking Book by Beatrice Ojakangas http://astore.amazon.com/thedarkit-20/detail/0816634963

1 cup butter, room temperature [226g]
1 cup brown sugar, well packed [220g]
2 tablespoons cinnamon
4 teaspoons ground ginger
3 teaspoons ground cloves
2 teaspoons baking soda
? cup boiling water
5 cups all-purpose flour [875g]

1. In a large bowl, cream the butter and sugar until blended. Add the cinnamon, ginger and cloves. Mix the baking soda with the boiling water and add to the dough along with the flour. Mix to make a stiff dough. If necessary add more water, a tablespoon at a time. Chill 2 hours or overnight.
2. Cut patterns for the house, making patterns for the roof, front walls, gabled walls, chimney and door out of cardboard.

Photobucket

3. Roll the dough out on a large, ungreased baking sheet and place the patterns on the dough. Mark off the various pieces with a knife, but leave the pieces in place.
4. [I rolled out the dough on a floured bench, roughly 1/8 inch thick (which allows for fact that the dough puffs a little when baked), cut required shapes and transferred these to the baking sheet. Any scraps I saved and rerolled at the end.]
5. Preheat the oven to 375′F (190′C). Bake for 12 to 15 minutes until the cookie dough feels firm. After baking, again place the pattern on top of the gingerbread and trim the shapes, cutting the edges with a straight-edged knife. Leave to cool on the baking sheet.

For the Roof-
1 cup white chocolate(bars/morsels)
Stirring in between, melt the Chocolate in the Microwave.Allow it to come to room temperature and gently brush it over the roof.Refrigerate,until use.Decorate it using Royal icing(recipe below)

Photobucket


Royal Icing:

1 large egg white
3 cups (330g) powdered sugar
1 teaspoon white vinegar
1 teaspoon almond extract

Beat all ingredients until smooth, adding the powdered sugar gradually to get the desired consistency. Pipe on pieces and allow to dry before assembling. If you aren’t using it all at once you can keep it in a small bowl, loosely covered with a damp towel for a few hours until ready to use. You may have to beat it slightly to get it an even consistency if the top sets up a bit. Piped on the house, this will set up hard over time.

Photobucket

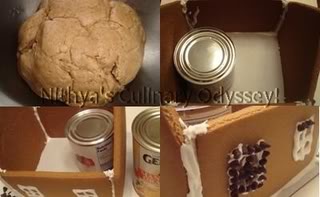
Assemble the house Place a thick Cardboard for the base.I filled my pastry bag with royal icing and generously applied it at the bottom of the wall and used cans to support the walls.Add a second wall securing it with syrup on top and on the sides touching the first wall.Repeat the same for other walls as well.Allow it to dry before working on the roof.Apply the icing generously on all sides and place the roof and again wait till it dries completely.Use chocolate morsels,sprinkles and M&M to decorate the house.

Photobucket

Tah dah.I MADE IT:-D

Verdict: Its one of the best things that I have baked this season…it was total fun.I am surely gona make them each and every year.Thanks DBC!

Vanilla Cake with Pineapple Cream filling and Whipped Cream frosting

The more you praise and celebrate your life, the more there is in life to celebrate ? Oprah Winfrey.

In childhood we longed to grow up but now we want to be kids.Looking back at good old days, birthday’s wasn’t jes about the gifts…. it was more about celebrating it with my loved ones and yes how can I forget the yummilicious food that Mom made all the time.She used to give me a box full of chocolates to be distributed at school and neighbourhood.No uniform day-that used to be the best thing.Oh, I just wonder where those wonder years melted away?

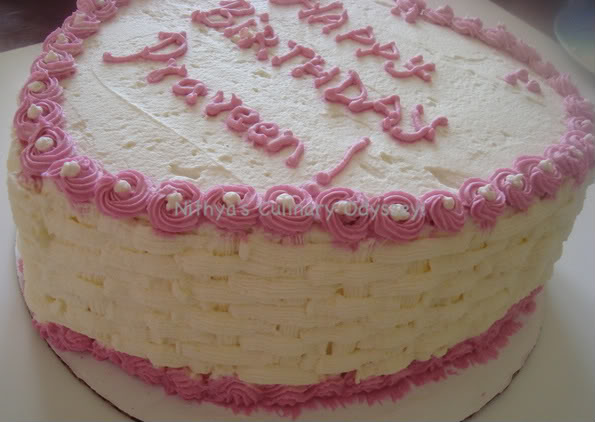
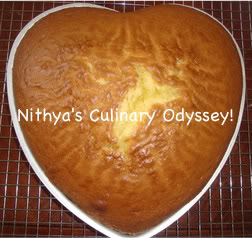
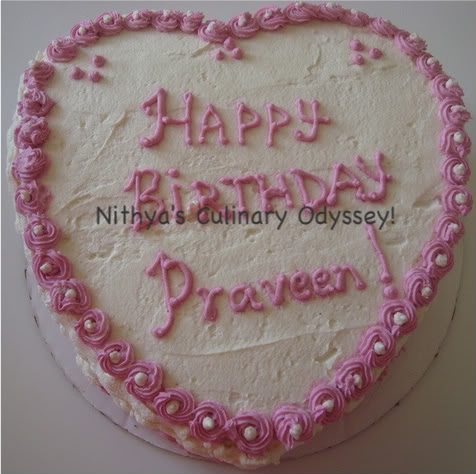
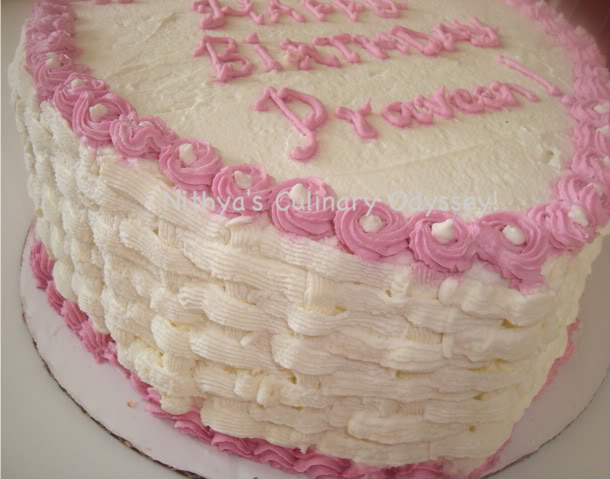
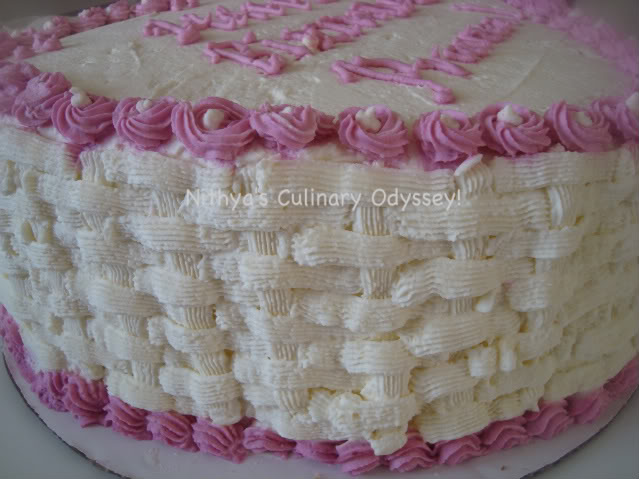
Regardless of however it is now,Birthdays are special. And it was a special time for me too,as it was P’s birthday.I baked the cake as per his liking.He prefers plain simple cakes to anything chocolaty.So I ended up with a Vanilla Cake with Pineapple Cream filling and whipped cream frosting.I haven’t seen him like any frosting other than Whipped cream, so it was cream all over the cake.Since it had to be a special cake I made a 10 inched three layered heart shaped cake and decorated it with Basket weave technique which I learnt while doing my Wilton course.This is one of my fav techniques and works best with buttercream frosting.I knew it was gona be challenging working with whipped cream coz of the texture,however it came out surprisingly well and was appreciated by everyone.I tripled the quantity of the mentioned recipe.

Photobucket

Recipe Source - Serena Bass’s Book (only for the cake)

Prep Time - 25mins

Baking time - 40min

Ingredients:

A cup Sugar

Two tsp Pure Vanilla Extract

Three Large eggs

a Cup Heavy cream

1 1/2 cup Cake Flour

1 1/2tsp Baking Powder

1/2 tsp Salt

1/4 C Granulated Sugar for dusting at the top(I skipped this one as my cake was well frosted)

Method: Preheat Oven at 350F.Grease a 10 inch cake pan.Beat Vanilla Extract,Egg and Sugar until its pale and thick.Separately beat cream in a bowl until soft peaks form.Turn this onto the egg mixture.Sift Flour,Baking Powder and salt,fold these together in the batter.Scrape the batter to the prepared pan ,sprinkle sugar on top and bake for 40mins or until a toothpick inserted comes out clean.Once done,cool the cake on rack.

Photobucket

For the filling & frosting:

Ingredients:

Whipped cream - 1 1/2 pint

Crushed Pineapple - 4oz

Vanilla Extract - a drop

Powdered Sugar - 5tbsp

Method: Beat the cream along with the extract until soft peaks form.Just take 1 cup of this mixture and mix in the crushed pineapple,this would be used as filling .To the remaining cream add in the sugar and beat again till you end up with peaks(when u run it thru a spatula the peaks shud stand,thats the ideal consistency).

Photobucket

Assemble the cake: Cut the cake into two halves(using a cake leveler is the best way to do it,if not you can also use a serrated knife).Spread the filling generously on top of one of the halves.Place the second half on top of it and frost the cake using the cream.If you are good at decorating the cake,you may use your pastry bags and nozzles to do the same.Adding food colors to the cream is also an option.

Photobucket

A closer look at the Basket weave technique :)

Photobucket

Verdict: It was a well crafted cake,which tasted as good as it looked. Perhaps my best attempt in frosting so far. Instead of using any techniques jes a simple layer of frosting wud be great too.

This is off too Mahimaa’s Contribute your Cakes and Cookies event.

Chegodilu - Indian Cooking November Challenge

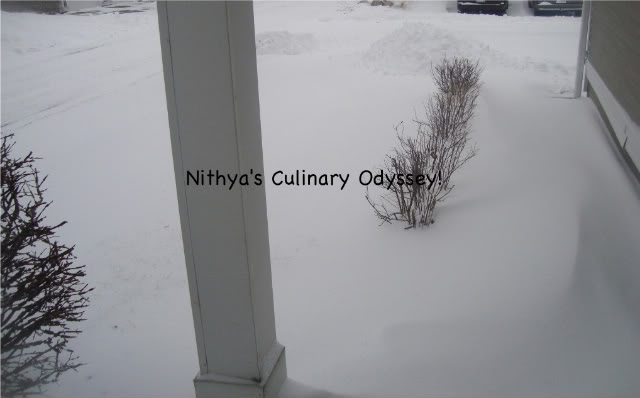
Of late I have been busy with too many things.Apart from the regular work,I have one or the other classes everyday - swimming,painting and what not. I am tired.Mind want’s to rest but heart doesn’t agree. I haven’t even had time to watch any of my fav serials on TV,missed so many episodes of Criminal Minds,Fringe and CSI.Unfortunately hulu doesn’t play Criminal Minds online,huh!.God,24hrs aint enuf for me. Weather is getting worse day by day,its abt 0F now.We already had our first major snow storm warning last week,gosh three more months to go.Oh lemme stop cribbing.This is how the entrance to my house looks….fully covered with snow!

Photobucket

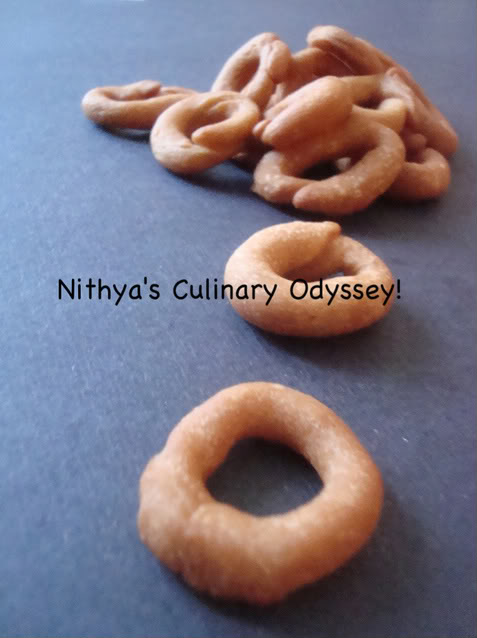
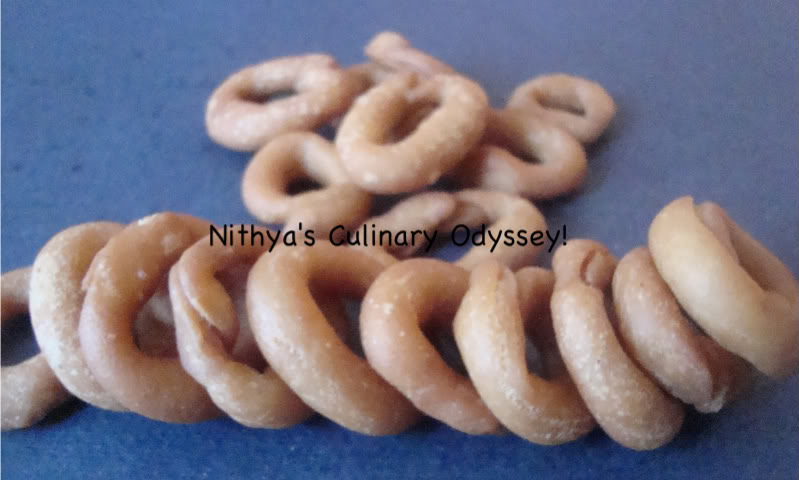
Its P’s birthday tomorrow,I need to bake his Birthday cake.I have too many things in mind,hope all materialize well.For now,I logged in to post ICC?s Nov Challenge ? Chegodilu.I’ve never heard about this,though I have had similar ones called Kodubele(not sure if they are the same).It was nice to munch on these cute li’l rings.Srivalli had suggested two recipes,I tried the second one.

Photobucket

Ingredients :

Rice flour - 3/4 cup
All purpose flour/ Maida - 1/4 cup
Ghee - 2 tbsp
Ajwain - 1/4 tsp
Red chilli powder - 1/4 tsp
Turmeric really a pinch
Salt as per taste
Oil to deep fry

Method:Boil 1 cup water in a bowl, add salt to it.

When the water starts boiling, remove from stove, add ajwain, red chilli powder, turmeric and flours. Stir with a ladle to make sure it is mixed well. Pour ghee on it and cover.

Once it cools, knead it to form smooth dough.

Pinch out small balls of dough and roll them like threads between your palm, bring the ends together to form into small rings

Fry them in hot oil til they turn golden in color.

Photobucket

Verdict: P finished it all in a day,he loved it. Its definitely a great snack to munch on.

Masala Puri with a twist!

Or shud I say,Masala Puri without the Puri?

Last month at the Hindu temple here,along with four other friends I cooked for 400 people.Each one was supposed to take up a dish and make it in three hours time,set the buffet table,serve the food and the proceeds went to the temple. It was a different experience handling huge vessels and spoons/spatulas(some which I wasn’t even able to hold).I had made Shahi Dum Aloo(recipe to follow shortly).The Original idea was to make Poori’s to go with the Aloo,but making it for so many was certainly a challenging task.At the last minute we got to know about frying Flour Tortillas instead of making Poori’s.After trying it at home,i realized how perfect they were.On the menu the Tortillas by itself was a hit. A friend of mine had mentioned about using corn tortillas for masala puris.I thought even Flour ones would do good.Making small Puri’s (for all chats) is again a painful job.So to make things easy,I baked these Tortillas until crisp and used them instead of Puri’s

Being here,so far from India I miss eating so many variety of food,especially chats.Who doesn’t like them??? The only way I can relish is by making them at home.Masala Puri is a very popular street food/chat found in Bangalore. Small Puris are crushed,topped with the Masala ie., nothing but a semi gravy made with few spices.The Puri’s which either get crushed or broken( the ones which cannot be used for making Pani Puri )are used to make Masala Puris.For the Tamarind Dates Chutney you can either settle for the store bought ones or make it from scratch(Cook 5-6 roughly chopped dates in Tamarind water.Once done,use a mixer and grind them well,sieve it.Add 2 tbsp of jaggery and allow it to boil until it thickens).

Preparation Time: 20mins
Serving - 4

Ingredients:For the Masala
1 Cup Frozen Peas(boiled and mashed)
1 medium sized Potato (boiled and mashed)
A tsp chilli powder
As per taste,Salt
A pinch,sugar
2 tbsp Tamarind Dates Chutney(recipe above)
1/2 Cup grated Carrot(optional)

Grind to a smooth paste-
an inch cinnamon stick
3 Red and 2 green chillies
4 -5 Mint leaves
1 tbsp coconut(optional)
A tbsp chopped Cilantro
A tsp of each - cumin seeds,coriander seeds,poppy seeds
4 tbsp Dalia (Roasted split pea) - Optional(I prefer without them)
Ginger

For the Puri
4 Flour Tortillas

Garnishing
A tbsp cilantro (chopped)
1/4 cup Onion finely chopped
1/4 cup Tomatoes finely chopped
1/2 Cup thin Sev

Method: Add 2 cups of water and bring the masala paste to a quick boil.Add Chilli powder,salt and sugar.When the raw smell disappears add the peas ,tamarind chutney, mashed potatoes along with enough water to cook.Allow it to boil until it reaches a semi gravy consistency. The Dalia and the Potato will act as a thickening agent. In the meanwhile, preheat the oven to 350F.Place the Tortillas(you may wana cut them into two or four) on a cookie sheet and bake for about 12 mins or until crisp.Remove and cool.Break them into pieces.

Just before serving,place the broken Tortillas in a serving plate,pour a ladle of Masala Mixture enough to cover the Puri’s,sprinkle chopped tomatoes,onions and cilantro.Garnish with sev.

Photobucket

Masala Puri always tastes good when its hot actually piping hot :-) .Instead of Flour you may even try the corn Tortillas.Some dislike the smell of Tortillas,but believe me once they are baked and broken you can hardly make out their taste(this is how I fooled P:-D).Also instead of baking you can just dry toast them in a Tava,it actually takes time but it’s not bad at all.

Verdict: It’s a perfect chat for the evening (especially if you are in 16F like me:-).

Rugelach and am back!

Note - I have moved my blog from www.aromasfrommykitchen.blogspot.com.

Alright am back.Welcome to my site,I am extremely delighted about having my own space for blogging. A big big thanks to friend R who helped me work this out. After having made peace with Plagiarism I have decided to move on.Thanks for your solidarity.This site was completed a few days back,but had a lil bit of technical glitches here n there, its all done now . up and running(Haven’t you heard that a zillion times at work:-))

I wanted to come up with something different and unusual. On my page, you would find Kitchen Vocab & Chemistry -where I will share some tips,ideas etc.The Art work section is for all my creative work.I have worked a lil on these pages for now,however I will keep updating them . Recipe Index ? the name says it all.

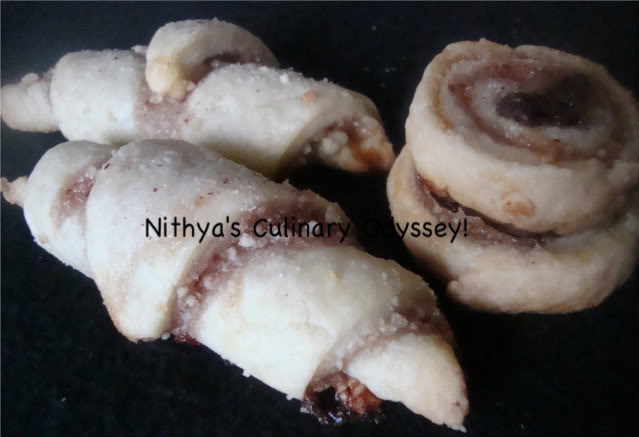
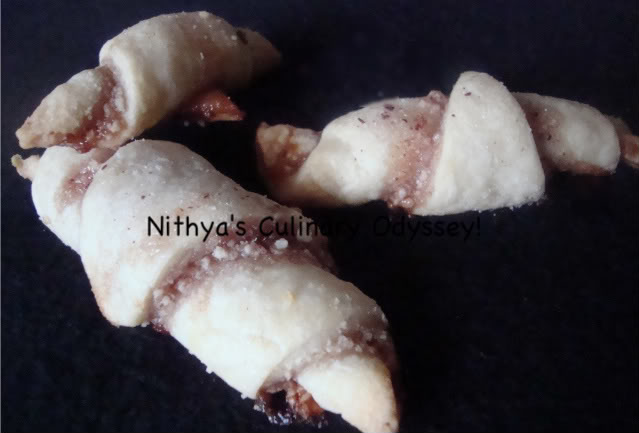
I wanted to start blogging with a sweet and baked these cute lil ones.Rugelach is a cookie made with cream cheese dough spread with any filling such as jam,syrup,cinnamon and nuts.It is called the “ultimate pastry cookie”,also referred as butter or nut horns(origin being European Jewish Community).As far as I know,they come in two shapes,one in the form of small rolls and the most popular being the crescent shaped one.There are again ways to make them,some use sour cream and others use cream cheese (like I did).These doughs are rolled out into circles,sugar,cinnamon and nuts are spread over,cut into pie shape/pizza shapes and rolled up in the form of crescents.I believe in the US the dough is called as ?cream cheese dough?.I have tweaked the recipe a lil as per my requirement.

Photobucket

Recipe Source : Joy of Cooking book

Preparation Time: 40 min(including baking time,excluding cooling time)

Servings: 16 large crescents and 14 small rectangles

Ingredients:

1 Cup Butter (2 sticks),softened

6 ounces cream cheese(softened)

2 Cup All Purpose Flour

A tsp ground Cinnamon

1/3 Cup Sugar

A cup Strawberry Syrup(The original recipe asked for any fruit preserves or Jam)

1 Cup mini chocolate chips(Raisins can also be used)

3 tbsp grounded Walnuts/Almonds(coarsely grounded)

Method: Beat Butter and Cream Cheese on medium speed until blended(I used my Kitchen Aid,an electric mixer will do good too).Add the flour and beat until; the dough comes together. Divide the dough into three parts.Flatten one part of it into 6×4 rectangle or 6 circle. Wrap in a plastic and refrigerate for an hour.(I divided them into 1 rectangle and 2 circles).

Preheat oven to 350F.Cover a cookie sheet with Parchment paper.Work with one portion of the dough(leave the remainder refrigerated).Mix Sugar and cinnamon together.

Rectangular Rugelach:

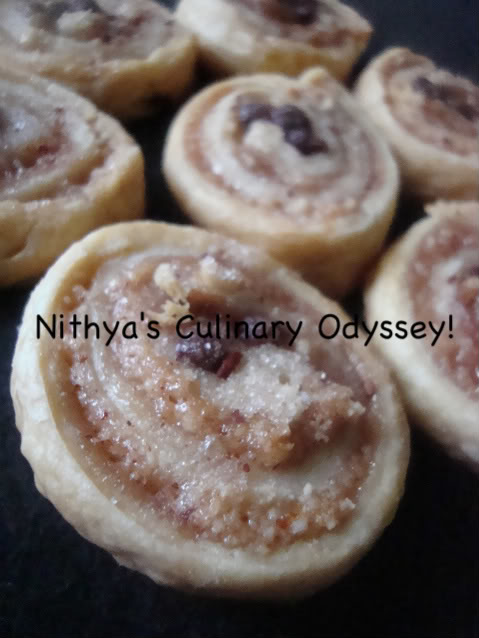
Shape by rolling each portion in to a 16X10 rectangle,about 1/8 thick.Use flour for dusting.Leaving border spread 1 rectangle with the syrup,place a line of chocolate chips in one end.Sprinkle sugar cinnamon mixture and nuts.Roll the dough starting at the chocolate end ,gently tucking and tightening as you go.Cut the roll into 1 1/2 slices.Repeat with remaining rectangles.(I wanted them to look like cinnamon rolls hence,sliced them really thin).

Photobucket

Crescent Rugelach:

Shape by rolling each portion into a circle about 14 in diameter.Spread the jam in thin layer,sprinkle cinnamon mixture and the nuts.Cut the circle like a pizza,creating 8 large or 16 small even triangles.Roll up from the wide end to the point,tucking the point under.Repeat with the remaining circles.(I made a small and a large circle)

Photobucket

Place the Rugelach to the cookie sheet and sprinkle each cookie with the cinnamon sugar mixture.Bake until bottoms are golden brown (top will still be blond),about 25mins.Remove and let stand on a rack until they firm slightly.

Verdict:

I usually buy the crescent rolls and bake them at home, which makes a perfect snack for evening.But nothing can beat the home made ones.The nutty texture really stands out.Its not that fluffy as the usual crescent that we get in grocery store.Its very easy to bake and the ingredients arent that complicated.Rugelach rocks!!!

You may also like-

Butter Cookies

Scandinavian Pecan Cookies

Cannoli - Daring Bakers November Challenge

When I logged in to check about November’s challenge the first thing I read was “no baking”,this was disappointing.After going thru the post,I wasn’t sure if I would be able to participate coz Cannoli is something that I have neither seen nor heard about.While shopping for some Baking stuffs in Sur La Table I came across these tubes and I was completely thrilled.I think this was the first time I made the challenge well in advance…..am thoroughly impressed.I still have these cute li’l tubes already made,it comes very handy when I have unexpected guests.

The November 2009 Daring Bakers Challenge was chosen and hosted by Lisa Michele of Parsley, Sage, Desserts and Line Drives. She chose the Italian Pastry, Cannolo (Cannoli is plural), using the cookbooks Lidia’s Italian-American Kitchen by Lidia Matticchio Bastianich and The Sopranos Family Cookbook by Allen Rucker; recipes by Michelle Scicolone, as ingredient/direction guides. She added her own modifications/changes, so the recipe is not 100% verbatim from either book.

Equipment:
Cannoli forms/tubes - optional, but recommended if making traditional shaped cannoli. Dried cannelloni pasta tubes work just as well!
Deep, heavy saucepan, enough to hold at least 2-3-inches of oil or deep fryer
Deep fat frying thermometer. although the bread cube or bit of dough test will work fine.
Metal tongs
Brass or wire skimmer OR large slotted spoon
Pastry bag with large star or plain tip, but a snipped ziplock bag, butter knife or teaspoon will work fine.
Cooling rack
Paper bags or paper towels
Pastry Brush
Cheesecloth
Sieve or fine wire mesh strainer
Electric Mixer, stand or hand, optional, as mixing the filling with a spoon is fine.
Food Processor or Stand Mixer also optional, since you can make the dough by hand, although it takes more time.
Rolling pin and/or Pasta roller/machine
Pastry or cutting board
Round cutters - The dough can also be cut into squares and rolled around the cannoli tube prior to frying. If making a stacked cannoli, any shaped cutter is fine, as well as a sharp knife.
Mixing bowl and wooden spoon if mixing filling by hand
Plastic Wrap/Clingfilm
Tea towels or just cloth towels

Required: Must make cannoli dough and shells. If you don’t have or do not want to purchase cannoli forms, which I would never ask of any of you, you could simply cut out circles, squares, or any shapes you want and stack them with the filling of your choice to make stacked cannoli’s aka Cannolipoleons (directions below). If desired, you can channel MacGuyver and fashion something heat proof to get traditional shaped cannoli (6-8 inch sawed off lengths of a wooden broom stick or cane, sanded down and oiled, is THE authentic cannoli form!), or non-traditional shapes such as creating a form to make bowls, or even using cream horns if you happen to have them. Mini cannoli would be great too, and I’ve provided links to retailers of cannoli forms of all sizes.

Also, for those who don’t like to cook or bake with alcohol - grape juice, cranberry juice, pomegranate juice, apple juice..any sweet juice of a fruit, especially ones used in or to make wine, can be substituted. Just add a little more vinegar to insure you get enough acid to relax the dough

6-8 inch long by 3/4 to 1 inch circumference cannoli forms aka your basic cannoli form size

Lidisano’s Cannoli
Makes 22-24 4-inch cannoli
Prep time:
Dough - 2 hours and 10-20 minutes, including resting time, and depending on whether you do it by hand or machine.
Filling - 5-10 minutes plus chilling time (about 2 hours or more)
Frying - 1-2 minutes per cannoli
Assemble - 20 - 30 minutes

CANNOLI SHELLS
2 cups (250 grams/8.82 ounces) all-purpose flour
2 tablespoons(28 grams/1 ounce) sugar
1 teaspoon (5 grams/0.06 ounces) unsweetened baking cocoa powder
1/2 teaspoon (1.15 grams/0.04 ounces) ground cinnamon
1/2 teaspoon (approx. 3 grams/0.11 ounces) salt
3 tablespoons (42 grams/1.5 ounces) vegetable or olive oil
1 teaspoon (5 grams/0.18 ounces) white wine vinegar
Approximately 1/2 cup (approx. 59 grams/approx. 4 fluid ounces/approx. 125 ml) sweet Marsala or any white or red wine you have on hand
1 large egg, separated (you will need the egg white but not the yolk)
Vegetable or any neutral oil for frying ? about 2 quarts (8 cups/approx. 2 litres)
1/2 cup (approx. 62 grams/2 ounces) toasted, chopped pistachio nuts, mini chocolate chips/grated chocolate and/or candied or plain zests, fruits etc.. for garnish
Confectioners’ sugar

Note - If you want a chocolate cannoli dough, substitute a few tablespoons of the flour (about 25%) with a few tablespoons of dark, unsweetened cocoa powder (Dutch process) and a little more wine until you have a workable dough (Thanks to Audax).

CANNOLI FILLING
2 lbs (approx. 3.5 cups/approx. 1 kg/32 ounces) ricotta cheese, drained
1 2/3 cups cup (160 grams/6 ounces) confectioner’s sugar, (more or less, depending on how sweet you want it), sifted
1/2 teaspoon (1.15 grams/0.04 ounces) ground cinnamon
1 teaspoon (4 grams/0.15 ounces) pure vanilla extract or the beans from one vanilla bean
3 tablespoons (approx. 28 grams/approx. 1 ounce) finely chopped good quality chocolate of your choice
2 tablespoons (12 grams/0.42 ounces) of finely chopped, candied orange peel, or the grated zest of one small to medium orange
3 tablespoons (23 grams/0.81 ounce) toasted, finely chopped pistachios

Note - If you want chocolate ricotta filling, add a few tablespoons of dark, unsweetened cocoa powder to the above recipe, and thin it out with a few drops of warm water if too thick to pipe.

DIRECTIONS FOR SHELLS:
1. In the bowl of an electric stand mixer or food processor, combine the flour, sugar, cocoa, cinnamon, and salt. Stir in the oil, vinegar, and enough of the wine to make a soft dough. Turn the dough out onto a lightly floured surface and knead until smooth and well blended, about 2 minutes. Shape the dough into a ball. Cover with plastic wrap and let rest in the fridge from 2 hours to overnight.

2 Cut the dough into two pieces. Keep the remaining dough covered while you work. Lightly flour a large cutting or pastry board and roll the dough until super thin, about 1/16 to 1/8″ thick (An area of about 13 inches by 18 inches should give you that). Cut out 3 to 5-inch circles (3-inch ? small/medium; 4-inch ? medium/large; 5-inch;- large. Your choice). Roll the cut out circle into an oval, rolling it larger and thinner if it?s shrunk a little.

3 Oil the outside of the cannoli tubes (You only have to do this once, as the oil from the deep fry will keep them well, uhh, oiled..lol). Roll a dough oval from the long side (If square, position like a diamond, and place tube/form on the corner closest to you, then roll) around each tube/form and dab a little egg white on the dough where the edges overlap. (Avoid getting egg white on the tube, or the pastry will stick to it.) Press well to seal. Set aside to let the egg white seal dry a little.

4. In a deep heavy saucepan, pour enough oil to reach a depth of 3 inches, or if using an electric deep-fryer, follow the manufacturer’s directions. Heat the oil to 375?F (190 ?C) on a deep fry thermometer, or until a small piece of the dough or bread cube placed in the oil sizzles and browns in 1 minute. Have ready a tray or sheet pan lined with paper towels or paper bags.

5. Carefully lower a few of the cannoli tubes into the hot oil. Do not crowd the pan. Fry the shells until golden, about 2 minutes, turning them so that they brown evenly.

8. Lift a cannoli tube with a wire skimmer or large slotted spoon, out of the oil. Using tongs, grasp the cannoli tube at one end. Very carefully remove the cannoli tube with the open sides straight up and down so that the oil flows back into the pan. Place the tube on paper towels or bags to drain. Repeat with the remaining tubes. While they are still hot, grasp the tubes with a potholder and pull the cannoli shells off the tubes with a pair of tongs, or with your hand protected by an oven mitt or towel. Let the shells cool completely on the paper towels. Place shells on cooling rack until ready to fill.

9. Repeat making and frying the shells with the remaining dough. If you are reusing the cannoli tubes, let them cool before wrapping them in the dough.

Cannoli shell preparation, cutting out the dough circles, sealing the dough around the form, frying the shells, finished shells ready to fill

Pasta Machine method:
1. Divide the dough into 4 equal pieces. Starting at the middle setting, run one of the pieces of dough through the rollers of a pasta machine. Lightly dust the dough with flour as needed to keep it from sticking. Pass the dough through the machine repeatedly, until you reach the highest or second highest setting. The dough should be about 4 inches wide and thin enough to see your hand through

2. Continue rolling out the remaining dough. If you do not have enough cannoli tubes for all of the dough, lay the pieces of dough on sheets of plastic wrap and keep them covered until you are ready to use them.

3, Roll, cut out and fry the cannoli shells as according to the directions above.

For stacked cannoli:
1. Heat 2-inches of oil in a saucepan or deep saute pan, to 350-375?F (176 - 190 ?C).

2. Cut out desired shapes with cutters or a sharp knife. Deep fry until golden brown and blistered on each side, about 1 - 2 minutes. Remove from oil with wire skimmer or large slotted spoon, then place on paper towels or bags until dry and grease free. If they balloon up in the hot oil, dock them lightly prior to frying. Place on cooling rack until ready to stack with filling.

DIRECTIONS FOR FILLING:
1. Line a strainer with cheesecloth. Place the ricotta in the strainer over a bowl, and cover with plastic wrap and a towel. Weight it down with a heavy can, and let the ricotta drain in the refrigerator for several hours to overnight.

2. In a bowl with electric mixer, beat ricotta until smooth and creamy. Beat in confectioner’s sugar, cinnamon, vanilla and blend until smooth. Transfer to another bowl and stir in chocolate, zest and nuts. Chill until firm.(The filling can be made up to 24 hours prior to filling the shells. Just cover and keep refrigerated).

ASSEMBLE THE CANNOLI:
1. When ready to serve..fill a pastry bag fitted with a 1/2-inch plain or star tip, or a ziplock bag, with the ricotta cream. If using a ziplock bag, cut about 1/2 inch off one corner. Insert the tip in the cannoli shell and squeeze gently until the shell is half filled. Turn the shell and fill the other side. You can also use a teaspoon to do this, although it?s messier and will take longer.

2. Press or dip cannoli in chopped pistachios, grated chocolate/mini chocolate chips, candied fruit or zest into the cream at each end. Dust with confectioner?s sugar and/or drizzles of melted chocolate if desired.

Verdict: As I mentioned earlier,this a super duper recipe…am gona keep making them:)


Alas! I have been bitten by Plagiarism ? Please read

I never thought that I would be a victim of “PLAGIARISM”.It is for one of my post - Bourbon Biscuits. Its very disappointing to see a fellow blogger conveniently copy my work.Am always open to the idea of sharing and over the past few years I have learnt a lot thru the blogging community.The least I expect from someone is an acknowledgement. People think they can be smart by changing the measurement units and get away unnoticed??. I am sorry they are grossly mistaken. I am deeply hurt and alarmed at the lack of basic blogging etiquette. I don?t want to name the person, however I hope the person realizes the mistake and doesn’t repeat.

P.S - I am working on my own website,hence haven’t been blogging much,will be back soon with a BANG!

Gulab Jamun for Indian cooking October Challenge

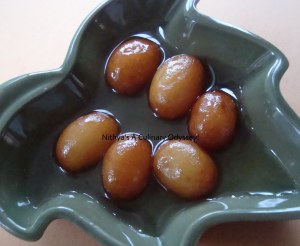
We are so used to the ready made Gulab Jamun mix,the thought about making this from scratch never occurred to me.Thanks Srivalli for this one…this was indeed a wonderful challenge and i enjoyed making them.I made them twice,played a li’l with the shapes.A must try sweet!!!!

Gulab(less) Jamun from The Yum Blog

Makes: around 25 jamuns

Ingredients

Khova - 11/2 cups/ 1 recipe
Maida - 1 cup
Sugar -3 cups (if you want excess syrup i.e floating jamuns increase by a cup)
Water - 1 cup (increase if you?re increasing sugar)
Cooking Soda - 3 pinches
Cardamom - 4 pods
Saffron leaves - a few
Oil - 1 cup (for deep frying)

Method

1. Combine sugar and water in a flat bottomed broad pan and simmer on a low heat until sugar dissolves. Add cardamom powder and saffron leaves and remove from fire.
2. Knead khova, maida and soda and quickly shape into balls.
3. Heat oil on a medium flame. Fry the jamuns till golden brown over a low to medium flame, keeping oil temperature uniform. Oil should not smoke.
4. Drain the jamuns and soak in the warm sugar syrup.


Serve the jamuns after half an hour.


Verdict: They are delicious,very soft and easy to make.

Muruku for Indian Cooking September Challenge

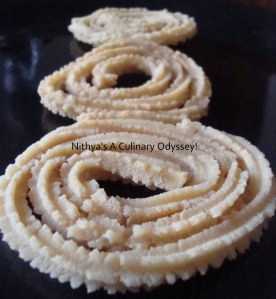
I think all these event’s actually force me to blog:).August Challenge was Dhokla,though I’ve made it “n” number of times something or the other was always wrong.I was thoroughly impressed with the recipe provided by Srivalli.I actually missed the event but tried the recipe later and it was jes PERFECT! I guess it was the best Dhokla I had ever made.The key to any food is the perfect recipe.Similarly the Muruku’s recipe was wonderful.I made some Muruku’s couple of days back with my own recipe,it was so hard eventually ended up being a disaster.Made them again using Srivalli’s method and they were just perfect.Thanks to her for super recipes:).So here it comes,crispy Murukus for Indian Cooking September challenge.


Preparation Time : 20 - 30 mins
Cooking Time : 20 - 30 mins
Makes : app 250 kg of Muruku
Cuisine: Andhra & Tamil Nadu

Utensils needed:
Muruku /Chakli Press.
Kadai

Ingredients Needed:

Raw Rice - 4 cups
Urad Dal - 1 cup
Water - app 1/2 cup or more

For Seasoning

Cumin seeds - 1 tsp
Sesame seeds- 1 tsp
Asafetida/ Hing - 1/2 tsp
Salt to taste
Butter - 75 gms

Method to prepare:

Wash and drain the rice. Shade dry the Rice for 1/2 hr. Dry roast the Urad dal to light brown. Allow it to cool.
If you are using more quantity, you can get it ground in rice mil, else use your mixie to grind both Rice and Urad dal.

First grind rice into a fine flour, keep it aside. then grind the urad dal to fine powder.

In a wide vessel, take both the flours along with salt. Mix well. Add cumin, Sesame seeds to the flour, mix well.

Whether you use Asafetida powder or the solid ones, you got to mix it in water, make sure it is dissolved before adding to the flour. If its not dissolved properly, when deep frying the muruku, there are chances for the hing to burst our due to air bubbles.

Mix in the hing to the flour and finally add the butter. Gather everything well and you will get more of a crumbling mixture. Now slowly add water and knead a dough which is little more softer than the puri dough.

Heat a kadai with oil enough to deep fry. Once the oil is hot enough, simmer to low flame.

Take the Muruku Aachu, wash and wipe it clean. Then divide the dough into equal balls. Fill the Muruku maker with the dough. You can either press it directly over the flames or press over a paper and gently slide it down the hot oil. But since the quantity mentioned here is less, you can press it directly over the kadai.

Cook over medium flame, using a slotted spoon, turn it over to other side to ensure both sides turn golden colour. You will know by seeing the colour that its cooked. Remove to a kitchen paper and store it in a air tight container.

Verdict - I don’t have words to say…its brilliant!